1-Click Deployment of RPMs with Jenkins

In one of my previous posts we learned how to build and package our projects as RPM packages. How do we get our shiny packages to our users? If we host our own RPM repository, we can use our extisting CI infrastructure (jenkins in our case) for that. Here are the steps in detail:

Convention for the RPM location in our jobs

To reduce the work needed for our deployment job we define a location where each job puts the RPM artifacts after a successful build. Typically we use something like $workspace/build_dir for that. Because we are using matrix build for different target plattforms, we need to use the same naming conventions for our job axes, too!

Job for RPM deployment

Because of the above convention we can use one parameterized job to deploy the packages of different build jobs. We use the JOBNAME of the build job as our only parameter:

Deploy-RPM-Jobname-Parameter

First the deploy job needs to get all the rpms from the build job. We can do this using the Copy Artifact plugin like so:Deploy-RPM-Copy-Artifacts

Since we are usually building for several distributions and processor architectures, we have a complete directory tree in our target directory. We are using a small shell script to copy all the packages to our repository using rsync. Finally we can update the remote repository over ssh. See the complete shell script below:

for i in suse-12.2 suse-12.1 suse-11.4 suse-11.3
do
  rm -rf $i
  dir32=$i/RPMS/i686
  dir64=$i/RPMS/x86_64
  mkdir -p $dir32
  mkdir -p $dir64
  versionlabel=`echo $i | sed 's/[-\.]//g'`
  if [ -e all_rpms/Architecture\=32bit\,Distribution\=$versionlabel/build_dir/ ]
  then
    cp all_rpms/Architecture\=32bit\,Distribution\=$versionlabel/build_dir/* $dir32
  fi
  if [ -e all_rpms/Architecture\=64bit\,Distribution\=$versionlabel/build_dir/ ]
  then
    cp all_rpms/Architecture\=64bit\,Distribution\=$versionlabel/build_dir/* $dir64
  fi
  rsync -e "ssh" -avz $i/* root@repository-server:/srv/www/htdocs/repo/$i/
  ssh root@repository-server "createrepo /srv/www/htdocs/repo/$i/RPMS"
done

Conclusion

With a few small tricks and scripts we can deploy the artifacts of our build jobs to the RPM repository and thus deliver a new software release at the push of a button. You could let the deployment job run automatically after a successful build, but we like to have more control over the actual software we release to our users.

TDD myths: the problems

I take a look at some (in my experience) problems/misconceptions with TDD:
100% code coverage is enough, Debugging is not needed, Design for testability, You are faster than without tests

100% code coverage is enough

Code coverage seems to be a bad indicator for the quality of the tests. Take the following code as an example:

public void testEmptySum() {
  assertEquals(0, sum());
}

public void testSumOfMultipleNumbers() {
  assertEquals(5, sum(2, 3));
}

Now take a look at the implementation:

public int sum(int...numbers) {
  if (numbers.length == 0) {
    return 0;
  }
  return 5;
}

Baby steps in TDD could lead you to this implementation. It has 100% code coverage and all tests are green. But the implementation isn’t finished at all. Our experiment where we investigated how much tests communicate the intend of the code showed flaws in metrics like code coverage.

Debugging is not needed

One promise of TDD or tests in general is that you can neglect debugging. Even abandon it. In my experience when a test goes red (especially an integration test) you sometimes need to fire up the debugger. The debugger helps you to step through code and see the actual state of the system at that time. Tests treat code as a black box, an input results in an output. But what happens in between? How much do you want to couple your tests to your actual implementation steps? Do we need the tests to cover this aspect of software development? Maybe something along the lines as shown in Inventing on principle where the computer shows you the immediate steps your code takes could replace debugging but tests alone cannot do it.

Design for testability

A noble goal. But are tests your primary client? No. Other code is. Design for maintainability would be better. You will need to change your code, fix it, introduce new features, etc. Don’t get me wrong: You need tests and you need testability. But how much code do you write specifically for your tests? How much flexibility do you introduce because of your tests? What patterns do you use just because your tests need them? It’s like YAGNI for code exposure for tests. Code specifically written only for tests couples your code to your tests. Only things that need to be coupled should be. Is the choice of the underlying data structure important? Couple it, test it. If it isn’t, don’t expose it, don’t write a getter. Don’t break the information hiding principle if you don’t need to. If you couple your tests too much to your code every little change breaks your tests. This hinders maintenance. The important and difficult design question is: what is important. Test this.

You are faster than without tests

Some TDD practitioners claim that they are faster with TDD than without tests because the bugs and problems in your code will overwhelm you after a certain time. So with a certain level of complexity you are going faster with TDD. But where is this level? In my experience writing code without tests is 3x-4x faster than with TDD. For small applications. There are entire communities where many applications are written without or with only a few tests. But I wouldn’t write a large application without tests but at least my feeling is that in many cases I go much slower. Cases where I feel faster are specification heavy. Like parsing or writing formats, designing an algorithm or implementing a scientific formula. So the call is open on this one. What are your experiences? Do you feel slowed down by TDD?

Communication through Tests – a larger experiment

We evaluated our ability to communicate through tests in a two-day experiment and gathered some interesting results.

triangulatorFor us, automated tests are the hallmark of professional software development. That doesn’t mean that we buy into every testing fad that comes along or consider ourselves testing experts just because we write some tests alongside our code. We put our money where our mouth is and evaluate our abilities in writing effective tests.

One way to measure the effectiveness of tests is to try to “communicate through tests”. One developer/team writes code and tests for a given specification. Another team picks up the tests only and tries to recreate the production code and infer the specification. The only communication between the two teams happens through the tests.

We performed a small experiment with two teams and one day for both phases and blogged about it. The results of this evaluation was that unit tests are a good medium to transport specification details. But we got a hint that problems might be bigger when the code was less arithmetic and more complex. As most of our development tasks are rather complex and driven by business rules instead of clean mathematical algorithms, we wanted to inspect further.

Our larger experiment

So we organized a bigger experiment with a broader scope. Instead of two teams, we had three teams. We ran the phases for eight instead of two hours, essentially increasing the resulting code size by a factor of 3. The assignments weren’t static, but versioned – and the team only knew the rules of the current version. When a team would reach a certain milestone, more rules would be revealed, partly contradicting the previous ruleset. This should emulate changing customer requirements. And to provide the ability to retrospect on the reconstruction phase, we recorded this phase with a screencast software (we used the commercial product Debut Video Capture), capturing both inputs and conversation by using headsets for every developer.

The first part of this experiment happened in late January of 2013, where all teams had one day to produce production and test code. This was a day of loud buzz in our development department. The second part for the reconstruction phase was scheduled for the middle of February 2013. We had to be a bit more quiet this time to increase the audio recording quality, but the developers were humming nonetheless.

Here are some numbers of what was produced in the first session:

  • Team 1: 400 lines of production code, 530 lines of test code. 8 production classes, 54 tests. Test coverage of 90.6%.
  • Team 2: 576 lines of production code, 655 lines of test code. 17 production classes, 59 tests. Test coverage of 98.2%.
  • Team 3: 442 lines of production code, 429 lines of test code. 18 production classes, 37 tests. Test coverage of 97.0%.

The reconstruction phase was finished in less than five hours, partly because we stuck very close to the actual tests with little guesswork. When the tests didn’t enforce a functionality, it wasn’t implemented to reveal the holes in the test coverage. This reduced the amount of production code that had to be written. On the flipside, every team got lost once on the way, loosing the better part of an hour without noticeable progress.

The results

After all the talk about the event itself, let’s have a look at our results of the experiment:

  • The recording of the reconstruction phase was a huge gain in understanding the detailed problems. We even discussed recording the construction phase too to capture the original design decisions.
  • Every decision on unclear terms from the original team lead to “blurry” tests that didn’t guide the reconstruction team as good as the “razor-sharp” tests did.
  • You could definitely tell the TDD tests from the “test first” tests or even the tests written “immediately after”. More on this aspect later, but this was our biggest overall take-away: The quality of the tests in terms of being a specification differed greatly. This wasn’t bound to teams – as soon as a team lost the TDD “drive”, the tests lost guidance power.
  • Test coverage (in terms of line coverage or conditional coverage) means nothing. You can have 100% test coverage and still suffer from severe plot holes in your tests. Blurry tests tend to increase the coverage, but not the accountability of tests.
  • In general, we were surprised how little guidance and coverage most tests offered. The assignments included some obvious “testing problems” like dealing with randomness and every team dealt with them deliberately. Still, these were the major pain points during the reconstruction phase. This result puts our first small experiment a bit into perspective. What works well with small code bases might be disproportionally harder to achieve when the code size scales up. So while TDD/tests might work sufficiently easy on a small task, it needs more attention for a larger task.

The biggest problem

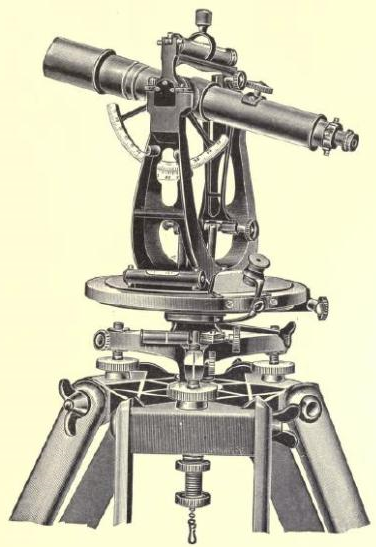
When talking about “plot holes” from the tests, let me give you a detailed example of what I mean. The more useless tests suffered from a lack of triangulation. In geometry, triangulation is the process of determining the location of a point by measuring several angles to it from known points. When writing tests, triangulation is the effort to “pinpoint” or specify the implementation with a set of different inputs and required outputs. You specify enough different tests of the same functionality to require it being “real” instead of a dummy implementation. Let’s look at this test:

@Test
public void parsesUserInput() {
  assertThat(new InputParser().parse("1 3 5"), hasItems(1, 3, 5));
}

Well, the test tells us that we need to convert a given string into a bunch of integers. It specifies the necessary class and method for this task, but gives us great freedom in the actual implementation. This makes the test green:

public Iterable<Integer> parse(String input) {
  return Arrays.asList(1, 3, 5);
}

As far as the tests are concerned, this is a concise and correct implementation of the required functionality. And while it is obvious in our example that this will never be sufficient, it oftentimes isn’t so obvious when the problem domain isn’t as familiar as parsing strings to numbers. But to complete my explanation of test triangulation, let’s consider a more elaborate implementation of this test that needs a lot more work on the implementation side (especially when developed in accordance with the Transformation Priority Premise by Uncle Bob and without obvious duplication):

@Test
public void parsesUserInput() {
  assertThat(new InputParser().parse("1 3 5"), hasItems(1, 3, 5));
  assertThat(new InputParser().parse("1 2"), hasItems(1, 2));
  assertThat(new InputParser().parse("1 2 3 4 5"), hasItems(1, 2, 3, 4, 5));
  assertThat(new InputParser().parse("1 4 5 3 2"), hasItems(1, 2, 3, 4, 5));
  assertThat(new InputParser().parse("5 4"), hasItems(4, 5));
  assertThat(new InputParser().parse("5 3"), hasItems(3, 5));
}

Maybe not all assertions are required and maybe they should live in different tests giving more hints in their names, but you get the idea: Making this test green is way “harder” than the initial test. Writing properly triangulated tests is one of the immediate benefits of Test Driven Development (TDD), as for example outlined nicely by Ray Sinnema on his blog entry about test-driving a code kata.
Our tests that were written “after the fact” often lacked the proper amount of triangulation, making it easier to “fake it” in the reconstruction phase. In a real project setting, these tests would allow for too much implementation deviation to act as a specification. They act more as usage examples and happy path “smoke” tests.

Our benefits

While this experiment doesn’t fulfill rigid academic requirements on gathering data, it already paid off greatly for us. We’ve examined our ability to express our implementations through tests and gathered insight on our real capabilities to use test-driven methodologies. Being able to judge relatively objectively on the quality of your own tests (by watching the reconstruction phase’s screencast) was very helpful. We now know better what skills to improve and what to focus on during training.

Where to go from here?

We plan to repeat this experiment with interested participants as a spare-time event later this year. For now and ourselves, we have gathered enough impressions to act on them. If you are interested in more details, drop us a note. We could publish only the tests (for reconstruction), the complete code or even the screencasts (albeit they are somewhat long-running). Our participants could elaborate their impressions in the comment section, if you ask them.
We are very interested in your results when performing similar events, like Tomasz Borek did this month in Krakow, Poland. We found his blog entry about the event to be very interesting. We definitely lacked the surprise element for the teams during the event.

TDD myths

Some TDD myths and what is true about them.

TDD, Test first or test immediately after are all the same

No. All methods result in having tests in the end. But especially in the TDD case your mind set is completely different. First the tests drive the design of your code. You construct your system piece by piece. Unit test for unit test. All code you write must have a test first and you use the tests to describe and reason about the external interface of your units. In TDD the tests represent the future clients using your code. In practice this leads to small(er) units.

In TDD the tests’ (main) objective is to prevent regression

No. Tests help immensely when you break the same code twice. But even more so tests help to structure your code and make it maintainable. When using TDD you tend to reduce your code and its flexibility because you need to write a test for every piece of functionality first. So over designing or implementing things you don’t need (breaking YAGNI or KISS) bites you doubly: in the code and in the tests. Also wrong design decisions like choosing an inappropriate data structure or representation hits you twice as hard. TDD emphasizes bad design decisions.

Test code is the same as production code

No. Test code should adhere too a similar quality level like production code. But you won’t write tests for your tests. Also conditionals and loops are a very bad idea in tests and should be avoided. Take the following example:

public void testSomething() {
  for (MyEnum value : values()) {
    assertEquals(expected, do(value))
  }
}

If you forgot an enum value the tests just passes. Even if you have no values in your enum it passes still. Conditions have the same problem: you introduce another path through your test which can be avoided or never taken. You could secure the other path through an assert but in some cases this is a hint that you broke another principle: single responsibility of tests.

DRY is harmful in tests

No. DRY (don’t repeat yourself) aims to reduce or eliminate duplication in logic. But often DRY is understood as removing code duplication. This is not the same! Code duplication can be essential in tests. You need all of the essential information in the test. This code should not be extracted or abstracted elsewhere. These code lines which may seem similar are not coupled logically. When you change one test, the other test is not affected.

TDD is hard

No and yes. For me learning TDD is like learning a new language. It certainly needs time. But if you do it often and repeatedly you learn more every time you use it. It’s a way of reasoning about a system, a way of thinking, a paradigm. When I started with TDD I thought it was impossible or unreasonable to use in cases other than where strong specs exist like parsing a format. But over time I value the driving part of TDD more and more. You can get into a TDD flow. TDD gives you a very good feeling of security when you refactor. It forces you beforehand to think about your intended use for your code. Which is good. It changes my way of seeing my code, one step at time. Some things are still hard: acceptance tests are unreasonably expensive. Just testing one thing needs discipline. Not jumping ahead of the tests and implementing too much code also. Finding the next unit of testing can be difficult, getting stuck can be frustrating. Just like learning a new language I think it is worth it.

Build a RPM package using CMake

Some while ago I presented a way to package projects using different build systems as RPM packages. If you are using CMake for your projects you can use CPack to build RPM packages (in addition to tarballs, NSIS installers, deb packages and so on). This is a really nice option for deployment of your own projects because installation and update can be easily done by the users using familiar package management tools like zypper, yum and yast2.

Your first CPack RPM

It is really easy to add RPM using CPack to your existing project. Just set the mandatory CPack variables and include CPack below the variable definitions, usually as one of the last steps:

project (my_project)
cmake_minimum_required (VERSION 2.8)

set(VERSION "1.0.1")
<----snip your usual build instructions snip--->
set(CPACK_PACKAGE_VERSION ${VERSION})
set(CPACK_GENERATOR "RPM")
set(CPACK_PACKAGE_NAME "my_project")
set(CPACK_PACKAGE_RELEASE 1)
set(CPACK_PACKAGE_CONTACT "John Explainer")
set(CPACK_PACKAGE_VENDOR "My Company")
set(CPACK_PACKAGING_INSTALL_PREFIX ${CMAKE_INSTALL_PREFIX})
set(CPACK_PACKAGE_FILE_NAME "${CPACK_PACKAGE_NAME}-${CPACK_PACKAGE_VERSION}-${CPACK_PACKAGE_RELEASE}.${CMAKE_SYSTEM_PROCESSOR}")
include(CPack)

These few lines should be enough to get you going. After that you can execute a make package command should obtain the RPM package.

Spicing up the package

RPM packages can contain much more metadata and especially package dependencies and a version changelog. Most of the stuff can be specified using CPACK variables. We sometimes prefer to use a SPEC file template to be filled and used by CPack because it then contains most of the RPM specific stuff in a familiar manner instead of polluting the CMakeLists.txt itself:

project (my_project)
<----snip your usual CMake stuff snip--->
<----snip your additional CPack variables snip--->
configure_file("${CMAKE_CURRENT_SOURCE_DIR}/my_project.spec.in" "${CMAKE_CURRENT_BINARY_DIR}/my_project.spec" @ONLY IMMEDIATE)
set(CPACK_RPM_USER_BINARY_SPECFILE "${CMAKE_CURRENT_BINARY_DIR}/my_project.spec")
include(CPack)

The variables in the RPM SPEC file will be replaced by the values provided in the CMakeLists.txt and then be used for the RPM package. It looks very similar to a standard SPEC file but you can omit the usual build instructions boiling down to something like this:

Buildroot: @CMAKE_CURRENT_BINARY_DIR@/_CPack_Packages/Linux/RPM/@CPACK_PACKAGE_FILE_NAME@
Summary:        My very cool Project
Name:           @CPACK_PACKAGE_NAME@
Version:        @CPACK_PACKAGE_VERSION@
Release:        @CPACK_PACKAGE_RELEASE@
License:        GPL
Group:          Development/Tools/Other
Vendor:         @CPACK_PACKAGE_VENDOR@
Prefix:         @CPACK_PACKAGING_INSTALL_PREFIX@
Requires:       opencv >= 2.4

%define _rpmdir @CMAKE_CURRENT_BINARY_DIR@/_CPack_Packages/Linux/RPM
%define _rpmfilename @CPACK_PACKAGE_FILE_NAME@.rpm
%define _unpackaged_files_terminate_build 0
%define _topdir @CMAKE_CURRENT_BINARY_DIR@/_CPack_Packages/Linux/RPM

%description
Cool project solving the problems of many colleagues.

# This is a shortcutted spec file generated by CMake RPM generator
# we skip _install step because CPack does that for us.
# We do only save CPack installed tree in _prepr
# and then restore it in build.
%prep
mv $RPM_BUILD_ROOT @CMAKE_CURRENT_BINARY_DIR@/_CPack_Packages/Linux/RPM/tmpBBroot

%install
if [ -e $RPM_BUILD_ROOT ];
then
  rm -Rf $RPM_BUILD_ROOT
fi
mv "@CMAKE_CURRENT_BINARY_DIR@/_CPack_Packages/Linux/RPM/tmpBBroot" $RPM_BUILD_ROOT

%files
%defattr(-,root,root,-)
@CPACK_PACKAGING_INSTALL_PREFIX@/@LIB_INSTALL_DIR@/*
@CPACK_PACKAGING_INSTALL_PREFIX@/bin/my_project

%changelog
* Tue Jan 29 2013 John Explainer <john@mycompany.com> 1.0.1-3
- use correct maintainer address
* Tue Jan 29 2013 John Explainer <john@mycompany.com> 1.0.1-2
- fix something about the package
* Thu Jan 24 2013 John Explainer <john@mycompany.com> 1.0.1-1
- important bugfixes
* Fri Nov 16 2012 John Explainer <john@mycompany.com> 1.0.0-1
- first release

Conclusion

Integrating RPM (or other package formats) to your CMake-based build is not as hard as it seems and quite flexible. You do not need to rely on the tools provided by your OS vendor and still deliver your software in a way your users are accustomed to. This makes CPack very continuous integration (CI) friendly too!

Java Generics: the Klingonian Cast

Struck by Java generic’s odd type erasure behaviour again? You can circumvent the missing upcast feature by using the Klingonian Cast.

Klingon_by_Balsavor

Ever since Generics were included in Java, they’ve been a great help and source of despair at once. One thing that most newcomers will stumble upon sooner or later is “Type Erasure” and its effects. You may read about it in the Java Tutorial and never quite understand it, until you encounter it in the wild (in your code) and it just laughs at your carefully crafted type system construct. This is the time when you venture into the deep end of the Java language specification and aren’t seen for days or weeks. And when you finally reappear, you are a broken man – or a strong warrior, even stronger than before, charged with the wisdom of the ancients.

The problem

If my introduction was too mystic for your taste – bear with me. The rest of this blog post is rather technical and bleak. It won’t go into the nitty-gritty details of Java generics or type erasure, but describe a real-world problem and one possible solution. The problem can be described by a few lines of code:


List<Integer> integers = new ArrayList<Integer>();
Iterable<Integer> iterable = integers;
Iterable<Number> numbers = integers; // Damn!

The last line won’t compile. Let’s examine it step by step:

  • We create a list of Integers
  • The list can be (up-)casted into an Iterable of Integers. Lists are/behave like Iterables.
  • But the list cannot be casted into an Iterable of Number, even though Integers are/behave like Numbers.

The compiler error message isn’t particularly helpful here:

Type mismatch: cannot convert from List<Integer> to Iterable<Number>

This is when we remember one thing about Java Generics: They aren’t exactly variant. While they have “use-site variance”, we are in need of “declaration-site variance” here, which Java Generics lack entirely. Don’t despair, this was all the theoretical discussion about the topic for today. If you want to know more, just ask in the comment section. Perhaps we can provide another blog post discussing just the theory.

The workaround

In short, our problem is that Java is unable to see the relationship between the types Integer and Number when given as generic parameter. But we can make it see:


List<Integer> integers = new ArrayList<Integer>();
List<Number> numberList = new ArrayList<Number>();
numberList.addAll(integers);
Iterable<Number> numbers = numberList;

This will compile and work. I’ve split the creation and filling of the second List into two steps to make more clear what’s happening: By explicitely creating a new collection and (up-)casting every element of the List alone, we can show the compiler that everything’s ok.

The Klingonian Cast

Well, if the compiler wants to see every element of our initial collection to be sure about upcasting, we should show him. But why create a new List and swap the elements by hand every time, when we can just use the “Klingonian Cast“? Ok, I’ve made the name up. But how else would you call a structure that’s essentially an upcast, but using two generic parameters and a dozen lines of code if not something very manly and bold. But enough mystery again, let’s look at the code:


List<Integer> integers = new ArrayList<Integer>();
Iterable<Number> numbers = MakeIterable.<Number>outOf(integers);

The good thing about the Klingonian cast is that it has a very thin footprint at runtime. Your hotspot compiler might even eliminate it completely. But you probably don’t want to hear about it characteristics, but see the implementation:


public class MakeIterable {
  public static <T> Iterable<T> outOf(final Iterable<? extends T> iterable) {
    return new Iterable<T>() {
      @Override
      public Iterator<T> iterator() {
        return iteratorOutOf(iterable.iterator());
      }
    };
  }

  protected static <T> Iterator<T> iteratorOutOf(final Iterator<? extends T> iterator) {
    return new Iterator<T>() {
      @Override
      public boolean hasNext() {
        return iterator.hasNext();
      }
      @Override
      public T next() {
        return iterator.next();
      }
      @Override
      public void remove() {
        iterator.remove();
      }
    };
  }
}

That’s it. A “simple” upcast for Java Generics, ready to use it for your own convenience. Enjoy!

FTP integrated

When developing a feature containing unknown technology or hardware, I prefer a spike followed by integration tests. Sometimes it helps a lot.

How it all began
One of our customers employs NAS for data storage, accessing it per FTP. Some of the features like copying and moving files around were already implemented by us using Apaches FTPClient. The next feature on the list was “cleanup after x days” – deletion of files, or more important: directories. FTP, being a pretty basic protocol, does not allow for recursive deletion of directories. The only way to do it is to delete the deepest elements first,  going up one level and repeat – or in other words – implementing the recursion yourself. This was too much for our simple feature, so the decision was made to hide the complexity behind a VirtualFile, an interface already existing in our framework.

Being a novice in speaking FTP I was happy to hear that we already have acquired exactly the same type of NAS the customer has. To see how the system behaves (or not) and document it at the same time, I decided to implement the interface integration test first.

Fun
As the amount of tests and file operations started to grow, so did grow the round trip time of my test/make test pass/refactor cycle and my patience dwindled. I switched from NAS FTP-Server to a local FileZilla FTP-Server. It worked like a charm and all necessary features were implemented really fast.

The next step was to run the app using the new feature with real amount of data, real directory structure and our NAS. It failed miserably. And randomly. The app suffered from closed connections while trying to open a data connection. After some search the reason was found: FTPClient we use had active mode enabled by default. That means that to transfer data the server tried to connect to the client and the clients Firewall did not like it. After setting connection mode to passive the problem was solved.

The tests run fine, but they run slow. And they introduced a dependency on an external system. If that system broke or were disabled for any other reason, our CI would report failure without any changes in the code. Both points could be addressed by using an embedded FTP Server. We choose Apaches FTP Server. Changing the tests was easy, since the only thing to do was to setup the server before the test and to shut it down afterwards. Surprisingly some tests failed. Apaches server handled some cases differently:

  • it allowed opening output streams to directories without any exception
  • it forbid to delete current working directory
  • the name listing in the directory (NLST) returned by NAS were absolute paths to the file, Apaches server returned simple names.

After another code change the code worked correctly with all three servers.

Lessons learned
While implementing the interface I learned much about how to create and test bridging functionality:

  • Specification cannot replace tests. Searching for the FTP commands to use I looked at several websites that described the commands. None of them wrote about whether NLST returns absolute paths or only filenames. There are always holes in the spec that will be interpreted differently by vendors or the vendors do not always obey it.
  • Unit tests are great, but they are limited to your code only. When it comes to communication between system components, especially communication with foreign systems, an integration test is a must.
  • Working with a test setup that mimics production environment as close as possible is great. Without the NAS, the app would have simply failed in the best case. In the worst case it would have deleted wrong files. Neither of them make a customer happy.

Lazy Initialization/evaluation can help you performance and memory-consumption-wise

One way to improve performance when working with many objects or large data structures is lazy initialization or evaluation. The concept is to defer expensive operations to the latest moment possible – ideally never. I want to show some examples how to use lazy techniques in java and give you pointers to other languages where it is even easier and part of the core language.

One use case was a large JTable showing hundreds of domain objects consisting of meta-data and measured values. Initially our domain objects held both types of data in memory even though only part of the meta data was displayed in the table. Building the table took several seconds and we were limited to showing a few hundred entries at once. After some analysis we changed our implementation to roughly look like this:

public class DomainObject {
  private final DataParser parser;
  private final Map<String, String> header = new HashMap<>();
  private final List<Data> data = new ArrayList<>();

  public DomainObject(DataParser aParser) {
    parser = aParser;
  }

  public String getHeaderField(String name) {
    // Here we lazily parse and fill the header map
    if (header.isEmpty()) {
      header.addAll(parser.header());
    }
    return header.get(name);
  }
  public Iterable<Data> getMeasurementValues() {
    // again lazy-load and parse the data
    if (data.isEmpty()) {
      data.addAll(parser.measurements());
    }
    return data;
  }
}

This improved both the time to display the entries and the number of entries we could handle significantly. All the data loading and parsing was only done when someone wanted the details of a measurement and double-clicked an entry.

A situation where you get lazy evaluation in Java out-of-the-box is in conditional statements:

// lazy and fast because the expensive operation will only execute when needed
if (aCondition() && expensiveOperation()) { ... }

// slow order (still lazy evaluated!)
if (expensiveOperation() && aCondition()) { ... }

Persistence frameworks like Hibernate often times default to lazy-loading because database access and data transmission is quite costly in general.

Most functional languages are built around lazy evaluation of and their concept of functions as first class citizens and isolated/minimized side-effects support lazyness very well. Scala as a hybrid OO/functional language introduces the lazy keyword to simplify typical java-style lazy initialization code like above to something like this:

public class DomainObject(parser: DataParser) {
  // evaluated on first access
  private lazy val header = { parser.header() }

  def getHeaderField(name : String) : String = {
    header.get(name).getOrElse("")
  }

  // evaluated on first access
  lazy val measurementValues : Iterable[Data] = {
    parser.measurements()
  }
}

Conclusion
Lazy evaluation is nothing new or revolutionary but a very useful tool when dealing with large datasets or slow resources. There may be many situations where you can use it to improve performance or user experience using it.
The downsides are a bit of implementation cost if language support is poor (like in Java) and some cases where the application can feel more responsive with precomputed/prefetched values when the user wants to see the details.

Aspects done right: Concerns

With aspects you cannot see (without sophisticated IDE support) which class has which aspects and which aspects are woven into the class when looking at its source. Here concerns (also called mixins or traits) come to the rescue.

The idea of encapsulating cross cutting concerns struck with me from the beginning but the implementation namely the aspects lacked clarity in my opinion. With aspects you cannot see (without sophisticated IDE support) which class has which aspects and which aspects are woven into the class when looking at its source. Here concerns (also called mixins or traits) come to the rescue. I know that aspects were invented to hide away details about which code is included and where but I find it confusing and hard to trace without tool support.

Take a look at an example in Ruby:

module Versionable
  extend ActiveSupport::Concern

  included do
    attr_accessor :version
  end
end

class Document
  include Versionable
end

Now Document has a field version and is_a?(Versionable) returns true. For clients it looks like the field version is in Document itself. So for clients of this class it is the same as:

class Document
  attr_accessor :version
end

Furthermore you can easily use the versionable concern in another class. This sounds like a great implementation of the separating of concerns principle but why isn’t everyone using it (besides being a standard for the upcoming Rails 4)? Well, some people are concerned with concerns (excuse the pun). As with every powerful feature you can shoot yourself in the foot. Let’s take a look at each problem.

  • Diamond problem aka multiple inheritance
  • Ruby has no multiple inheritance. Even when you include more than one module the modules are like superclasses for the message resolve order. Every include creates a new “superclass” above the including class. So the last include takes precedence.

  • Dependencies between concerns
  • You can have dependencies between different concerns like this concern needs another concern. ActiveSupport:Concerns handles these dependencies automatically.

  • Unforeseeable results
  • One last big problem with concerns is having side effects from combining two concerns. Take for an example two concerns which add a method with the same name. Including both of them renders one concern unusable. This cannot be solved technically but I also think this problem shows an underlying, more important cause. It could be because of poor naming. Or you did not separate these two concerns enough. As always tests can help to isolate and spot the problem. Also concerns should be tested in isolation and in integration.

Thoughts about TDD

Thoughts and links about test driven development

First a disclaimer: I think tests are a hallmark for professional software development, I like to write tests before the implementation but that’s not always easy or simple (for the difference please refer to Simple made easy). I find it hard to grasp test driven development (TDD) though. The difference between test first and test driven lies in the intention: in both cases tests are written before any implementation code but in TDD the tests drive the design of your implementation.

The problem with opinions of TDD is there are mostly extreme positions: some think “TDD is the (next) holy grail” or the ones which dismissed it. Though reading between the lines there are great discussions about how to do it and what problems arise. Many people (me included) are really trying to get value from TDD. Testing should be fun.
One way in letting the tests drive the way you develop is proposed by Uncle Bob: transformation priority premise. He proposes a list of transformations which introduce new or replace existing constructs like replacing a constant by a variable or adding more logic and gives them a priority. Only if you cannot use a high priority transformation to get the test to pass you look at a transformation with a lower priority.
But how do you determine what you should test next or even which is the first test?
Taking the typical Conway’s game of life kata as an example one thing struck me: I could only get the TDD to work smoothly when I started with the data structure. But why that? Naturally I start with the algorithm (in this case the rules) and write the first test for it. But upon further inspection of the problem and deeper (domain) knowledge it seems the data structure is way more important for solving this kata. So you need to know where the journey goes along beforehand, not every step you will take but the big picture: first the data structure, then the rules in this example. Maybe you should start with the integrations or the functional tests and break them down into units.
What are your experiences using TDD? Do you use or want to use TDD?