…or transformators. Often when I meet people and talk to them about their jobs or everyday life topics come up about suboptimal processes and workflows and other complexeties we have to deal with. Almost everytime such issues arise my brain start a background process working on ways to improve the talked-about situation.
Many of my developer colleagues and friends are the same: We all shake our heads or face palm and immediately think about possible remedies.
Talking to non-developers about the same issues often leads to reactions like
- It cannot be changed
- It has been this way since forever
- We have never done it that way
None of the great (software) engineers I had the pleasure to work with thinks this way:
They all try to understand the context, domain and status quo. As a part of this process often the first problems are uncovered. In addition we define aims and target metrics together with the domain experts who often are part of one of several user groups.
On that basis they develop solutions fitting to the situation at hand. All the constraints in time, resources and knowledge are taken into account. Knowing that the initial scope usually does not cover a full solution, an evolvable system is designed that already provides value. Over time they add features, fix blind spots and weaknesses and gradually expand the scope.
This analytic view and the incremental process towards a system that improves the current situation is key in pushing things forward. It also eliminates most of the “impossible to implement/change” counterargument.
The latter two main arguments against change revolve often about excluding user groups like elderly people or people accustomed to the status quo unwilling to adapt. They can be mitigated by designing the systems and services to have multi-modal inputs and outputs. Working with them can stay largely unchanged for inert users groups while others may utilize the new options the solutions offer.
Recently, I heard of a nice example of this: Customer banking already is largely digitalized but there are banks that still offer inboxes for credit transfer on paper in addition to online-banking and apps. People without digital devices or knowledge simply throw the papers into the inbox where it automatically gets scanned and digitally processed. And there is still the option to snail-mail the account statements for the people who do their management on paper. All the process in between is automated and digital leaving no one behind.
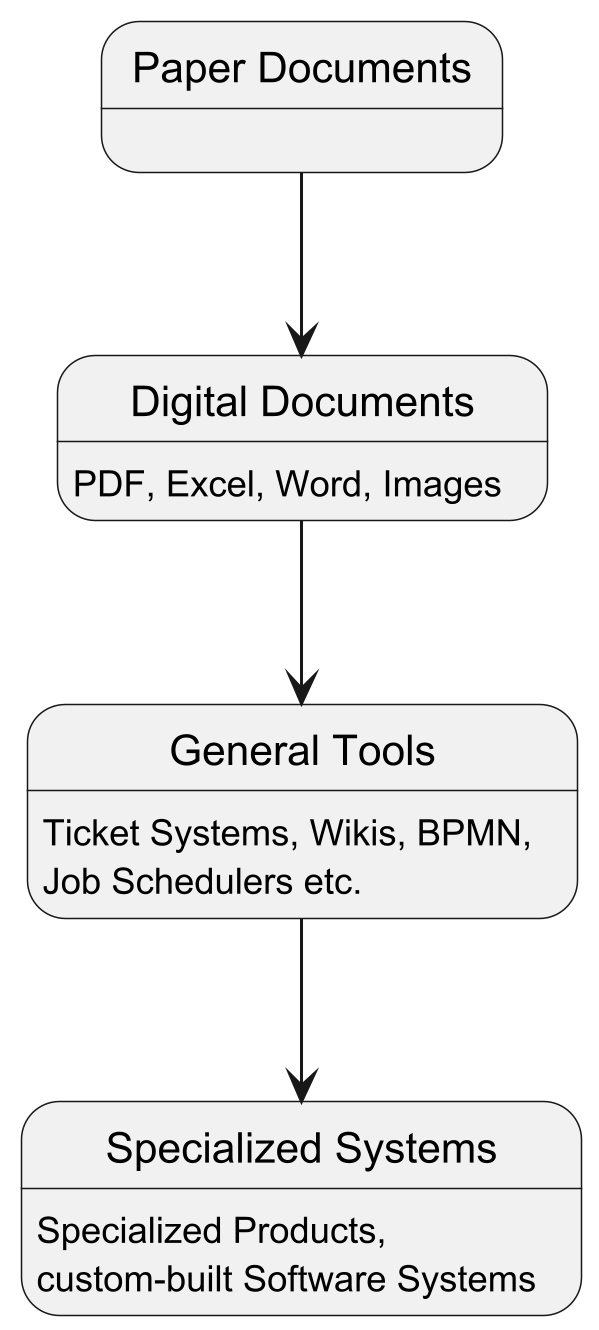
In https://schneide.blog/2026/01/19/digitalization-is-hard-especially-in-germany/ I described general guidelines to make mostly analog real-world processes digital and frictionless.