Trait-queries for my C++ dependency injection container

This posts builds upon my previous posts on my C++ dependency-injection container: Automated instance construction in C++, Improved automated instance construction in C++ and Even better automated instance construction in C++. I was actually quite happy with the version from the last post and didn’t really touch the implementation for a good long while. But lately, I identified a few related requirements that could be solved elegantly by an extension to the container, so I decided to give it a go.

New Requirements

  1. Sometimes I need to get services from the DI just to create them. They would then register themselves with an event bus or some other system. I would not really call into them actively, and therefore I did not need access to the instances created. This could previously be done via something like (void)provider.get<my_autonomous_system>(), after all the services were registered. That works, but doesn’t scale up very well once you have a few of those. It would be much better to have something like provider.instantiate_all_autonomous_systems().
  2. Some groups of systems I would instantiate and keep around just to call them in a totally homogeneous way, like system_one.update(), system_two.update(), etc.. Again it would be better to not require the concrete types at the call site and instead just get the requested systems and call their update() in a loop.

Query Interface

It turns out that both requirements can be solved by requesting instances for “a group” of registered services. In the case of the first requirement, that’s actually all that is needed, but for the second requirement, the instances also need to be processed in some way, e.g. upcasting or other forms of type-erasure. Here’s how I wanted it to look:

di di;
di.insert_unique<actual_update_thing_one>().trait<update_trait>();
di.insert_unique<actual_update_thing_two>().trait<update_trait>();

auto updaters = di.query_trait<update_trait>();
for (auto const& each : updaters)
  each->update();

After registration with the DI, types can be marked with one or many traits, which can later be queried. For this example, the trait looks like this:

struct update_trait
{
  using type = update_service*;
  static update_service* type_erase(update_service* x)
  {
    return x;
  }
};

It really just does an upcast to update_service, which is derived-from by both of the types. But it would be equally possible to use std::function<> in case the types are only compatible via duck-typing:

struct update_trait
{
  using type = std::function<void()>;
  template <class T> static std::function<void()> type_erase(T* x)
  {
    return [x]
    {
      x->update();
    };
  }
};

Of course, that changes the final loop in the example to:

for (auto const& each : updaters)
  each();

So a traits type needs to contain a type-alias for the target type and a function to process the instance pointer into that target type, be it by wrapping it in some sort of adaptor or via upcasting. They type is separate, and not the return type of the function, because it has to be independent of the instance type that goes in, while the function can be a template and thus have different return (which is fine if they all convert to the target type).

Implementation

When you add a trait for a type T via the .trait<Trait>() template, I register a what I call a ‘resolver’, which is just a std::function<typename Trait::type()> that invokes Trait::type_erase(get_ptr<T>()). These are all put into a std::vector<>:

template <typename Trait> using trait_resolvers =
  std::vector<std::function<typename Trait::type()>>;

For all the traits, these are stored in an std::unordered_map<std::type_index, std::any> where the key is typeid(Trait).

On query_trait<Trait>, I look into that map, get the trait_resolvers<Trait> out of it, and call each resolver to fill a new std::vector<typename Trait::type>, which is then returned and can be iterated by the user.

This implementation maps better to to the second use-case, but the first can be done with bogus type_erase function in the trait like this:

struct auto_create_trait
{
  using type = int;
  template <class T>
  static int type_erase(T* x)
  {
    return 0;
  }
};

This creates an std::vector<int> that isn’t needed, which is not ideal but not a deal-breaker either. On the other hand, it is not too hard to properly support void as the type with just two if constexpr (std::is_same_v<typename Traits::type, void>), one in the resolver lambda that omits the type_erase call and one in query_trait that omits storing the resolver result. This way, I can also use [[nodiscard]] on query_trait, and the trait can be written as just struct auto_create_trait { using type = void; };.

Heterogeneous lookup in unordered C++ containers

I often use std::string_view via the sv suffix for string constants in my code. If I need to associate something with those constants at runtime, I put it in an std::unordered_map with the constants as the keys.

Just a few days ago, I was using and std::unordered_map<std::string, ...> and wanted to .find(...) something in it with such a string constant. But that didn’t compile. From long ago, I remember that the type must be identical, and since there is no implicit conversion from std::string_view to std::string, I made that explicit to get it to compile. But wait. Didn’t C++ add support for using a different type than the key_type for the lookup? Indeed it did, in P0919R3 and P1690R1 from last decade. All major compilers seem to support it too. Then why wasn’t this working? It turns out that it’s not enabled by default, you need to explicitly enable it by supplying a special hasher. Here’s how I do it:

struct stringly_hash
{
  using is_transparent = void;
  [[nodiscard]] size_t operator()(char const* rhs) const
  {
    return std::hash<std::string_view>{}(rhs);
  }
  [[nodiscard]] size_t operator()(std::string_view rhs) const
  {
    return std::hash<std::string_view>{}(rhs);
  }
  [[nodiscard]] size_t operator()(std::string const& rhs) const
  {
    return std::hash<std::string>{}(rhs);
  }
};

template <typename ValueType>
using unordered_string_map = std::unordered_map<
  std::string,
  ValueType,
  stringly_hash,
  std::equal_to<>
>;

This is almost the same code as the sample given in the first of the two proposals. The using is_transparent = void; is how the feature is enabled and was changed in the second proposal.

I have changed my stance on “using” in C++ headers

I used to be pretty strictly against using either C++ using-directives or -declarations from within header files. It kind of stuck with me as a no-go. But that has changed in recent years.

There are now good cases where using can go into a header. For example, I do not really like putting things like…

using namespace std::string_literals;
using namespace std::string_view_literals;
using namespace std::chrono_literals;

…at the beginning of each source file. Did you know that you can pull all those (and some more) in with a single using namespace std::literals? Either way, in my newer projects, these usually go into one of the more prominent headers. Same goes for other literal operators such as those from the SI library. And so do using declarations for common vocabulary types. E.g. 2D or 3D vector types , in math heavy projects. Of course, they always go after the specific #include(s) the using is referencing. The benefits of doing that usually outweigh the danger of name-clashes and weird order dependencies.

There are cases where I still avoid using in headers however, and that is when the given header is ‘public’, i.e. being consumed by something that is not under my organization’s control. In that case, you better leave that decision to the library consumer.

Efficient integer powers of floating-point numbers in C++

Given a floating-point number x, it is quite easy to square it: x = x * x;, or x *= x;. Similarly, to find its cube, you can use x = x * x * x;.

However, when raising it to the 4’th power, things get more interesting: There’s the naive way: x = x * x * x * x;. And the slightly obscure way x *= x; x *= x; which saves a multiplication.

When raining to the 8’th power, the naive way really loses its appeal: x = x * x * x * x * x * x * x * x; versus x *= x; x *= x; x *= x;, that’s 7 multiplications version just 3. This process can easily be extended for raising a number to any power-of-two N, and will only use O(log(n)) multiplications.

The algorithm can also easily be extended to work with any integer power. This works by decomposing the number into product of power-of-twos. Luckily, that’s exactly what the binary representation so readily available on any computer is. For example, let us try x to the power of 20. That’s 16+4, i.e. 10100 in binary.

x *= x; // x is the original x^2 after this
x *= x; // x is the original x^4 after this
result = x;
x *= x; // x is the original x^8 after this
x *= x; // x is the original x^16 after this
result *= x;

Now let us throw this into some C++ code, with the power being a constant. That way, the optimizer can take out all the loops and generate just the optimal sequence of multiplications when the power is known at compile time.

template <unsigned int y> float nth_power(float x)
{
  auto p = y;
  auto result = ((p & 1) != 0) ? x : 1.f;
  while(p > 0)
  {
    x *= x;
    p = p >> 1;
    if ((p & 1) != 0)
      result *= x;
  }

  return result;
}

Interestingly, the big compilers do a very different job optimizing this. GCC optimizes out the loops with -O2 exactly up to nth_power<15>, but continues to do so with -O3 on higher powers. clang reliably takes out the loops even with just -O2. MSVC doesn’t seem to eliminate the loops at all, nor does it remove the multiplication with 1.f if the lowest bit is not set. Let me know if you find an implementation that MSVC can optimize! All tested on the compiler explorer godbolt.org.

My conan 2 Consumer Workflow

A great many things changed in the transition from conan 1.x to conan 2.x. For me, as an application-developer first, the main thing was how I consume packages. The two IDEs I use the most in C++ are Visual Studio and CLion, so I needed a good workflow with those. For Visual Studio, I am using its CMake integration, otherwise known as “folder mode”, which lets you directly open a project with a CMakeLists.txt file in it, instead of generating a solution and opening that. The deciding factor for me is that that uses Ninja as a build tool instead of MSBuild, which often is a lot faster. I have had projects with 3.5x build-time speed ups. As an added bonus, CLion supports very much the same workflow, which reduces friction when switching between platforms.

Visual Studio

First, we’re going to need some local profiles. I typically treat them as ‘build configurations’, with one profile for debug and release on each platform. I put them under version control with the project. A good starting point to create them is conan profile detect, which guesses your environment. To create a profile to a file, go to your project folder and use something like:

conan profile detect --name ./windows_release

Note the ./ in the name, which will instruct conan to create a profile in the current working directory instead of in your user settings. For me, this generates the following profile:

[settings]
arch=x86_64
build_type=Release
compiler=msvc
compiler.cppstd=14
compiler.runtime=dynamic
compiler.version=194
os=Windows

Conan will warn you, that this is only a guess and you should make sure that the values work for you. I usually bump up the compiler.cppstd to at least 20, but the really important change is to change the CMake generator to Ninja, after which the profile should look something like this:

[settings]
arch=x86_64
build_type=Release
compiler=msvc
compiler.cppstd=20
compiler.runtime=dynamic
compiler.version=194
os=Windows

[conf]
tools.cmake.cmaketoolchain:generator=Ninja

Copy and edit the build_type to create a corresponding profile for debug builds.

While conanfile.txt still works for specifying your dependencies, I now recommend directly using conanfile.py from the get go, as some options like overriding dependencies are now exclusive to it. Here’s an example installing the popular logging library spdlog:

from conan import ConanFile
from conan.tools.cmake import cmake_layout


class ProjectRecipe(ConanFile):
    settings = "os", "compiler", "build_type", "arch"
    generators = "CMakeToolchain", "CMakeDeps"

    def requirements(self):
        self.requires("spdlog/1.14.1")

    def layout(self):
        cmake_layout(self)

Note that I am using cmake_layout to setup the folder structure, which will make conan put the files it generates in build/Release for the windows_release profile we created.

Now it is time to install the dependencies using conan install. Make sure you have a clean project before this, e.g. there are no other build/config folders like build/, out/ and .vs/. Specifically, do not open the project in Visual Studio before doing that, as it will create another build setup. You already need the CMakeLists.txt at this point, but it can be empty. For completeness, here’s one that works with the conanfile.py from above:

cmake_minimum_required(VERSION 3.28)
project(ConanExample)

find_package(spdlog CONFIG REQUIRED)

add_executable(conan_example
  main.cpp
)

target_link_libraries(conan_example
  spdlog::spdlog
)

Run this in your project folder:

conan install . -pr:a ./windows_release

This will install the dependencies and even tell you what to put in your CMakeLists.txt to use them. More importantly for the Visual Studio integration, it will create a CMakeUserPresets.json file that will allow Visual Studio to find the prepared build folder once you open the project. If there is no CMakeLists.txt when you call conan install, this file will not be created! Note that you generally do not want this file under version control.

Now that this is setup, you can finally open the project in Visual Studio. You should see a configuration named “conan-release” already available and CMake should run without errors. After this point, you can let conan add new configurations and Visual Studio should automatically pick them up through the CMake user presets.

CLion

The process is essentially the same for CLion, except that the profile will probably look different, depending on the platform. Switching the generator to Ninja is not as essential, but I still like to do it for the speed advantages.

Again, make sure you let conan setup the initial build folders and CMakeUserPresets.json and not the IDE. CLion will then pick them up and work with them like Visual Studio does.

Additional thoughts

I like to create additional script files that I use to setup/update the dependencies. For example, in windows, I create a conan_install.bat file like this:

@echo Installing debug dependencies
conan install . -pr:a conan/windows_debug --build=missing %*
@if %errorlevel% neq 0 exit /b %errorlevel%

@echo Installing release dependencies
conan install . -pr:a conan/windows_release --build=missing %*
@if %errorlevel% neq 0 exit /b %errorlevel%

Have you used other workflows successfully in these or different environments? Let me know about them!

Simple marching squares in C++

Marching squares is an algorithm to find the contour of a scalar field. For example, that can be a height-map and the resulting contour would be lines of a specific height known as ‘isolines’.

At the core of the algorithm is a lookup table that says which line segments to generate for a specific ’tile’ configuration. To make sense of that, you start with a convention on how your tile configuration and the resulting lines are encoded. I typically add a small piece of ASCII-art to explain that:

// c3-e3-c2
// |      |
// e0    e2
// |      |
// c0-e1-c1
//
// c are corner bits, e the edge indices

The input of our lookup table is a bitmask of which of the corners c are ‘in’ or above our isolevel. The output is which tile edges e to connect with line segments. That is either 0, 1 or 2 line segments, so we need to encode that many pairs. You could easily pack that into a 32-bit, but I am using a std::vector<std::uint8_t> for simplicity. Here’s the whole thing:

using config = std::vector<std::uint8_t>;
using config_lookup = std::array<config, 16>;
const config_lookup LOOKUP{
  config{},
  { 0, 1 },
  { 1, 2 },
  { 0, 2 },
  { 2, 3 },
  { 0, 1, 2, 3 },
  { 1, 3 },
  { 0, 3 },
  { 3, 0 },
  { 3, 1 },
  { 1, 2, 3, 0 },
  { 3, 2 },
  { 2, 0 },
  { 2, 1 },
  { 1, 0 },
  config{},
};

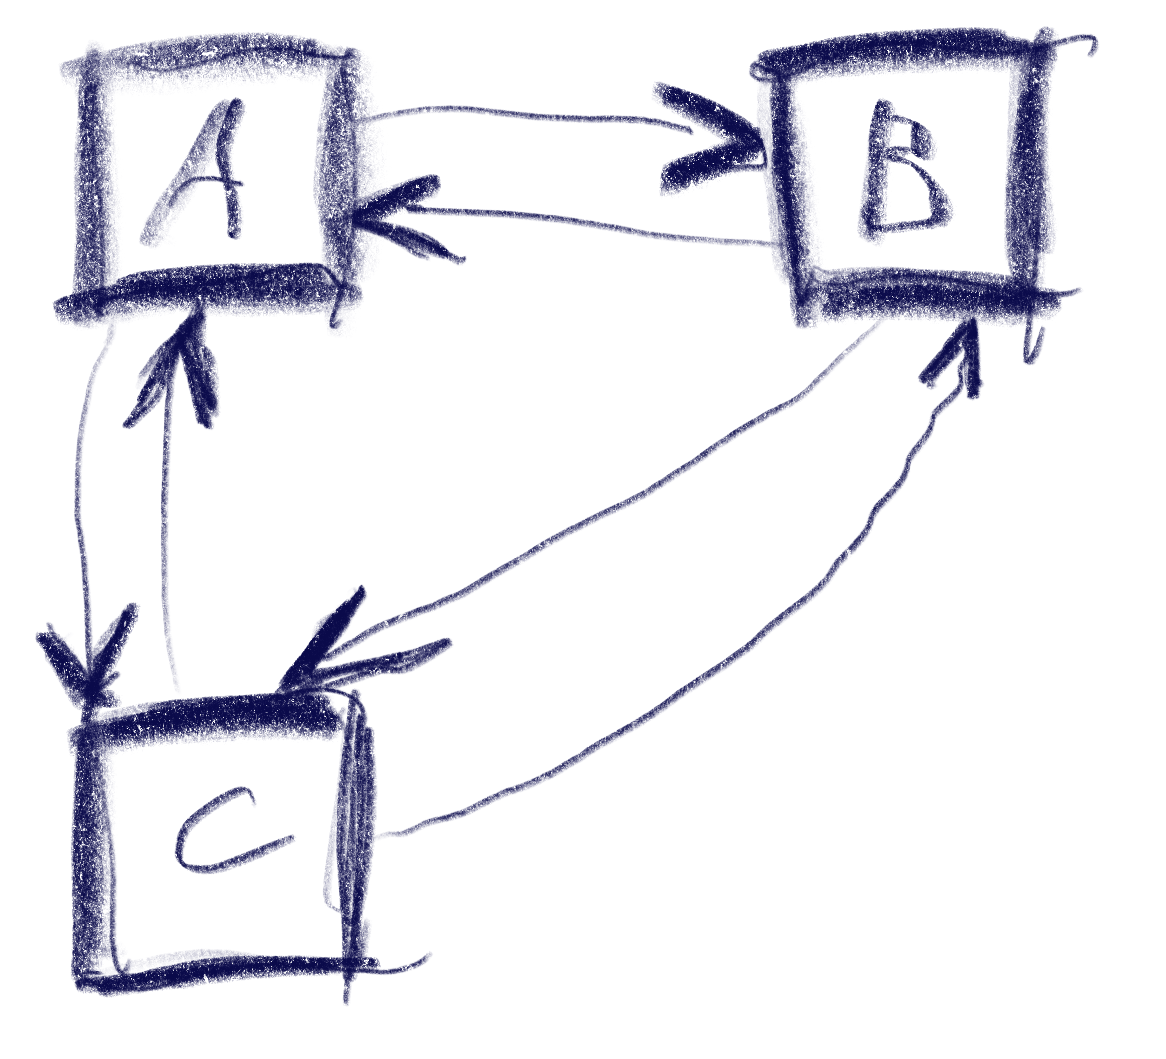
I usually want to generate index meshes, so I can easily connect edges later without comparing the floating-point coordinates. So one design goal here was to generate each point only once. Here is the top-level algorithm:

using point_id = std::tuple<int, int, bool>;

std::vector<v2<float>> points;
// Maps construction parameters to existing entries in points
std::unordered_map<point_id, std::uint16_t, key_hash> point_cache;
// Index pairs for the constructed edges
std::vector<std::uint16_t> edges;

auto [ex, ey] = map.size();
auto hx = ex-1;
auto hy = ey-1;

// Construct inner edges
for (int cy = 0; cy < hy; ++cy)
for (int cx = 0; cx < hx; ++cx)
{
  std::uint32_t key = 0;
  if (map(cx, cy) > threshold)
    key |= 1;
  if (map(cx + 1, cy) > threshold)
    key |= 2;
  if (map(cx + 1, cy + 1) > threshold)
    key |= 4;
  if (map(cx, cy + 1) > threshold)
    key |= 8;

  auto const& geometry = LOOKUP[key];

  for (auto each : geometry)
  {
    auto normalized_id = normalize_point(cx, cy, each);
    auto found = point_cache.find(normalized_id);
    if (found != point_cache.end())
    {
      edges.push_back(found->second);
    }
    else
    {
      auto index = static_cast<std::uint16_t>(points.size());
      points.push_back(build_point(map, threshold, normalized_id));
      edges.push_back(index);
      point_cache.insert({ normalized_id, index });
    }
  }
}

For each tile, we first figure out the lookup input-key by testing the 4 corners. We then get-or-create the global point for each edge point from the lookup.
Since each edge in a tile can be accessed from two sides, we first normalize it to have a unique key for our cache:

point_id normalize_point(int cx, int cy, std::uint8_t edge)
{
  switch (edge)
  {
  case 3:
    return { cx, cy + 1, false };
  case 2:
    return { cx + 1, cy, true };
  default:
    return { cx, cy, edge == 0 };
  };
}

When we need to create a point an edge, we interpolate to estimate where exactly the isoline intersects our tile-edge:

v2<float> build_point(raster_adaptor const& map, float threshold, point_id const& p)
{
  auto [x0, y0, vertical] = p;
  int x1 = x0, y1 = y0;
  if (vertical)
    y1++;
  else
    x1++;

  const auto s = map.scale();
  float h0 = map(x0, y0);
  float h1 = map(x1, y1);
  float lambda = (threshold - h0) / (h1 - h0);

  auto result = v2{ x0 * s, y0 * s };
  auto shift = lambda * s;
  if (vertical)
    result[1] += shift;
  else
    result[0] += shift;
  return result;
}

For a height-map, that’s about as good as you can get.

You can, however, sample other scalar field functions with this as well, for example sums of distances. This is not the most sophisticated implementation of marching squares, but it is reasonably simple and can easily be adapted to your needs.

Four-way Navigation in UIs

Just yesterday, I was working on the task of enabling gamepad navigation of a graphical UI. I had implemented this before in my game abstractanks but since forgotten how exactly I did it. So I opened the old code and tried to decipher it, and I figured that’d make a nice topic to write about.

Basic implementation

Let’s break down the simple version of the problem: You have a bunch of rectangular controls, and given a specific one, figure out the next one with an input of either left, up, right or down.

This sketch shows a control setup with a possible solution. It also contains an interesting situation: going ‘down’ from B box goes to C, but going up from there goes to A!

The key to creating this solution is a metric that weights the gap for a specific input direction, e.g. neighbor_metric(
box<> const& from, box<> const& to, navigation_direction direction)
. To implement this, we need to convert this gap into numbers we can use. I’ve used a variant of Arvo’s algorithm for that: For both axes, get the difference of the rectangles’ intervals along that axis and store those in a 2d-vector. In code:

template <int axis> inline float difference_on_axis(
box<> const& from, box<> const& to)
{
if (to.min[axis] > from.max[axis])
return to.min[axis] - from.max[axis];
else if (to.max[axis] < from.min[axis])
return to.max[axis] - from.min[axis];
return 0.f;
}

v2<> arvo_vector(box<> const& from, box<> const& to)
{
return {
difference_on_axis<0>(from, to),
difference_on_axis<1>(from, to) };
}

That sketch shows the resulting vectors from the box in the top-left going to two other boxes. Note that these vectors are quite different from the difference of the boxes’ centers. In the case of the two top boxes, the vector connecting the centers would tilt down slightly, while this one is completely parallel to the x axis.

Now armed with this vector, let’s look at the metric I was using. It results in a 2d ‘score’ that is later compared lexicographically to determine the best candidate: the first number determines the ‘angle’ with the selected axis, the other one the distance.

template <int axis> auto metric_on_axis(box<> const& from, box<> const& to)
{
auto delta = arvo_vector(from, to);
delta[0] *= delta[0];
delta[1] *= delta[1];
auto square_distance = delta[0] + delta[1];

float cosine_squared = delta[axis] / square_distance;
return std::make_pair(-cosine_squared, delta[axis]);
}

std::optional<std::pair<float, float>> neighbor_metric(
box<> const& from, box<> const& to, navigation_direction direction)
{
switch (direction)
{
default:
case navigation_direction::right:
{
if (from.max[0] >= to.max[0])
return {};
return metric_on_axis<0>(from, to);
}
case navigation_direction::left:
{
if (from.min[0] <= to.min[0])
return {};
return metric_on_axis<0>(from, to);
}
case navigation_direction::up:
{
if (from.max[1] >= to.max[1])
return {};
return metric_on_axis<1>(from, to);
}
case navigation_direction::down:
{
if (from.min[1] <= to.min[1])
return {};
return metric_on_axis<1>(from, to);
}
}
}

In practice this means that the algorithm will favor connections that best align with the input direction, while ties resolved by using the closest candidate. The metric ‘disqualifies’ candidates going backward, e.g. when going right, the next box cannot start left of the from box.

Now we just need to loop through all candidates and the select the one with the lowest metric.

This algorithm does not make any guarantees that all controls will be accessible, but that is a property that can easily be tested by traversing the graph induced by this metric, and the UI can be designed appropriately. It also does not try to be symmetric, e.g. going down then up does not always result in going back to the previous control. As we can see in the first sketch, this is not always desirable. I think it’s nice to be able to go from B to C via ‘down’, but I’d be weird to go ‘up’ back there instead of A. Instead, going ‘right’ to B does make sense.

Hard cases

But there can be ambiguities that this algorithm does not quite solve. Consider the case were C is wider, so that is is also under B:

The algorithm will connect both A and B down to C, but the metric will be tied for A and B going up from C. The metric could be extended to also include the ‘cross’ axis min-point of the box, e.g. favoring left over right for westerners like me. But going from B down to C and then up to A would feel weird. One idea to resolve this is to use the history to break ties, e.g. when coming from B to C, going back up would go back to C.

Another hard case is scroll-views. In fact, they seem to change the problem domain. Instead of treating the inputs as boxes in a flat plane, navigating in a scroll view requires to navigate to potentially only partially visible or even invisible boxes and bringing them into view. I’ve previously solved this by treating every scroll-view as its own separate plane and navigating only within that if possible. Only when no target is found within the scroll-view, did the algorithm try to navigate to items outside.

My Favorite Pattern

It has become somewhat of an internal meme that I do not like it when programmers use the word “wrapper”. When someone does say it, I usually get a cue from one of the others to start complaining about it. Do not get me wrong, though. I am very much in favor of wrapping things, but with purpose. And my favorite one is the façade.

When simple becomes complex

Many times, APIs start out simple and elegant. This usually works for a while and the API gets used a lot precisely because of its beauty and simplicity. But eventually, a new use case comes along that demands more of the API than it can currently serve. It has to be extended. This usually takes the form of an additional method or function parameter, or an additional function that needs to be called. Using the API now becomes more complex all its users.

Do not underestimate this effect. I have only anecdotal evidence, but in my experience, a lot of unnecessary software complexity can be attributed to this1. The Pareto-Principle applies here: A single use case causes all the users of the previously simple API to deal with new complexity (e.g. 10% of the use cases cause 90% of the complexity in the user-/call-sites).

Façades make it look beautiful

Luckily, it can be dealt with beautifully: using the façade pattern. This pattern abstracts a complex API behind a simple API. The trade-off, of course, is that it is less powerful than the “full API”. In our example though, all of the previous use-cases can keep using the simple API via a façade.

When to apply this

The aforementioned example, extending an API, is a very nice opportunity to apply the façade. Just keep the interface of the old API around, and re-implement it using the new, extended API, which is usually created by modifying the old API’s implementation. Now all the old call-sites can stay the same, yet you can have a more powerful API for those rare cases that need it.

Of course, you can also identify common usage patterns and refactor them using a façade, but that’s usually much harder to do.

What exactly are façades made of?

Façades do not hide the more complex API in the sense that the APIs users are not allowed to use it. Yes, façades make APIs look beautiful, but that is where the metaphor ends. You can still access what is behind the façade. You can even write more façades for the behind. Many APIs have multiple common cases and only very few complex ones.

So… Classes? Functions? Data? Any of those, in fact. Whenever you enable writing something in a simpler way for a common case, you have a façade . Very often, a small function with a simple signature is all the façade you need.

But it makes all the difference.

Now can someone please tell me what that little hook under the c is called?

  1. Façades can, of course, also contribute to creating complexity by growing the codebase and creating ‘variants’. But they rarely do. ↩︎

Finding refactoring candidates using reflection

If some of your types are always used together, that is probably a sign that you are missing an abstraction that bundles them. For example, if I always see the types Rectangle and Color together, it’s probably a good idea to create a ColoredRectangle class that combines the two. However, these patterns tend to emerge over time, so it’s hard to actually find them manually.

Reflection can help find these relationships between types. For example, you can look at all the function/method parameter lists in your code and mark all types appearing there as ‘being used together’. Then count how often these tuples appear, and you might have a good candidate for refactoring.

Here’s how to do that in C#. First pick a few assemblies you want to analyze. One way to get them is using Assembly.GetAssembly(typeof(SomeTypeFromYourAssembly)). Then get all the methods from all the types:

IEnumerable<MethodInfo> GetParameterTypesOfAllMethods(IEnumerable<Assembly> assemblies)
{
  var flags = BindingFlags.Instance | BindingFlags.Static | BindingFlags.Public
    | BindingFlags.NonPublic | BindingFlags.DeclaredOnly;
  foreach (var assembly in assemblies)
  {
    foreach (var type in assembly.GetTypes())
    {
      foreach (var method in type.GetMethods(flags))
      {
        yield return method;
      }
    }
  }
}

The flags are important: the default will not include NonPublic and DeclaredOnly. Without those, the code will not report private methods but give you methods from base classes that we do not want here.

Now this is where things become a little more muddy, and specific to your application. I am skipping generated methods with “IsSpecialName”, and then I’m only looking at non-generic class parameters:

foreach (var method in GetParameterTypesOfAllMethods(assemblies))
{
  if (method.IsSpecialName)
    continue;

  var parameterList = method.GetParameters();

  var candidates = parameterList
      .Select(x => x.ParameterType)
      .Where(x => !x.IsGenericParameter)
      .Where(x => x.IsClass);

  /* more processing here */
}

Then I convert the types to a string using ToString() to get a nice identifier that includes filled generic parameters. I sort and join the type ids to get a key for my tuple and count the number of appearances in a Dictionary<string, int>:

var candidateNames = candidates
    .Select(x => x.ToString())
    .OrderBy(x => x)
    .ToList();

if (candidateNames.Count <= 1)
  continue;

if (candidateNames.Any(string.IsNullOrWhiteSpace))
  continue;

var key = string.Join(",", candidateNames);

if (!lookup.ContainsKey(key))
{
  lookup.Add(key, 1);
}
else
{
  lookup[key]++;
}

Once that is done, you can sort the resulting lookup, print out all the tuples, and see if there are any good candidates.

There’s much room for improvement with a method like this. For example, skipping non-class types is a pretty arbitrary choice. And you will not find new tuples built from built-in types this way. However, because those types offer very little semantic by themselves, it can be hard to correlate multiple occurrences simply by their types.

Even better automated instance construction in C++

In the previous articles on automated instance construction (first and second) I showed how you can use constructor-argument deduction to automatically do dependency injection. While that approach worked nicely in general, one little detail was still nagging me: Since construction of the actual objects happens at the end of a recursion, the stack depth in some of those construction could get quite deep. In fact there are an additional Maxactual number of c’tor parameters functions on the stack before the c’tor is called. This effect is even worse when resolving long dependency chains, were those functions are there for each of the dependencies currently being resolved.

The previous code uses an std::index_sequence of the exactly the right length to inject the same number of mimic parameters that are then used to locate dependencies. If we knew the right length, there wouldn’t have to be any recursion around the construction. And that’s actually easy to refactor out, we can just figure out the std::index_sequence first and return, and then use it outside of the recursion:

template <class T, std::size_t Head, std::size_t... Rest>
constexpr auto
injection_parameter_sequence(std::index_sequence<Head, Rest...>,
  decltype(T{ mimic<T>{ Head }, mimic<T>{ Rest }... })* = nullptr)
{
  return std::index_sequence<Head, Rest...>{};
}

template <class T>
constexpr auto injection_parameter_sequence(std::index_sequence<>)
{
  return std::index_sequence<>{};
}

template <class T, std::size_t... Rest>
constexpr auto
injection_parameter_sequence(std::index_sequence<Rest...>)
{
  return injection_parameter_sequence<T>(std::make_index_sequence<sizeof...(Rest) - 1>{});
}

Starting with a “long” index sequence, this overload set returns the smaller index sequence for the construction. We can use a small tool function to actually create the instance:

template <class T, std::size_t... Params>
constexpr auto make_unique_injected_with_sequence(service_provider const& p, std::index_sequence<Params...>)
{
  return std::make_unique<T>(mimic<T>(p, Params)...);
}

Which can be called like this:

template <class T, std::size_t Max = 16> auto make_unique_injected(service_provider const& p)
{
  return make_unique_injected_with_sequence<T>(p,
    injection_parameter_sequence<T>(std::make_index_sequence<Max>{}));
}

Only these last two function will be added to the call stack for each constructor call, which is not a whole lot. This construction has the additional advantage that only these two need to be changed to support different kinds construction, e.g. using std::make_shared instead of std::make_unique.