The buzz around AI often only revolves around how fast and cheap it is to genereate code. And it is true: Developing small tools has gotten waaaayyyyy cheaper.
Software systems on the other hand are a lot more than code:
They are business requirements
They are tradeoffs
They are design decisions
They are built on incomplete knowledge
They are limited by technology
They are documentation
While AI may help in many items of the list, too, there is a lot of human interaction and need for human involvement. Humans need documents and other things to reason about.
Imho one important aspect are the decisions we made in the context, at the time. This is often overlooked and development teams and/or customers ask themselves later, why things were done the way they are now. Sometimes discussions go round in circles and discoveries of the past are rediscovered again and again.
ADRs to the rescue!
This is where Architectural Decision Records (ADRs) can help tremedously! They do not only describe the status quo of a system or feature but provide additional insight. Typical ADRs document the decisions taken in a structured and referencable way. Besides the decision itself they contain metadata like
An identifier
The people involved
The context
Several alternatives that were discussed
Pros, cons and consequences of each option
The reason for the decision
The catalog of ADRs usually grows gradually during the life of a software system. Like the system itself and its environment the ADR catalog is not static but dynamically changing:
ADRs can become invalid, they can be superseded by newer ones and may have other statuses like proposed, accepted and rejected. The identifier allows them to be referenced in other documentation, issues and code comments.
Over the years they provide a description of the journey the people involved and the software system took together. This journey may not have been a short and straight one but often had many twists and turns.
All that can be seen an tracked in the ADR catalog. The current team and customer can take a look at the journey and identify place to revisit or paths to avoid because it is documented in an appropriate way.
Do we need even more documentation than we have already?
Projects usually have a decent amount of documentation, so you may ask: Do we need even more? And how much effort should go into something like ADRs?
I think, ADRs offer different and very valuable information while being designed to be very lightweight. Most people use Markdown templates for there ADRs so you have a standard format making it fast to create and being skimmed over. MADR seems very popular and I also like aspects of tekiegirl/Archangels templates.
Defining your own template that fits your needs best based on those suggestions should not be that big of a deal. Neither is starting to use ADRs in your running or future projects:
Just document every decision that meets one or more of the following criteria
impacts the implementation
hard or expensive to reverse/change
topic comes up repeatedly in meetings
new members ask repeatedly about it
affects multile teams, services or systems
difficult to explain without the context
overrides or adopts decision by another team
Conclusion
ADRs are a lightweight documentation tool offering a unique and very useful perspective an a project/software system. You can start using them right away to get benefit and can reference them in several other places like issues, documentation, commits and code. Keeping them as close to the code as possible (e.g. in the same code repository) makes them easier to find.
There are and surely will be more and more tools that can use the information in your ADRs to help you reason about your system, its history and its future.
For each software application, there only exists one single, authoritative source of truth: The source code. If something isn’t in the code, it doesn’t exist. This source of truth is so important that we invented version control (or source control) that allows us to:
travel backwards in time
create alternative realities
progress multiple realities concurrently
That’s pretty awesome and something that not many professions can rely on. It is a “hidden superpower” of software development.
But when you look at a software project and not just the application, there is a lot more “truths” or information available than what fits into the source code. Let’s have a look at a few of them:
The ticket system
The ticket system or issue tracker or bug tracker or whatever you call it is a glorified to-do list that tells people what is lacking in the source code.
One view on the ticket system could be that of a health record system. Each ticket represents an ailment that the software application has. If it’s a bug, it is clearly in an undesirable state that needs to be “healed”. If it’s a new feature, the medical metaphor doesn’t fit perfectly, but we can view our development work as some kind of plastic surgery that makes the software more appealing to the customer.
Either way, the ticket system holds episodical wisdom. It explains the state of our application in hundreds or thousands of more or less independent short stories that are worked on in isolation. To gain a complete vision about the software project from the ticket system alone is possible, but cumbersome.
If you think about it, there is a clear connection between a short story (ticket) and one alternative reality in which the application is told about the story.
The wiki
For each project, there is a lot of information that is fluid, but not episodical. The current state of truth is valid until it gets replaced by a newer truth. Attempting to capture this information in tickets would result in an awkward lack of oversight.
Luckily, there is a tool that was invented specifically for this type of information: The wiki or the editable website graph. Your project can claim an area in this graph and fragment the information according to the mental model of the project team. Every time some outdated information is found, it can be updated in place. Every time some information is not found, it can be added in the place where it was anticipated.
The file storage
Every software project that I know has a lot of accompanying documents that are important for the project, but maybe not so much for the actual day-to-day development. Depending on who you ask, these documents may very well constitute “the project” and everything “below” them are just necessary technicalities.
The nature of a document is that it exists forever once created. There are lots of attempts to bring version control to the document world, but a typical question in this area is: “Is my document still valid?”
Because documents are represented by files (in the digital and the analog world), a file storage is the least we need to manage them. If your file storage entices you to name your documents “_latest”, “_newer”, “_version2” or something like that, you probably want to step up your document versioning game. Document management systems (DMS) might be what you are looking for. For small teams, a central instance of a Nextcloud might already be sufficient.
The derived documentation
If you happen to develop a software product, you need to provide a user manual and additional technical documentation. These documents need to be in eventual synchronisation with your first and central source of truth: The source code. And because your source code adapts, these documents need to adapt constantly, too.
This is the area where our company has the most “room for improvement”. I’m not diving into details here because I know our approaches are not sustainable.
Single source of truth?
The problem with this fragmented approach to capture the whole of a project is that you need to study all the different places and combine the information in your head. And not only you, every team member has to do this.
You can try to combine different sources into one:
If you squint really hard, you might think that a wiki can replace a ticket system, because each ticket can be represented by a graph node and the linking might resemble a grouping mechanism. My uninformed guess would be that this replaces software specialization with the need for human discipline. But maybe it can work and I just don’t know about the proper tooling yet?
One rather obvious integration might be to put the wiki alongside the code. I haven’t seen a good solution for merge conflicts yet, but maybe it is possible somehow.
Putting the file storage into your source repository makes it bigger and unwieldy, but it would be a natural step towards single sourcing – until you want to give your code repository away without revealing your company’s contracts. Suddenly, separate storage areas become important.
The one thing I struggle to integrate into the source repository is the derived documentation. I can think about storing the documents alongside the code and even requiring to update them before a merge request of a feature branch is accepted, but I shudder to think about the inevitable merge requests that need to be resolved.
Maybe there is a suitable solution out there that I’m missing? Leave a hint in the comments!
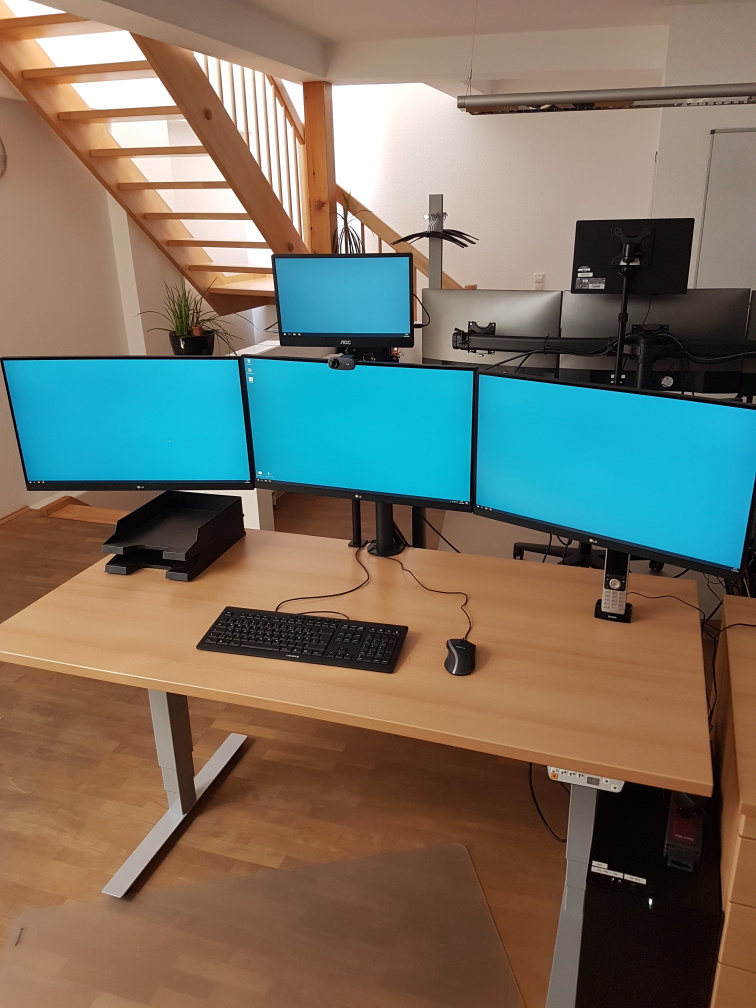
In this blog post, I’ll describe my experiences with a certain product (a computer monitor) and its manual. It might serve as an example of how ridiculous a poorly designed customer experience is perceived on the receiving end. Hopefully, it inspires some readers to think about sensible defaults and how to communicate them.
This meant that we bought a lot of smaller monitors in the last months. We decided to go the monoculture route and bought one piece of our favorite model.
It arrived faulty. The only thing that this device did was to indicate “battery full” when the battery status button was pressed (yes, this particular monitor has its own battery for mobile usage). Everything else didn’t work, especially not the power button. The device was a dead fish. I returned it to the supplier.
The replacement unit was also dead on arrival. This puzzled me, because the odds of having two duds in a row seem very small. So I investigated and found an interesting fact: The unpacking and assembly instruction sheet is incomplete. Well, even more than that. It’s plain misleading.
It starts with a big lettered alert that reads “Please follow the illustration and text description strictly when opening the package and installing the display.” It then shows three illustrations of a totally different monitor and ends the instructions at the step when the styrofoam is removed (and no cables attached). At the bottom of the sheet, there’s an explanation: “The machine picture and styrofoam shown are for illustration purpose only and may differ from the actual product”. You can’t make this up.
The manual urges me to follow it “strictly” and then vaguely tells me how to unwrap the monitor from the styrofoam and nothing more. Even better, in the illustrations, there are different options given like “For binding-less, please ignore the untying action” (actual quote!). You can’t follow strictly if given multiple options and hand-wavey instructions. “Unpack the monitor correctly” is more actionable than this manual.
But that was just the beginning. The user manual actually references the correct monitor and gives usage instructions for common use cases, but it lacks a troubleshooting section. The user manual starts with a working device – and my device(s) don’t work. They don’t turn on if the power button is pressed – and it has to be pressed for 3 seconds to turn on the monitor! Yes, the manual is clear on this one: To turn the monitor on by using its power button, you have to press for three, long, “twenty-two”, tedious, “twenty-three”, seconds. That’s like having a light switch, but if you press it in the dark, it requires you to keep pressing because it could be a mistake – do you really want to have the lights on?
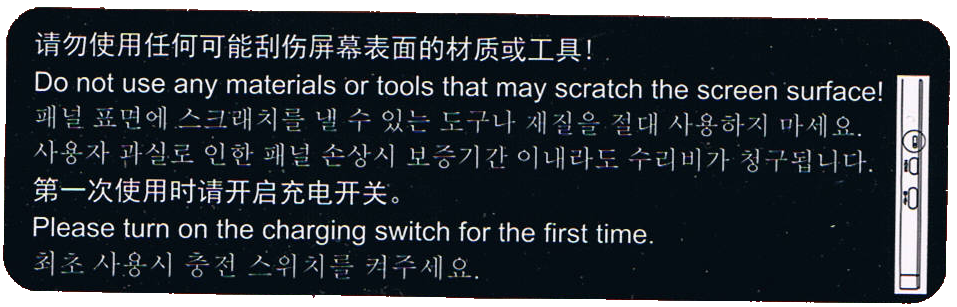
The device is still dead, the manual is no help for my situation, so I inspect the material a little bit more thorough. There is a sticker at the bottom of the monitor (at the opposite side from the power plug and the power button) that catches my eye. I have photographed it, because nobody would believe me otherwise. Here it is:
The first sentence is a no-brainer. But the second one is a head-scratcher: “Please turn on the charging switch for the first time”.
There is no mention of a “charging switch” in the manual. There is no switch labeled “charging” on the device. All the buttons/switches and ports that are present are described in the manual and can’t be interpreted as a “charging switch”.
But if you look at the sticker more closely, you’ll see the illustration at the right side. In reality, it is 3 mm wide and 18 mm in height. It is very small. Even smaller are the depicted things – they resemble the input ports on the right side! From the bottom up, there is a USB-C port, a micro-HDMI port and something that is encircled in the illustration. The circle is probably our hint that this is indeed the “charging switch” mentioned on the sticker.
I searched for the switch and only found a notch in the plastic, about 3 mm wide. Only by using a magnifying glass did I find a small black plastic knob at the bottom of the notch (2 mm deep). The knob is probably one square-millimeter tiny. It was situated more to the top of the notch.
I have built electronics since the early nineties. I know how to solder and recognize all kinds of electronic parts. This thing was a DIP-switch, but one of the smallest ones I’ve ever seen. And it wasn’t labeled at all. The only hint we get to search for it is the illustration on the sticker.
So – is it in the “on” position? I decided to find out by moving it down. A paper clip wire was too big to fit, so I used the smallest screwdriver my micro-mechanic screwdriver set would offer. Just a bit smaller and I would have resorted to an actual hair. The DIP-switch moved half a millimeter down and got stuck more to the bottom of the notch.
The monitor suddenly worked – after the three second pressing. The unlabeled “on” position of the unlabeled “charging switch” that you have to manipulate by using the smallest metal rod that you can find in an electronics lab is at the bottom. Good to know.
I won’t reiterate the madness that we just experienced. It gets even worse, so buckle up.
Right now, I have a working monitor that is actually pleasing to use. I buy it again – the same routine. I wonder if I should report the trick to the supplier.
We have more than two workplaces, so I buy the monitor – the same product for the same price – again, but five times now.
I get five packages with identical content. Well, nearly identical. The stickers are different!
Three monitors have the same sticker as seen above. One of them needs to be switched to turn on, the other two were already in the “on” position.
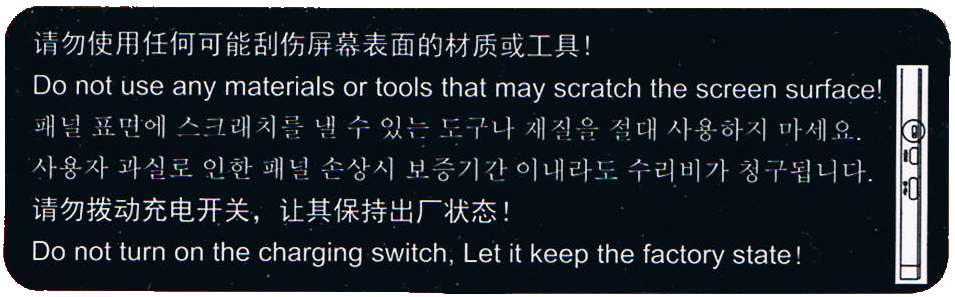
But the other two monitors have a different sticker:
Both monitors were already in the “on” position, so nothing needed to be done. But this sticker tells you to leave the charging switch alone – A switch that is never mentioned in the manual, that is so small that you probably miss it even if you search for it and that needs special equipment to be changed. That’s as if my refrigerator came with a warning sticker not to disable a particular fuse when this fuse is safely hidden away in the internals of the refrigerators electronics and never mentioned in the manual. Why point it out if my only job is to ignore it?
Remember the first manual that “strictly” tells a vague story? This is the same logic. And it gets even better with the second sentence, the one with an exclamation mark! “Let it keep the factory state!” means that it is turned off when coming from the factory? Or does it mean to keep it in the state that is delivered, regardless of the monitor being functional or disabled by it?
I still don’t know what the “on” position of this switch really is and now I’m even more confused than before.
My mind invented this elaborate fantasy story about a factory that produces monitors. One engineer is tasked with designing the charging functionality and adds the “charging switch” to enable or disable the whole feature. But she/he forgets to remove it before the blueprint is committed into production and now the switch is part of the consumer product. The DIP switch is on the “off” position by default from its producer. This renders the first batches of monitors useless because the documentation doesn’t mention the magic switch that needs to be flipped once to have the monitors turn on. The return rates are horrendous and management gets involved. They decide to get rid of the problem by applying a quick fix – the first sticker. This sentences their customers to perform a scavenger hunt of subtle hints to have the monitors work. They also install a new production line station – the switch flipper. This person needs training and is only available for the day shift – Half of the monitors leave the factory with the switch in the “on” position, the other half is in the “off” position. The first sticker remains, it is still a mystery, but the return rates are cut in half nearly overnight.
In my story, the original engineer recognizes her/his error and tries to correct it – by reversing the switch positions. The default position (“off”) now enables the feature, while the “on” position disables it. Just by turning the (still unlabeled) positions around, the factory produces ready-to-use monitors without requiring intervention from the customer.
The problem? A lot of customers have now learned the switch-flip trick and deactivate their product. And the switch flipper still deactivates half of the production without noticing. They need to inform their customers! They apply the second sticker, hoping to clear this matter once and for all.
And here I am, having bought 7 monitors so far and received nearly every possible combination of sticker and initial switch position. I am more confused and wary as if they had stuck to their original approach and just updated their manual.
But there is one indicator that might be helpful: The serial number of the monitors start with some letters and then two digits:
79: You get sticker 1 and need to flip the switch
99: You get sticker 2 and need not flip the switch
69: You get sticker 1, but the switch is already flipped
At least that was my observation with the samples at hand.
What can we, as software developers, learn from this disaster?
First, keep an eye on your feature switches! One non-sensible default and you chase that error forever.
Second, don’t compensate the first error by making the complemental error, too. Sometimes, the cure is worse than the disease.
Third, don’t ever not avoid negative logic! Boolean logic is hard enough itself, if you further complicate it, people like me will just resort to guessing and trial-and-error.
Fourth, and that is the most important one for me: Don’t explain things that need no attention from the user. I’m definitely guilty of that one. Often, I want my documentation to be “complete” and to “show all opportunities” when all I do is confuse my users with sentences like “Do not turn on the charging switch. Let it keep the factory state!” and then never mention the “charging switch” anywhere again.
One of the core concepts of software development and IT in general is “automation”, the “creation and application of technologies to produce and deliver goods and services with minimal human intervention” (definition from techopedia).
The problem is that “minimal human intervention” is often misunderstood as “no human intervention”, which is the most laborious and expensive stage of automation that might not have the most economic return on investment. It might be more efficient to have some degree of intervention left while investing only a fraction of the automation work and duration.
In order to decide “how much” automation is the most profitable for the foreseeable future, I’ve established a model with four stages of automation that I can quickly check against the circumstances. In this blog post, I describe the first two stages and give some ideas how to implement them.
Stage 1: Documentation
The first step to automation is to just describe the process in a manner that can be repeated. The documentation itself does nothing, but it enables repetition and scalability, two fundamental aspects of automation.
Think about baking a pie. If you just mix some ingredients and put it in the oven for an arbitrary amount of time, you might produce the most delicious pie ever, but you cannot do it again if you don’t remember all details and, even more tragic, nobody else can bake your pie. In order to give others the secret to your special pie, you have to give them the recipe – the documentation of its production process. Once the recipe is written down (and published), it can be read by many bakers in parallel and enables all of them to recreate your invention (to some degree at least, there are probably still some tricks and secrets left out of the recipe).
While the pie baking process still needs human intervention (the bakers that read the recipe and transform it into a series of actions), it is automated in the sense that it can be repeated with roughly the same result and these repetitions, given enough bakers and ovens, can be performed in parallel.
The economic evaluation of documentation shows that it is really easy to create, fast to change and, given some quality of content, nearly universally understood. If you don’t want to invest a lot of time and money, documenting your processes is the first and most important step towards automation. For a lot of your processes, it will also be the last possible stage of automation, at least until artificial intelligence learns your tricks and interpretations.
Documenting your processes is (no surprises here) the foundation of most quality assurance standards. But it is surprisingly hard to start with. This is not a matter of tools – pen and paper will do in the beginning. It is a shift in your mindset. The goal is no longer to bake a pie. It is to write a recipe while you bake the pie as a reference piece for it. If you want to start documenting your processes, here are three tips that might help you:
Choose a digital tool that doesn’t obstruct you. It should be digital because this facilitates distribution and collaboration. It should not hinder you because every time you need to think about the tool, you lose the focus on your process. I’m using a Wiki that lets me type the things I want to say without interference. In my case, that’s Confluence, but Obsidian or other tools are just as good.
Try to adopt a narrative structure to describe your processes. Think about the established structure of a baking recipe. For example, there is an ingredients list separate from the preparation instructions. If you find a structure that works for you, repeat and evolve it. It helps you and your readers to stay on track and don’t scatter the information all over the place. In my case, the structure consists of four paragraphs:
Event/Trigger – The circumstance(s) that should be present at the beginning of the process
Actions/Steps – The things you have to do, described in the necessary details for the target audience. This is often the paragraph with the most content.
Result – Description of the circumstance(s) that should be present once you’ve done all steps. In recipes, this is often a photo of the meal/pastry. For first-time performers, this description is important to be able to declare success.
Report – Who needs to be informed? This paragraph is often missing in descriptions, but crucial for collaboration. If nobody knows there is a fresh and delicious pie in the kitchen, it will not be eaten. Ok, that’s a bad example: Pies in the oven announce themselves with their smell. Digital products often have no smell – inform your peers!
Iterate over your documentation any chance you get. It is easy to bake your signature pie from memory. But is the recipe still accurate? Are there details that are important, but missing from the description? Your digital tool probably allows immediate modification of your documentation and maybe even informs interested readers about your update. Unchanged documentation is dead documentation. In my case, I always open my process description on a secondary monitor whenever I perform them. Sometimes, I invite others to perform the process for me to review the accuracy and fidelity of the documentation.
If you can open the process description of many of your routine tasks, you have reached the first stage of automation for your work. Of course, there will be lots of things you do that are not “routine” – yet. With good documentation, you can even think about delegation – the art of maximizing the amount of work done by others – without sacrificing essential quality.
In later stages, the delegation target (the “others”) will be machines.
Stage 2: Recurring reminders
If you’ve documented a process with a structure similar to mine, you specified a trigger or event that requires the process to be performed. Perhaps its the first day of the month and you need to update your timesheet or send out the appointment overview for the next weeks. Maybe your office plants silently thirst for some water. Whatever it is, if your process is recurrent, you might think about recurring reminders.
This will not automate the performance of the process, but unburden you of thinking about the triggering event. The machines will now remind you about certain tasks. This can be a simple series of reminders in your schedular app or, like in my case, the automated creation of issues (or todo items, tickets) in your work planning application.
For example, once every few weeks, a friendly machine creates an issue for me to write a blog entry on this blog. It does the same for my colleagues and even sets a “due date” (The due date for this post is today). With this simple construct, some discipline and coordination, we’ve managed to write one blog post every week for more than ten years now.
The machine that creates the issues doesn’t check them. It doesn’t supervise their progress and isn’t offended if we “won’t fix” issues because we are on holiday or the plants are still wet. It will just create the next issue according to the rhythm. It is our duty as humans to check if that rhythm fits or if it should be sped up or slowed down.
If you want to employ really elaborate triggers for your reminders, a platform like “If this then that (IFTTT)” might be the right choice. Just keep in mind that with complexity, there often comes rigidity, which isn’t always desired.
By automating the aspect of reminding us about the routine tasks, we can concentrate on doing them. We don’t forget to write blog posts or to water the plants because the machine doesn’t forget. Another improvement is that this clearly distinguishes between routine (has a recurring reminder) and anomaly. If the special one-time task occurs again, we give it a recurring reminder and adopt it as a new routine task. If a reminder about a routine task is “won’t fixed” often enough without any inclination that it will be required again, we delete the reminder.
Conclusion for part I
If you combine automated recurring reminders with structured documentation, you already gain a lot of advantages and can free your mind from the mundane details and intervals of your routine tasks. You haven’t automated any aspect of your real work yet, which means that these two stages can be applied to most if not all workplaces.
We transformed our evolutionary grown IT landscape to a planned setup. Here is what we learned on the way (part 2/2).
Recap of the situation
In the first part of this blog series, we introduced you to our evolutionary grown IT landscape. We had a room full of snow- flaked servers and no overall concept how to use them. We wanted our services to be self-contained and separated. So we chose the approach of virtualization to host one VM per service on a uniform platform. We chose VirtualBox, Vagrant and Ansible to help us along the way.
This blog entry tells you about the way and our experiences and insights.
The migration
In order to migrate every service you use to its own virtual machine (VM), you’ll need a list or map of your services first. We gathered our list, compared it to reality, adjusted it, reiterated everything, added the forgotten services, drew the map, compared again, drew again and even then missed some services that are painfully obvious in hindsight, like DNS or SMTP. We identified more than 15 distinct services and estimated their resource profile. Then we planned the VM layouts and estimated the required computation power to host all of them. Then we bought the servers.
We started with three powerful hosting servers but soon saw that there is a group of “alpha VMs” with elevated requirements on availability and bought a fourth hosting server with emphasis on redundancy. If some seldom used backoffice service goes down, that’s one thing. The most important services of our company should not go down because of a harddisk failure or such.
Four nearly identical hosting servers to run 15+ VMs on required a repeatable process to set things up. This is where the first tip comes into play:
Document everything. Document all the details. Have your Wiki ready and write a step-by-step tutorial for every task you perform. It’s really tedious and probably a bit cumbersome at first, but it will pay of sooner and better than you’d imagine.
We started the migration process with the least important services to get a feeling for the required steps. It turned out later that these services were also the most time-consuming ones. The most essential and seemingly complex services took the least time. We essentially experienced the pareto effect but in reverse: We started with the lowest benefit for the highest cost. But we can give two tips from this experience:
Go the extra mile. Just forget about the pareto effect and migrate all services. It’s so much more fun to have a clean IT landscape map than one where most things are tidy but there’s an area marked “here be dragons”.
Migration effort and service importance aren’t linked. Our most important service was migrated in about half an hour. Our least important service needed nearly three days. It’s all about the system architecture of the service and if it values self-containment.
The migration took place over the course of a few months with frequent address changes of our tools and an awful lot of communication for cutoff dates. If you need to migrate a service, be very open about the process and make sure that the old service address won’t work after the switch. I cannot count the amount of e-mails I wrote with the subject prefix “IMPORTANT!”. But the transition went smooth and without problems, so we probably added some extra caution that might not have been necessary.
After the migration
When we had migrated our last service in its own VM, there were a lot of old servers without any purpose anymore. We switched them off and got rid of them. Now we had nearly two dozen new servers to care for. One insight we had right after the start of our journey is that virtualized servers require the same amount of administration as physical ones. Just using our old approaches for the new IT landscape wouldn’t cut it. So we invested heavily in automation and scripted everything. Want to set up a new CI build slave? Just add its address into Ansible’s inventory and run the script (“playbook”). All servers need security updates? Just one command and a little wait.
Learning to automate the administrative tasks in the right way had a steep curve, but it’s the only feasible way. We benefit heavily from the simple fact that we forced ourselves to do it by making it impossible to handle the tasks manually. It’s a “burned bridges” approach, but upon reaching the goal, it really pays off. So another tip:
Automate everything. Even if you think you’ll perform this task just a few times – that’s exactly the scenario to automate it to never have to bother with the details again. Automation is key if you want to scale your IT landscape to reasonable sizes.
Reaping the profit
We’ve done the migration and have a fully virtualized setup now. This would not be very beneficial in itself, but opens the door for another level of capabilities we simply couldn’t leverage before. Let me just describe two of them:
Rethink your backup strategy. With virtual machines, you can now backup your services on an appliance level. If you wanted to perform this with a real server, you would need to buy the exact same hardware, make exact copies of the harddisks and store this “clone machine” somewhere safe. Creating an appliance level backup means to stop the VM, export it and restart it. You’ll have some downtime, but everything else is just a (big) file.
Rethink your service maintainance strategy. We often performed test upgrades to newer versions of our important services on test machines. If the upgrade went well, we would perform it again on the live server and hope for the best. With virtual machines and appliance backups, you can try the upgrade on an exact copy of the live server over and over again. And if you are happy with the result, you just swap your copy with the live server and everything’s fine. No need for duplicated procedures, you always work with the real deal – well, an indistinguishable copy of it.
Conclusion
We’ve migrated our IT landscape from evoluationary to a planned virtualized state in just about a year. We’ve invested weeks of work in it, just to have the same services available as before. From a naive viewpoint, nothing much has changed. So – was it worth it?
The answer is short and clear: Absolutely yes. Even in the short time after the migration, the whole setup performs smoother and more in a planned way than just by chance. The layout can be communicated clearer and on different levels. And every virtual machine has its own use case, to the point and dedicated. We now have an IT landscape that obeys our rules and responds to our needs, whereas before we often needed to make hard compromises.
The positive effects of documentation and automation alone are worth the journey, even if they are mere side effects of the main goal. +1, would migrate again.
Writing documentation is seldom fun for developers and much useless documentation is written. I want to provide some guidelines helping to focus your project documentation efforts on useful stuff instead of following a set of dogmatic rules to plainly fulfill requirements.
Code Documentation
Probably written many times before but nevertheless often neglected:
Avoid untouched documentation templates, e.g. // This is a getter for A. They only clutter the code hurting developers instead of providing value.
Do not document every class, method, file etc. blindly. Focus on all API classes et al. to be used by other (external) developers.
Do not document what the code does, it should speak for itself. Rather explain why a certain algorithm or data structure is used. Try to communicate design decisions.
Check comments everytime you touch documented code and update them if necessary. Outdated documentation hurts more than its worth so if docs exists keep them up-to-date.
Project Documentation
This kind of documentation usually provides more value than many javadoc/doxygen generated pages. Nowadays, many people use a wiki software for project documentation. I encourage you to use a powerful wiki like Confluence because it provides rich formatting options and templating allowing for visually pleasing and expressive documentation. As such it may be even printed (to PDF) and handed out to your customers.
Putting parts like Installation into the code repository and integrating them into the wiki often serves administrators, managers (visibility!) and developers. See my older post “centralized project documentation” for some other ideas.
Wikis allow for easy editing and document sharing and are version controlled. All this facilitates reviews and updates of the documents.
Document prerequisites and external dependencies explicitly. They may be hard to find in configuration files but are of good use to people running your project.
Improve searches in the wiki by providing tags and other metadata to help your future me and others finding the information they are looking for.
Provide consistent examples or even templates for common documentation tasks to encourage others and help them getting their project documentation started.
Conclusion
Good documentation is a real asset and can provide much value if you keep your efforts focused on the important stuff. Complex workflows and draconic rules will hinder documentation efforts wheres open collaboration and valuable documentation will motivate bringing more of it into existence.
Project documentation is one thing developers do not like to think about but it is necessary for others to use the software. There are several approaches to project documentation where it is either stored in the source code repository and/or some kind of project web page, e.g. in a wiki. It is often hard for different groups of people to find the documentation they need and to maintain it. I want to show an approach to store and maintain the documentation in one place and integrate it in several other locations.
The project documentation (not API documentation, generated by tools like javadoc or Doxygen) should be version controlled and close to the source code. So a directory in the project source tree seems to be a good place. That way the developers or ducumenters can keep it up-to-date with the current source code version. For others it may be hard to access the docs hidden somewhere in the source tree. So we need to integrate them into other tools to become easily accessible by all the people who need them.
Documentation format
We start with markdown as the documentation format because it is easily read and written using a normal text editor. It can be converted to HTML, PDF and other common document formats. The markdown files reside in a directory next to the source tree, named documentation for example. With pegdown there is a nice java library allowing integration of markdown support in your projects.
Integration in your wiki
Often you want to have your project documentation available on a web page, usually a wiki. With confluence you can directly embed markdown files from an URL in your project page using a plugin. This allows you to enrich the general project documentation in the source tree with your organisation specific documentation. The documentation becomes more widely accessible and searchable. The link can be served by a source code browser like gitweb: http://myrepo/git/?p=MyProject.git;a=blob_plain;f=README.md;hb=HEAD and is alsways up-to-date.
Project hosting platforms like Github or your own repository manager, e.g. gitlab also can display markdown-formatted content from your source tree as the project description yielding a basic project page more or less for free.
Conclusion
Using markdown as a basis for your project documentation is a very flexible approach. It stays usable without any tool support and can be integrated and used in various ways using a plethora of tools and converters. Especially if you plan to open source a project it should contain useful documentation in such a widely understood format distributed with your source code.