Automatic deployment of (Grails) applications

What was your most embarrassing moment in your career as a software engineer? Mine was when I deployed an application to production and it didn’t even start. Stop using manual deployment and learn how to automate your (Grails) deployment

What was your most embarrassing moment in your career as a software engineer? Mine was when I deployed an application to production and it didn’t even start.

Early in my career deploying an application usually involved a fair bunch of manual steps. Logging in to a remote server via ssh and executing various commands. After a while repetitive steps were bundled in shell scripts. But mistakes happened. That’s normal. The solution is to automate as much as we can. So here are the steps to automatic deployment happiness.

Build

One of the oldest requirements for software development mentioned in The Joel Test is that you can build your app in one step. With Grails that’s easy just create a build file (we use Apache Ant here but others will do) in which you call grails clean, grails test and then grails war:

<project name="my_project" default="test" basedir=".">
  <property name="grails" value="${grails.home}/bin/grails"/>
  
  <target name="-call-grails">
    <chmod file="${grails}" perm="u+x"/>
    <exec dir="${basedir}" executable="${grails}" failonerror="true">
      <arg value="${grails.task}"/><arg value="${grails.file.path}"/>
      <env key="GRAILS_HOME" value="${grails.home}"/>
    </exec>
  </target>
  
  <target name="-call-grails-without-filepath">
    <chmod file="${grails}" perm="u+x"/>
    <exec dir="${basedir}" executable="${grails}" failonerror="true">
      <arg value="${grails.task}"/><env key="GRAILS_HOME" value="${grails.home}"/>
    </exec>
  </target>

  <target name="clean" description="--> Cleans a Grails application">
    <antcall target="-call-grails-without-filepath">
      <param name="grails.task" value="clean"/>
    </antcall>
  </target>
  
  <target name="test" description="--> Run a Grails applications tests">
    <chmod file="${grails}" perm="u+x"/>
    <exec dir="${basedir}" executable="${grails}" failonerror="true">
      <arg value="test-app"/>
      <arg value="-echoOut"/>
      <arg value="-echoErr"/>
      <arg value="unit:"/>
      <arg value="integration:"/>
      <env key="GRAILS_HOME" value="${grails.home}"/>
    </exec>
  </target>

  <target name="war" description="--> Creates a WAR of a Grails application">
    <property name="build.for" value="production"/>
    <property name="build.war" value="${artifact.name}"/>
    <chmod file="${grails}" perm="u+x"/>
    <exec dir="${basedir}" executable="${grails}" failonerror="true">
      <arg value="-Dgrails.env=${build.for}"/><arg value="war"/><arg value="${target.directory}/${build.war}"/>
      <env key="GRAILS_HOME" value="${grails.home}"/>
    </exec>
  </target>
  
</project>

Here we call Grails via the shell scripts but you can also use the Grails ant task and generate a starting build file with

grails integrate-with --ant

and modify it accordingly.

Note that we specify the environment for building the war because we want to build two wars: one for production and one for our functional tests. The environment for the functional tests mimic the deployment environment as close as possible but in practice you have little differences. This can be things like having no database cluster or no smtp.
Now we can put all this into our continuous integration tool Jenkins and every time a checkin is made out Grails application is built.

Test

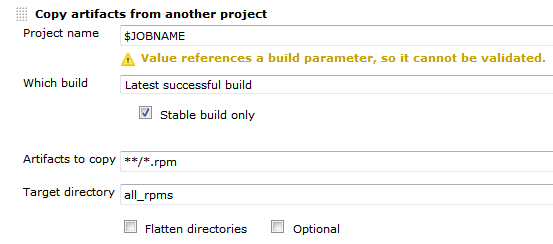
Unit and integration tests are already run when building and packaging. But we also have functional tests which deploy to a local Tomcat and test against it. Here we fetch the test war of the last successful build from our CI:

<target name="functional-test" description="--> Run functional tests">
  <mkdir dir="${target.base.directory}"/>
  <antcall target="-fetch-file">
    <param name="fetch.from" value="${jenkins.base.url}/job/${jenkins.job.name}/lastSuccessfulBuild/artifact/_artifacts/${test.artifact.name}"/>
    <param name="fetch.to" value="${target.base.directory}/${test.artifact.name}"/>
  </antcall>
  <antcall target="-run-tomcat">
    <param name="tomcat.command.option" value="stop"/>
  </antcall>
  <copy file="${target.base.directory}/${test.artifact.name}" tofile="${tomcat.webapp.dir}/${artifact.name}"/>
  <antcall target="-run-tomcat">
    <param name="tomcat.command.option" value="start"/>
  </antcall>
  <chmod file="${grails}" perm="u+x"/>
  <exec dir="${basedir}" executable="${grails}" failonerror="true">
    <arg value="-Dselenium.url=http://localhost:8080/${product.name}/"/>
    <arg value="test-app"/>
    <arg value="-functional"/>
    <arg value="-baseUrl=http://localhost:8080/${product.name}/"/>
    <env key="GRAILS_HOME" value="${grails.home}"/>
  </exec>
</target>

Stopping and starting Tomcat and deploying our application war in between fixes the perm gen space errors which are thrown after a few hot deployments. The baseUrl and selenium.url parameters tell the functional plugin to look at an external running Tomcat. When you omit them they start the Tomcat and Grails application themselves in their process.

Release

Now all tests passed and you are ready to deploy. So you fetch the last build … but wait! What happens if you have to redeploy and in between new builds happened in the ci? To prevent this we introduce a step before deployment: a release. This step just copies the artifacts from the last build and gives them the correct version. It also fetches the lists of issues fixed from our issue tracker (Jira) for this version as a PDF. These lists can be sent to the customer after a successful deployment.

Deploy

After releasing we can now deploy. This means fetching the war from the release job in our ci server and copying it to the target server. Then the procedure is similar to the functional test one with some slight but important differences. First we make a backup of the old war in case anything goes wrong and we have to rollback. Second we also copy the context.xml file which Tomcat needs for the JNDI configuration. Note that we don’t need to copy over local data files like PDF reports or serach indexes which were produced by our application. These lie outside our web application root.

<target name="deploy">
  <antcall target="-fetch-artifacts"/>

  <scp file="${production.war}" todir="${target.server.username}@${target.server}:${target.server.dir}" trust="true"/>
  <scp file="${target.server}/context.xml" todir="${target.server.username}@${target.server}:${target.server.dir}/${production.config}" trust="true"/>

  <antcall target="-run-tomcat-remotely"><param name="tomcat.command.option" value="stop"/></antcall>

  <antcall target="-copy-file-remotely">
    <param name="remote.file" value="${tomcat.webapps.dir}/${production.war}"/>
    <param name="remote.tofile" value="${tomcat.webapps.dir}/${production.war}.bak"/>
  </antcall>
  <antcall target="-copy-file-remotely">
    <param name="remote.file" value="${target.server.dir}/${production.war}"/>
    <param name="remote.tofile" value="${tomcat.webapps.dir}/${production.war}"/>
  </antcall>
  <antcall target="-copy-file-remotely">
    <param name="remote.file" value="${target.server.dir}/${production.config}"/>
    <param name="remote.tofile" value="${tomcat.conf.dir}/Catalina/localhost/${production.config}"/>
  </antcall>

  <antcall target="-run-tomcat-remotely"><param name="tomcat.command.option" value="start"/></antcall>
</target>

Different Environments: Staging and Production

If you look closely at the deployment script you notice that uses the context.xml file from a directory named after the target server. In practice you have multiple deployment targets not just one. At the very least you have what we call a staging server. This server is used for testing the deployment and the deployed application before interrupting or corrupting the production system. It can even be used to publish a pre release version for the customer to try. We use a seperate job in our ci server for this. We separate the configurations needed for the different environments in directories named after the target server. What you shouldn’t do is to include all those configurations in your development configurations. You don’t want to corrupt a production application when using the staging one or when your tests run or even when you are developing. So keep configurations needed for the deployment environment separate and separate from each other.

Celebrate

Now you can deploy over and over again with just one click. This is something to celebrate. No more headaches, no more bitten finger nails. But nevertheless you should take care when you access a production system even it is automatically. Something you didn’t foresee in your process could go wrong or you could make a mistake when you try out the application via the browser. Since we need to be aware of this responsibility everybody who interacts with a production system has to wear our cowboy hats. This is a conscious step to remind oneself to take care and also it reminds everybody else that you shouldn’t disturb someone interacting with a production system. So don’t mess with the cowboy!

Building Visual C++ Projects with CMake

In previous post my colleague showed how to create RPM packages with CMake. As a really versatile tool it is also able to create and build Visual Studio projects on Windows. This property makes it very valuable when you want to integrate your project into a CI cycle(in our case Jenkins).

Prerequisites:

To be able to compile anything following packages needed to be installed beforehand:

  •  CMake. It is helpful to put it in the PATH environment variable so that absolute paths aren’t needed.
  • Microsoft Windows SDK for Windows 7 and .NET Framework 4 (the web installer or  the ISOs).  The part “.NET Framework 4” is very important, since when the SDK for the .NET Framework 3.5 is installed you will get following parse error for your *.vcxproject files:

    error MSB4066: The attribute “Label” in element is unrecognized

    at the following position:

    <ItemGroup Label=”ProjectConfigurations”>

    Probably equally important is the bitness of the installed SDK. The x64 ISO differs only in one letter from the x86 one. Look for the X if want 64 bit.

  • .NET Framework 4, necessary to make msbuild run

It is possible that you encounter following message during your SDK setup:

A problem occurred while installing selected Windows SDK components. Installation of the “Microsoft Windows SDK for Windows 7” product has reported the following error: Please refer to Samples\Setup\HTML\ConfigDetails.htm document for further information. Please attempt to resolve the problem and then start Windows SDK setup again. If you continue to have problems with this issue, please visit the SDK team support page at http://go.microsoft.com/fwlink/?LinkId=130245. Click the View Log button to review the installation log. To exit, click Finish.

The reason behind this wordy and less informative error message were the Visual C++ Redistributables installed on the system. As suggested by Microsoft KB article removing them all helped.

Makefiles:

For CMake to build anything you need to have a CMakeLists.txt file in your project. For a tutorial on how to use CMake, look at this page. Here is a simple CMakeLists.txt to get you started:

project(MyProject)
 cmake_minimum_required(VERSION 2.6)
 set(source_files
 main.cpp
 )
 include_directories(
 ${CMAKE_CURRENT_SOURCE_DIR}
 )
 add_executable(MyProject ${source_files})

Building:

To build a project there are few steps necessary. You can enter them in your CI directy or put them in a batch file.

call "%ProgramFiles%\Microsoft SDKs\Windows\v7.1\Bin\SetEnv.cmd" /Release /x86

With this call all necessary environment variables are set. Be careful on 64 bit platforms as jenkins slave executes this call in a 32 bit context and so “%ProgramFiles%” is resolved to “ProgramFiles (x86)” where the SDK does not lie.

del CMakeCache.txt

This command is not strictly necessary, but it prevents you from working with outdated generated files when you change your configuration.

cmake -G "Visual Studio 10" .

Generates a Visual Studio 2010 Solution. Every change to the solution and the project files will be gone when you call it, so make sure you track all necessary files in the CMakeLists.txt.

cmake --build . --target ALL_BUILD --config Release

The final step. It will net you the MyProject.exe binary. The target parameter is equal to the name of the project in the solution and the config parameter is one of the solution configurations.

Final words:

The hardest and most time consuming part was the setup of prerequisites. Generic, not informative error messages are the worst you can do to a clueless customer. But… when you are done with it, you are only two small steps apart from an automatically built executable.

1-Click Deployment of RPMs with Jenkins

In one of my previous posts we learned how to build and package our projects as RPM packages. How do we get our shiny packages to our users? If we host our own RPM repository, we can use our extisting CI infrastructure (jenkins in our case) for that. Here are the steps in detail:

Convention for the RPM location in our jobs

To reduce the work needed for our deployment job we define a location where each job puts the RPM artifacts after a successful build. Typically we use something like $workspace/build_dir for that. Because we are using matrix build for different target plattforms, we need to use the same naming conventions for our job axes, too!

Job for RPM deployment

Because of the above convention we can use one parameterized job to deploy the packages of different build jobs. We use the JOBNAME of the build job as our only parameter:

Deploy-RPM-Jobname-Parameter

First the deploy job needs to get all the rpms from the build job. We can do this using the Copy Artifact plugin like so:Deploy-RPM-Copy-Artifacts

Since we are usually building for several distributions and processor architectures, we have a complete directory tree in our target directory. We are using a small shell script to copy all the packages to our repository using rsync. Finally we can update the remote repository over ssh. See the complete shell script below:

for i in suse-12.2 suse-12.1 suse-11.4 suse-11.3
do
  rm -rf $i
  dir32=$i/RPMS/i686
  dir64=$i/RPMS/x86_64
  mkdir -p $dir32
  mkdir -p $dir64
  versionlabel=`echo $i | sed 's/[-\.]//g'`
  if [ -e all_rpms/Architecture\=32bit\,Distribution\=$versionlabel/build_dir/ ]
  then
    cp all_rpms/Architecture\=32bit\,Distribution\=$versionlabel/build_dir/* $dir32
  fi
  if [ -e all_rpms/Architecture\=64bit\,Distribution\=$versionlabel/build_dir/ ]
  then
    cp all_rpms/Architecture\=64bit\,Distribution\=$versionlabel/build_dir/* $dir64
  fi
  rsync -e "ssh" -avz $i/* root@repository-server:/srv/www/htdocs/repo/$i/
  ssh root@repository-server "createrepo /srv/www/htdocs/repo/$i/RPMS"
done

Conclusion

With a few small tricks and scripts we can deploy the artifacts of our build jobs to the RPM repository and thus deliver a new software release at the push of a button. You could let the deployment job run automatically after a successful build, but we like to have more control over the actual software we release to our users.

Testing on .NET: Choosing NUnit over MSTest

We sometimes do smaller .NET projects for our clients even though we are mostly a Java/JVM shop. Our key infrastructure stays the same for all projects – regardless of the platform. That means the .NET projects get integrated into our existing continuous integration (CI) infrastructure based on Jenkins. This works suprisingly well even though you need a windows slave and the MSBuild plugin.

One point you should think about is which testing framework to use. MSTest is part of Visual Studio and provides nice integration into the IDE. Using it in conjunction with Jenkins is possible since there is a MSTest plugin for our favorite CI server. One downside is that you need either Visual Studio itself or the Windows SDK (500MB download, 300MB install) installed on the build server in addition to .NET. Another one is that it does not work with the “Express” editions of Visual Studio. Usually that is not a problem for companies but it raises the entry barrier for open source or other non-profit projects by requiring relatively expensive Visual Studio licences.

In our scenarios NUnit proved much lighter and friendlier in installation and usage. You can easily bundle it with your sources to improve self-containment of the project and lessen the burden on the system and tools. If you plug the NUnit tool into the external tools-section of Visual Studio (which also works with Express) the integration is acceptable, too.

Conclusion

If you are not completely on the full Microsoft stack for you project infrastructure using Visual Studio, TeamCity, Sourcesafe et al. it is worth considering choosing NUnit over MSTest because of its leaner size and looser coupling to the Mircosoft stack.

Triggering jenkins from git with common post-receive hook

The standard way of triggering Jenkins jobs from a git repository was issuing a get request on the “build now” URL of the job in the post-receive hook, e.g.

curl http://my_ci_server:8080/job/my_job/build?delay=0sec

The biggest problem of this approach is that you have to hardcode the job name into the url. This prevents sharing the hook between repositories and requires you to put an adjusted post-receive hook script into each new repository. Also, additional work has to be done to trigger jobs only for certain branches and the like.
Fortunately, Jenkins offers a new way of triggering jobs from a git repository for quite a while now. Essentially you have to notify jenkins of the commit in your repository and configure the job for polling.

To trigger jobs for the repository git@my_repository_server:my_project.git you can use the following script:

GIT_REPO_URL=git@my_repository_server:`pwd | sed 's:.*\/::'`
curl http://my_ci_server:8080/git/notifyCommit?url=$GIT_REPO_URL

Notice the absence of any repository or job specific stuff in the post-receive hook. Such a hook can be placed in a central location and be shared between repositories using symbolic links.

Testing C programs using GLib

Writing programs in good old C can be quite refreshing if you use some modern utility library like GLib. It offers a comprehensive set of tools you expect from a modern programming environment like collections, logging, plugin support, thread abstractions, string and date utilities, different parsers, i18n and a lot more. One essential part, especially for agile teams, is onboard too: the unit test framework gtest.

Because of the statically compiled nature of C testing involves a bit more work than in Java or modern scripting environments. Usually you have to perform these steps:

  1. Write a main program for running the tests. Here you initialize the framework, register the test functions and execute the tests. You may want to build different test programs for larger projects.
  2. Add the test executable to your build system, so that you can compile, link and run it automatically.
  3. Execute the gtester test runner to generate the test results and eventually a XML-file to you in your continuous integration (CI) infrastructure. You may need to convert the XML ouput if you are using Jenkins for example.

A basic test looks quite simple, see the code below:

#include <glib.h>
#include "computations.h"

void computationTest(void)
{
    g_assert_cmpint(1234, ==, compute(1, 1));
}

int main(int argc, char** argv)
{
    g_test_init(&argc, &argv, NULL);
    g_test_add_func("/package_name/unit", computationTest);
    return g_test_run();
}

To run the test and produce the xml-output you simply execute the test runner gtester like so:

gtester build_dir/computation_tests --keep-going -o=testresults.xml

GTester unfortunately produces a result file which is incompatible with Jenkins’ test result reporting. Fortunately R. Tyler Croy has put together an XSL script that you can use to convert the results using

xsltproc -o junit-testresults.xml tools/gtester.xsl testresults.xml

That way you get relatively easy to use unit tests working on your code and nice some CI integration for your modern C language projects.

Update:

Recent gtester run the test binary multiple times if there are failing tests. To get a report of all (passing and failing) tests you may want to use my modified gtester.xsl script.

Building Windows C++ Projects with CMake and Jenkins

An short and easy way to build Windows C++ Software with CMake in Jenkins (with the restriction to support Visual Studio 8).

The C++ programming environment where I feel most comfortable is GCC/Linux (lately with some clang here and there). In terms of build systems I use cmake whenever possible. This environment also makes it easy to use Jenkins as CI server and RPM for deployment and distribution tasks.

So when presented with the task to set up a C++ windows project in Jenkins I tried to do it the same way as much as possible.

The Goal:

A Jenkins job should be set up that builds a windows c++ project on a Windows 7 build slave. For reasons that I will not get into here, compatibility with Visual Studio 8 is required.

The first step was to download and install the correct Windows SDK. This provides all that is needed to build C++ stuff under windows.

Then, after installation of cmake, the first naive try looked like this (in an “execute Windows Batch file” build step)

cmake . -DCMAKE_BUILD_TYPE=Release

This cannot work of course, because cmake will not find compilers and stuff.

Problem: Build Environment

When I do cmake builds manually, i.e. not in Jenkins, I open the Visual Studio 2005 Command Prompt which is a normal windows command shell with all environment variables set. So I tried to do that in Jenkins, too:

call “c:\Program Files\Microsoft SDKs\Windows\v6.0\Bin\SetEnv.Cmd” /Release /x86

cmake . -DCMAKE_BUILD_TYPE=Release

This also did not work and even worse, produced strange (to me, at least) error messages like:

‘Cmd’ is not recognized as an internal or external command, operable program or batch file.

The system cannot find the batch label specified – Set_x86

After some digging, I found the solution: a feature of windows batch programming called delayed expansion, which has to be enabled for SetEnv.Cmd to work correctly.

Solution: SetEnv.cmd and delayed expansion

setlocal enabledelayedexpansion

call “c:\Program Files\Microsoft SDKs\Windows\v6.0\Bin\SetEnv.Cmd” /Release /x86

cmake . -DCMAKE_BUILD_TYPE=Release

nmake

Yes! With this little trick it worked perfectly. And feels almost as with GCC/CMake under Linux:  nice, short and easy.

Your own CI-based RPM build farm, part 3

In my previous post we learned how to build RPM packages of your software for multiple versions of your target distribution(s). Now I want to present a way of automating the build process and building packages on/for all target platforms. You should have a look at the openSUSE build service to see if it already fits your needs. Then you can stop reading here :-).

We needed better control over the platforms and the process, so we setup a build farm based on the Jenkins continuous integration (CI) server ourselves. The big picture consists of the following components:

  • build slaves allowing a jenkins user to do unattended builds of the packages
  • Jenkins continuous integration server using matrix builds with build slaves for each target platform
  • build script orchestrating the build of all our self-maintained packages
  • jenkins job to deploy the packages to our RPM repository

Preparing the build slaves

Standard installations of openSUSE need some minor tweaks so they can be used as Jenkins build slaves doing unattended RPM package builds. Here are the changes we needed to make it work properly:

  1. Add a user account for the builds, e.g. useradd -m -d /home/jenkins jenkins and setup a password with passwd jenkins.
  2. Change sshd configuration to allow password authentication and restart sshd.
  3. We will link the SOURCES and SPECS directories of /usr/src/packages to the working copy of our repository, so we need to delete the existing directories: rm -r /usr/src/packages/SPECS /usr/src/packages/SOURCES /usr/src/packages/RPMS /usr/src/packages/SRPMS.
  4. Allow non-priviledged users to work with /usr/src/packages with chmod -R o+rwx /usr/src/packages.
  5. Copy the ssh public key for our git repository to the build account in ~/.ssh/id_rsa
  6. Test ssh access on the slave as our build user with ssh -v git@repository. With this step we confirm the host authenticity one time so that future public key ssh interactions work unattended!
  7. Configure git identity on the slave with git config --global user.name "jenkins@build###-$$"; git config --global user.email "jenkins@buildfarm.myorg.net".
  8. Add privileges for the build user needed for our build process in /etc/sudoers: jenkins ALL = (root) NOPASSWD:/usr/bin/zypper,/bin/rpm

Configuring the build slaves

Linux build slaves over ssh are quite easily configured using Jenkins’ web interface. We add labels denoting the distribution release and architecture to be easily able to setup our matrix builds. Then we setup our matrix build as a new job with the usual parameters for source code management (in our case git) etc.

Our configuration matrix has the two axes Architecture and OpenSuseRelease and uses the labels of the build slaves. Our only build step here is calling the script orchestrating the build of our rpm packages.

Putting together the build script

Our build script essentially sets up a clean environment, builds package after package installing build prerequisites if needed. We use small utility functions (functions.sh) for building a package, installing packages from repository, installing freshly built packages and removing installed RPM. The script contains roughly the following phases:

  1. Figure out some quirks about the environment, e.g. openSUSE release number or architecture to build.
  2. Clean the environment by removing previously installed self-built packages.
  3. Setting up the build environment, e.g. linking folder from /usr/src/packages to our working copy or installing compilers, headers and the like.
  4. Building the packages and installing them locally if they are a dependency of packages yet to be built.

Here is a shortened example of our build script:

#!/bin/bash

RPM_BUILD_ROOT=/usr/src/packages
if [ "i686" = `uname -m` ]
then
  ARCH=i586
else
  ARCH=`uname -m`
fi
SUSE_RELEASE=`cat /etc/SuSE-release | sed '/^[openSUSE|CODENAME]/d' | sed 's/VERSION =//g' | tr -d '[:blank:]' | sed 's/\.//g'`

source functions.sh

# setup build environment
ensureDirectoryLinks
# force a repository refresh without checking the signature
sudo zypper -n --no-gpg-checks refresh -f OUR_REPO
# remove previously built and installed packages
removeRPM libomniORB4.1
removeRPM omniNotify2
# install needed tools
installFromRepo c++-compiler
if [ $SUSE_RELEASE -lt 121 ]
then
  installFromRepo java-1_6_0-sun-devel
else
  installFromRepo jdk
fi
installFromRepo log4j
buildRPM omniORB
installRPM $ARCH/libomniORB4.1
installRPM $ARCH/omniORB-devel
installRPM $ARCH/omniORB-servers
buildAndInstallRPM omniNotify2 $ARCH

Deploying our packages via Jenkins

We setup a second Jenkins job to deploy successfully built RPM packages to our internal repository. We use the Copy Artifacts plugin to fetch the rpms from our build job and put them into a directory like all_rpms. Then we add a build step to execute a script like this:

for i in suse-12.1 suse-11.4 suse-11.3
do
  rm -rf $i
  mkdir -p $i
  versionlabel=`echo $i | sed 's/[-\.]//g'`
  cp -r "all_rpms/Architecture=32bit,OpenSuseRelease=$versionlabel/RPMS" $i
  cp -r "all_rpms/Architecture=64bit,OpenSuseRelease=$versionlabel/RPMS" $i
  cp -r "all_rpms/Architecture=64bit,OpenSuseRelease=$versionlabel/SRPMS" $i
  rsync -e "ssh" -avz $i/* root@rpmrepository.intranet:/srv/www/htdocs/OUR_REPO/$i/
  ssh root@rpmrepository.intranet "createrepo /srv/www/htdocs/OUR_REPO/$i/RPMS"

Summary

With a setup like this we can perform an automatic build of all our RPM packages on several targetplatform everytime we update one of the packages. After a successful build we can deploy our new packages to our RPM repository making them available for our whole organisation. There is an initial amount of work to be done but the rewards are easy, unattended package updates with deployment just one button click away.

Clean Code OSX / Cocoa Development – Setting up CI and unit testing

To start with the tool chain used by clean code development you need a continuous integration server.
Here we install Jenkins on OS X (Lion) for Cocoa development (including unit testing of course).

Prerequisites: Xcode 4 and Java 1.6 installed

To start with the tool chain used by clean code development you need a continuous integration server.
Here we install Jenkins on OS X (Lion) for Cocoa development (including unit testing of course).

Installing Jenkins

Installing Jenkins is easy if you have homebrew installed:

brew update
brew install jenkins

and start it:

java -jar /usr/local/Cellar/jenkins/1.454/lib/jenkins.war

Open your browser and go to http://localhost:8080.

Installing the Xcode plugin

Click on Manage Jenkins -> Manage Plugins
and install the following plugins:

  • Git plugin
  • Xcode plugin (not the SICCI one)

Setup Job

On the Jenkins start page navigate to New Job -> Freestyle

Choose Git as your Version control system (or what is appropriate for you). If you want to run a local git build use a file URL, supposing your project is in a directory named MyProject inside your home directory the URL would look like:

file://localhost//Users/myuser/MyProject/

Add a Xcode build step under Build -> Add build step -> Xcode
and enter your main target (which is normally your project name)
Target: MyProject
Configuration: Debug

If you got Xcode 4.3 installed you may run into

error: can't exec '/Developer/usr/bin/xcodebuild' (No such file or directory)

First you need to install the Command Line Tools Xcode 4 via Downloads Preference Pane in Xcode (you need a developer account) and run

sudo xcode-select -switch /Applications/Xcode.app/Contents/Developer

Done!
Now you can build your project via Jenkins.

GHUnit Tests

Since we want to do clean code development we need unit tests. Nowadays you have two options: OCUnit or GHUnit. OCUnit is baked into Xcode right from the start and for using it in Jenkins you just create an additional build step with your unit testing target. So why use GHUnit (besides having a legacy project using it)? For me GHUnit has one significant advantage over OCUnit: you can run an individual test. And with some additions and tweaks you have support in Xcode, too.

So if you want to use GHUnit start with installing the Xcode Templates.
In Xcode you select your targets and create a new target via New Target -> Add Target -> GHUnit -> GHUnit OSX Test Bundle with OCMock
This creates a new directory. If you use automatic reference counting (ARC), replace GHUnitTestMain.m with the one from Tae

Copy RunTests.sh into UnitTests/Supported Files which copies the file into your UnitTests directory. Make it executable from the terminal with

chmod u+x RunTests.sh

In Xcode navigate to your unit test target and in Build Phases add the following under Run Script

$TARGETNAME/RunTests.sh

In Jenkins add a new Xcode build step to your job with Job -> Configure -> Add Build Step -> Xcode
Enter your unit test target into the Target field, set the configuration to Debug and add the follwing custom xcodebuild arguments:

GHUNIT_CLI=1 GHUNIT_AUTORUN=1 GHUNIT_AUTOEXIT=1 WRITE_JUNIT_XML=YES

At the time of this writing there exists a bug that the custom xcodebuild arguments are not persisted after the first run.

At the bottom of the page check Publish JUnit Test Report and enter

build/test-results/*.xml.

Ready to start!

Breakpad and Your CI – A Strong Team

Google’s breakpad together with your CI system can prepare you for the worst.

If your C++ software has to run 24/7 on some server rack at your customer’s data center, it has to meet not only all the user requirements, but also requirements that come from you as developer. When your customer calls you about some “problems”, “strange behaviours”, or even crashes, you must be able to detect what went wrong. Fast!

One means to this end is of course logging. But if your application crashes, nothing beats a decent stacktrace 🙂

Google’s breakpad library comes in very handy here because it provides very easy crash reporting. Even if your process has 2 gigs of virtual memory, breakpad shrinks that ‘core dump’ down to a couple of megs.

Breakpad pulls that trick off by using so-called symbol files that you have to generate for each compiled binary (executable or shared library). These symbol files together with the breakpad dump file that is created at crash time are then used to recreate the stacktrace.

Because every compilation creates different binaries, dump file and symbol files need to be ‘based on’ exactly the same binaries.

This is where you can let your CI system do some work for you. At one of our customers we use Jenkins not only for the usual automatic builds and tests after each check-in but also for release builds that go into production.

At the end of each build, breakpad’s symbol dumper runs over all compiled executables and libraries and generates the symbol files. These are then archived together with the compiled binaries.

Now we are prepared. Whenever some customer sends us a dump file, we can just easily pull out the symbol files corresponding to the software version that runs at this customer and let breakpad do its magic…