
Using sensors is a task we often face in our company. This article series consisting of two parts will show how to install a GPS module in a Raspberry Pi and to provide access to the GPS data over ethernet. This guide is based on a Raspberry Pi Model B Revision 2 and the GPS shield “Sparqee GPSv1.0”. In the first part, we will demonstrate the setup of the hardware and the retrieval of GPS data within the Raspberry Pi.
Hardware configuration
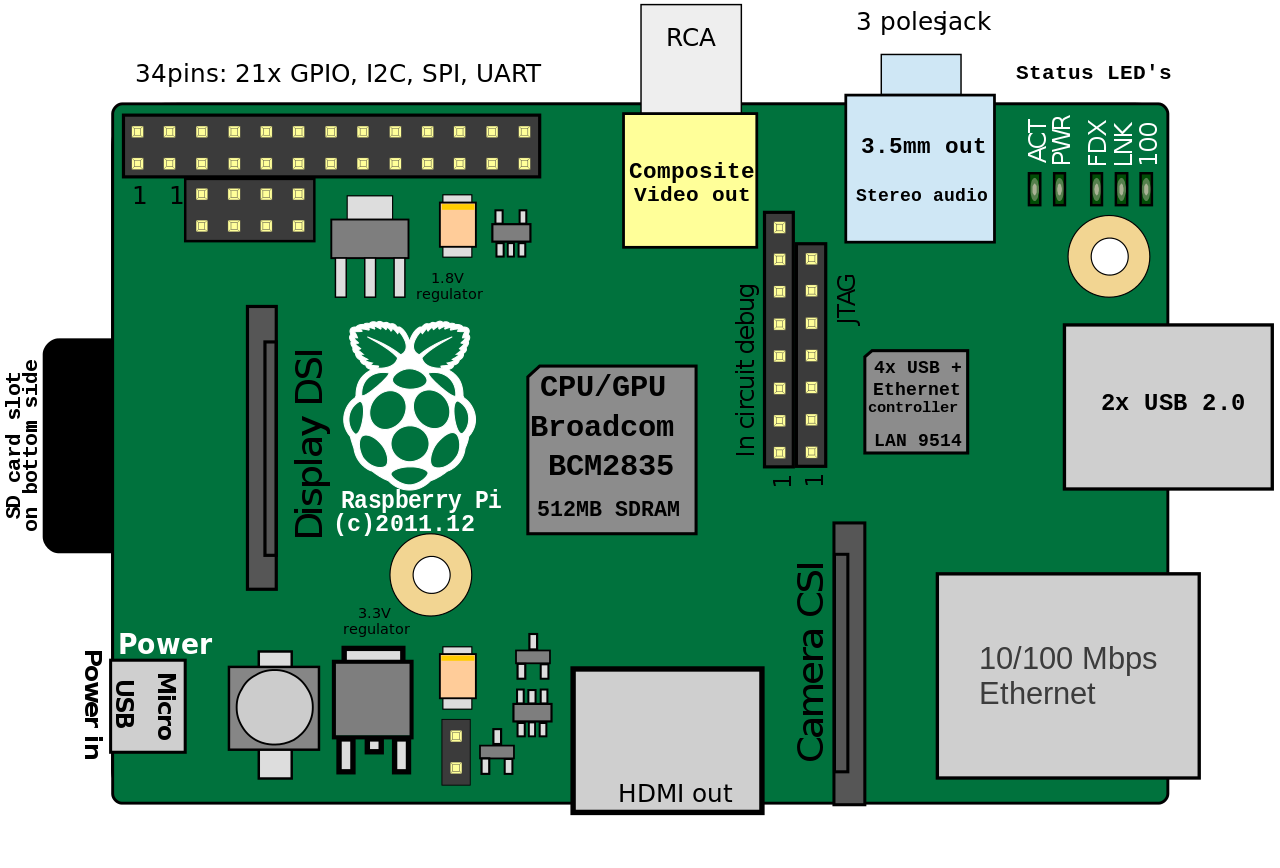
The GPS shield can be connected to the Raspberry Pi by using the pins in the top left corner of the board.
The Sparqee GPS shield possesses five pins whose purpose can be found on the product page:
| Pin | Function | Voltage | I/O |
| GND | Ground connection | 0 | I |
| RX | Receive | 2.5-6V | I |
| TX | Transmit | 2.5-6V | O |
| 2.5-6V | Power input | 2.5-6V | I |
| EN | Enable power module | 2.5-6V | I |
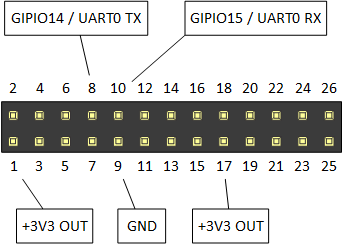
We used the following pin configuration for connecting the GPS shield:
| GPS Shield | Raspberry Pi | Pin-Nummer |
| GND | GND | 9 |
| RX | GPIO14 / UART0 TX | 8 |
| TX | GPIO15 / UART0 RX | 10 |
| 2.5-6V | +3V3 OUT | 1 |
| EN | +3V3 OUT | 17 |
You can see the corresponding pin numbers on the Raspberry board in the graphic below. A more detailed guide for the functionality of the different pins can be found here.
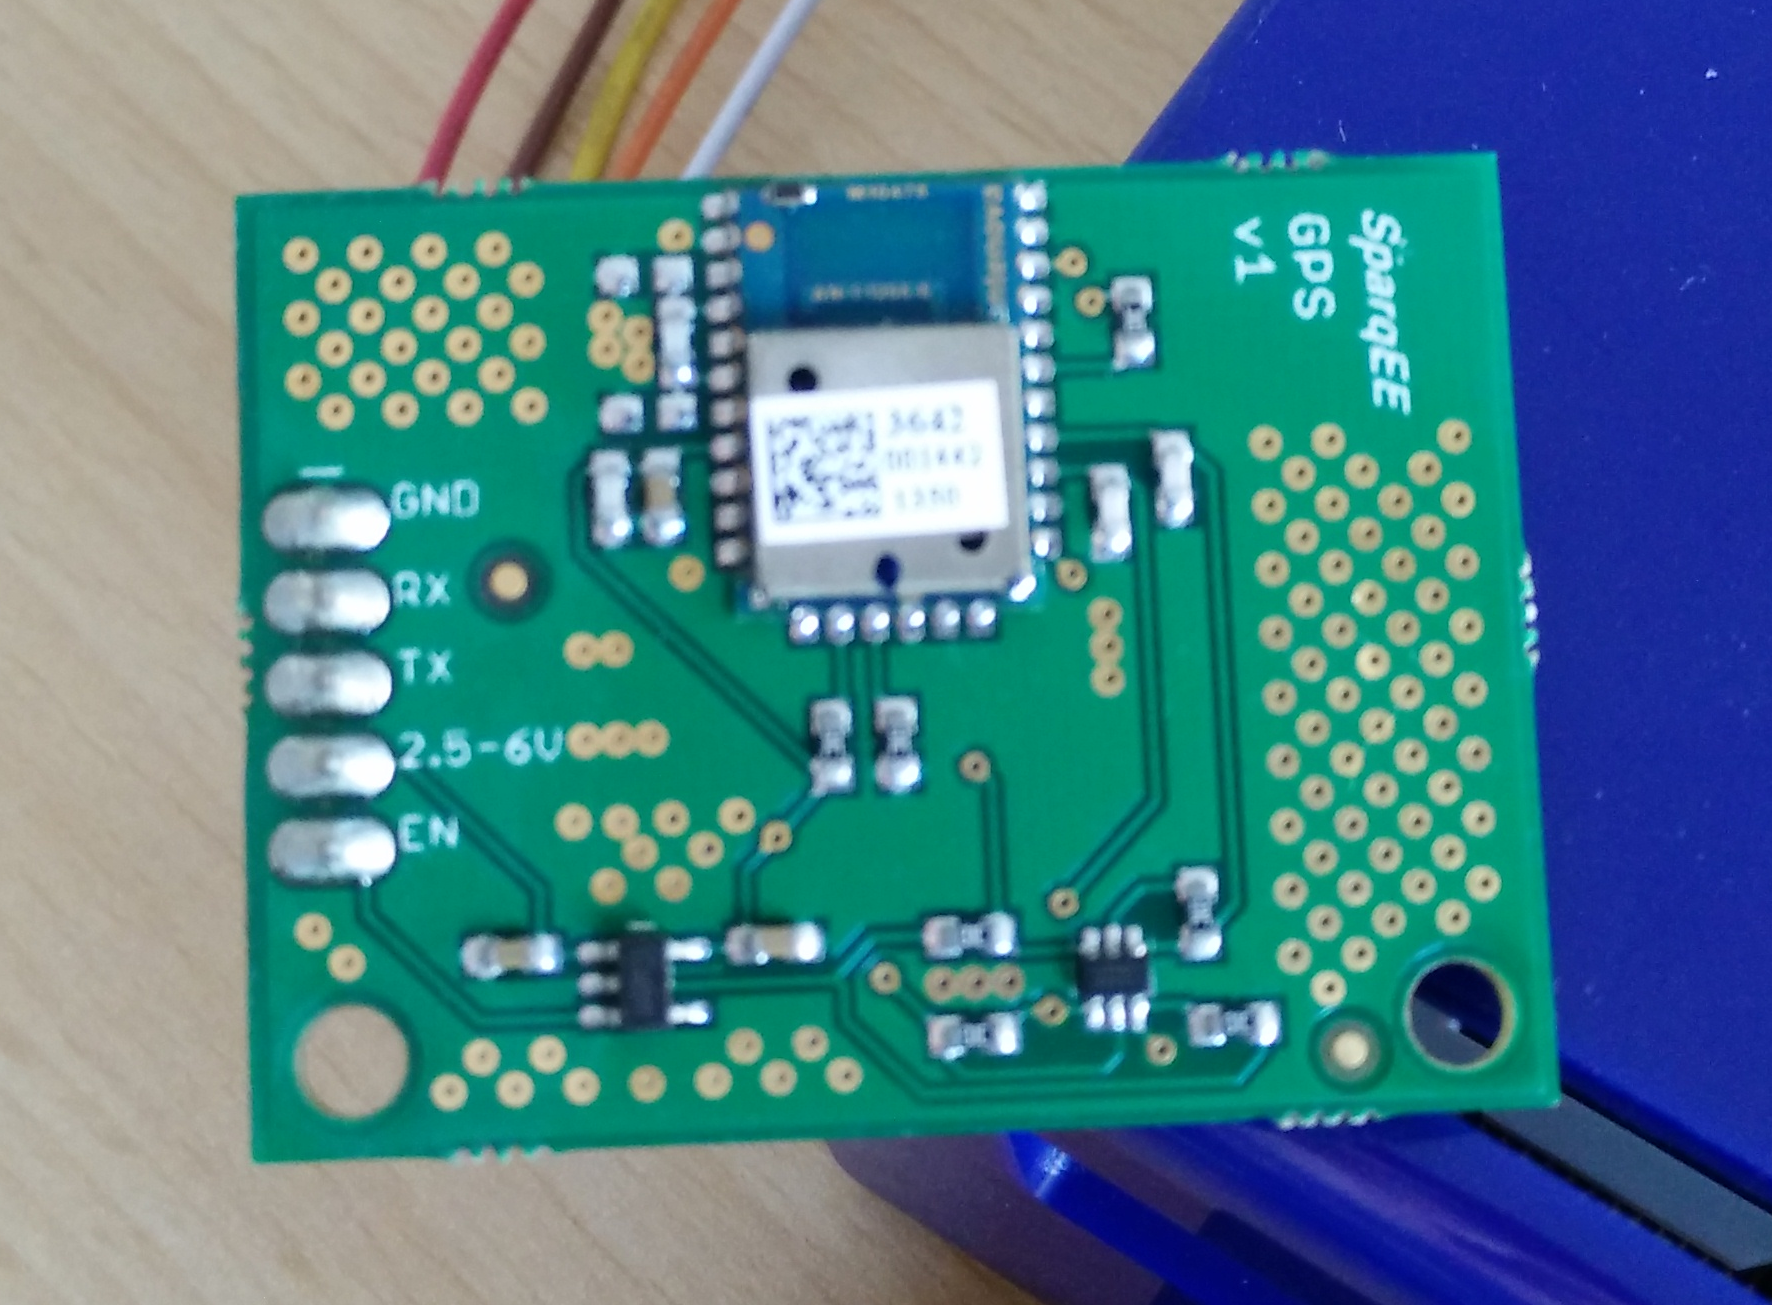
After attaching the GPS module, our Raspberry Pi looks like this:

GPS data retrieval
The Raspberry GPS communicates with the Sparqee GPS shield over the serial port UART0. However, in Raspbian this port is usually used as serial console, which is why we cannot directly access the GPS shield. To turn this feature off and activate the module, you have to follow these steps:
- Edit the file /boot/cmdline.txt and delete all parameters containing the key ttyAMA0:
console=ttyAMA0,115200 kgdboc=ttyAMA0,115200
Afterwards, our file contains this text:
dwc_otg.lpm_enable=0 console=tty1 root=/dev/mmcblk0p2 rootfstype=ext4 elevator=deadline rootwait
- Edit the file /etc/inittab and comment the following line out:
T0:23:respawn:/sbin/getty -L ttyAMA0 115200 vt100
Comments are identified by the hash sign; the result should look as follows:
#T0:23:respawn:/sbin/getty -L ttyAMA0 115200 vt100
- Next, we have to reboot the Raspberry Pi:
sudo reboot
- Finally, we can test the GPS module with Minicom. The baud rate is 9600 and the device name is /dev/ttyAMA0:
sudo minicom -b 9600 -D /dev/ttyAMA0 -o
If necessary, you can install Minicom using APT:
sudo apt-get install minicom
You can quit Minicom with the key combination strg+a followed by z.
If you succeed, Minicom will continually output a stream of GPS data. Depending on wether the GPS module attains a lock, that is, wether it receives GPS data by a satellite, the output changes. While no data is received, the output remains mostly empty.
$GPGGA,080327.199,,,,,0,00,,,M,0.0,M,,0000*59
$GPGSA,A,1,,,,,,,,,,,,,,,*1E
$GPRMC,080327.199,V,,,,,,,240314,,,N*42
$GPGGA,080328.199,,,,,0,00,,,M,0.0,M,,0000*56
$GPGSA,A,1,,,,,,,,,,,,,,,*1E
$GPRMC,080328.199,V,,,,,,,240314,,,N*4D
$GPGGA,080329.199,,,,,0,00,,,M,0.0,M,,0000*57
$GPGSA,A,1,,,,,,,,,,,,,,,*1E
$GPGSV,3,1,12,02,14,214,29,04,64,182,24,05,00,000,21,10,00,000,23*7E
$GPGSV,3,2,12,12,03,334,26,08,57,094,,23,52,187,,27,52,110,*76
$GPGSV,3,3,12,03,36,332,,09,32,128,,24,27,212,,17,26,350,*7B
Once the GPS module starts receiving a signal, Minicom will display more data as in the example below. If you encounter problems in attaining a GPS lock, it might help to place the Raspberry Pi outside.
$GPGSA,A,3,17,09,28,08,26,07,15,,,,,,2.4,1.4,1.9*.6,1.7,2.0*3C
$GPRMC,031349.000,A,3355.3471,N,11751.7128,W,0.00,143.39,210314,,,A*76
$GPGGA,031350.000,3355.3471,N,11751.7128,W,1,06,1.7,112.2,M,-33.7,M,,0000*6F
$GPGSA,A,3,17,09,28,08,07,15,,,,,,,2.6,1.7,2.0*3C
$GPGSV,3,1,12,17,67,201,30,09,62,112,28,28,57,022,21,08,55,104,20*7E
$GPGSV,3,2,12,07,25,124,22,15,24,302,30,11,17,052,26,26,49,262,05*73
$GPGSV,3,3,12,30,51,112,31,57,31,122,,01,24,073,,04,05,176,*7E
$GPRMC,031350.000,A,3355.3471,N,11741.7128,W,0.00,143.39,210314,,,A*7E
$GPGGA,031351.000,3355.3471,N,11741.7128,W,1,07,1.4,112.2,M,-33.7,M,,0000*6C
A detailed description of the GPS format emitted by the Sparqee GPSv1.0 can be found here. Probably the most important information, the GPS coordinates, is contained by the line starting with $GPGGA: In this case, the module was located at 33° 55.3471′ Latitude North and 117° 41.7128′ Longitude West at an altitude of 112.2 meters above mean sea level.
Conclusion
We demonstrated how to connect a Sparqee GPS shield to a Raspberry Pi and how to display the GPS data via Minicom. In the next part, we will write a network service that extracts and delivers the GPS data from the serial port.


