Your null parameter is hostile

I hope we all agree that emitting null values is a hostile move. If you are not convinced, please ask the inventor of the null pointer, Sir Tony Hoare. Or just listen to him giving you an elaborate answer to your question:

https://www.infoq.com/presentations/Null-References-The-Billion-Dollar-Mistake-Tony-Hoare/

So, every time you pass a null value across your code’s boundary, you essentially outsource a problem to somebody else. And even worse, you multiply the problem, because every client of yours needs to deal with it.

But what about the entries to your functionality? The parameters of your methods? If somebody passes null into your code, it’s clearly their fault, right?

Let’s look at an example of pdfbox, a java library that deals with the PDF file format. If you want to merge two or more PDF documents together, you might write code like this:

File left = new File("C:/temp/document1.pdf");
File right = new File("C:/temp/document2.pdf");

PDFMergerUtility merger = new PDFMergerUtility();
merger.setDestinationFileName("C:/temp/combined.pdf");

merger.addSource(left);
merger.addSource(right);

merger.mergeDocuments(null);

If you copy this code verbatim, please be aware that proper exception and resource handling is missing here. But that’s not the point of this blog entry. Instead, I want you to look at the last line, especially the parameter. It is a null pointer and it was my decision to pass it here. Or was it really?

If you look at the Javadoc of the method, you’ll notice that it expects a StreamCacheCreateFunction type, or “a function to create an instance of a stream cache”. If you don’t want to be specific, they tell you that “in case of null unrestricted main memory is used”.

Well, in our example code above, we don’t have the necessity to be specific about a stream cache. We could implement our own UnrestrictedMainMemoryStreamCacheCreator, but it would just add cognitive load on the next reader and don’t provide any benefit. So, we decide to use the convenience value of null and don’t overthink the situation.

But that’s the same as emitting null from your code over a boundary, just in the other direction. We use null as a way to communicate a standard behaviour here. And that’s deeply flawed, because null is not standard and it is not convenient.

Offering an interface that encourages clients to use null for convience or abbreviation purposes should be considered just as hostile as returning null in case of errors or “non-results”.

How could this situation be defused by the API author? Two simple solutions come to mind:

  1. There could be a parameter-less method that internally delegates to the parameterized one, using the convenient null value. This way, my client code stays clear from null values and states its intent without magic numbers, whereas the implementation is free to work with null internally. Working with null is not that big of a problem, as long as it doesn’t pass a boundary. The internal workings of a code entity is of nobody’s concern as long as it isn’t visible from the outside.
  2. Or we could define the parameter as optional. I mean in the sense of Optional<StreamCacheCreateFunction>. It replaces null with Optional.empty(), which is still a bit weird (why would I pass an empty box to a code entity?), but communicates the situation better than before.

Of course, the library could also offer a variety of useful standard implementations for that interface, but that would essentially be the same solution as the self-written implementation, minus the coding effort.

In summary, every occurrence of a null pointer should be treated as toxic. If you handle toxic material inside your code entity without spilling it, that’s on you. If somebody spills toxic material as a result of a method call, that’s an hostile act.

But inviting your clients to use toxic material for convenience should be considered as an hostile attitude, too. It normalizes harmful behaviour and leads to a careless usage of the most dangerous pointer value in existence.

The Dimensions of Navigation in Eclipse

Following up on “The Dimensions of Navigation in Object-Oriented Code” this post explores how Eclipse, one of the most mature IDEs for Java development, supports navigating across different dimensions of code: hierarchy, behavior, validation and utilities.

Let’s walk through these dimensions and see how Eclipse helps us travel through code with precision.

1. Hierarchy Navigation

Hierarchy navigation reveals the structure of code through inheritance, interfaces and abstract classes.

  • Open Type Hierarchy (F4):
    Select a class or interface, then press F4. This opens a dedicated view that shows both the supertype and subtype hierarchies.
  • Quick Type Hierarchy (Ctrl + T):
    When your cursor is on a type (like a class, interface name), this shortcut brings up a popover showing where it fits in the hierarchy—without disrupting your current layout.
  • Open Implementation (Ctrl + T on method):
    Especially useful when dealing with interfaces or abstract methods, this shortcut lists all concrete implementations of the selected method.

2. Behavioral Navigation

Behavioral navigation tells you what methods call what, and how data flows through the application.

  • Open Declaration (F3 or Ctrl + Click):
    When your cursor is on a method call, pressing F3 or pressing Ctrl and click on the method jumps directly to its definition.
  • Call Hierarchy (Ctrl + Alt + H):
    This is a powerful tool that opens a tree view showing all callers and callees of a given method. You can expand both directions to get a full picture of where your method fits in the system’s behavior.
  • Search Usages in Project (Ctrl + Shift + G):
    Find where a method, field, or class is used across your entire project. This complements call hierarchy by offering a flat list of usages.

3. Validation Navigation

Validation navigation is the movement between your business logic and its corresponding tests. Eclipse doesn’t support this navigation out of the box. However, the MoreUnit plugin adds clickable icons next to classes and tests, allowing you to switch between them easily.

4. Utility Navigation

This is a collection of additional navigation features and productivity shortcuts.

  • Quick Outline (Ctrl + O):
    Pops up a quick structure view of the current class. Start typing a method name to jump straight to it.
  • Search in All Files (Ctrl + H):
    The search dialog allows you to search across projects, file types, or working sets.
  • Content Assist (Ctrl + Space):
    This is Eclipse’s autocomplete—offering method suggestions, parameter hints, and even auto-imports.
  • Generate Code (Alt + Shift + S):
    Use this to bring up the “Source” menu, which allows you to generate constructors, getters/setters, toString(), or even delegate methods.
  • Format Code (Ctrl + Shift + F):
    Helps you clean up messy files or align unfamiliar code to your formatting preferences.
  • Organize Imports (Ctrl + Shift + O):
    Automatically removes unused imports and adds any missing ones based on what’s used in the file.
  • Markers View (Window Show View Markers):
    Shows compiler warnings, TODOs, and FIXME comments—helps prioritize navigation through unfinished or problematic code.

Eclipse Navigation Cheat Sheet

ActionShortcut / Location
Open Type HierarchyF4
Quick Type HierarchyCtrl + T
Open ImplementationCtrl + T (on method)
Open DeclarationF3 or Ctrl + Click
Call HierarchyCtrl + Alt + H
Search UsagesCtrl + Shift + G
MoreUnit SwitchMoreUnit Plugin
Quick OutlineCtrl + O
Search in All FilesCtrl + H
Content AssistCtrl + Space
Generate CodeAlt + Shift + S
Format CodeCtrl + Shift + F
Organize ImportsCtrl + Shift + O
Markers ViewWindow → Show View → Markers

Dockerized toolchain in CLion with Conan

In the olden times it was relatively hard to develop C++ projects cross-platform. You had to deal with cross-compiling, different compilers and versions of them, implementation-defined and unspecified behaviour, build system issues and lacking dependency management.

Recent compilers mitigated many problems and tools like CMAKE and Conan really helped with build issues and dependencies. Nevertheless, C++ – its compilers and their output – is platform-dependent and thus platform differences still exist and shine through. But with the advent of containerization and many development tools supporting “dev containers” or “dockerized toolchains” this also became much easier and feasible.

CLion’s dockerized toolchain

CLions dockerized toolchain is really easy to setup. After that you can build and run your application on the platform of your choice, e.g. a Debian container running your IDE on a Windows machine. This is all fine and easy for a simple CMake-based hello-world project.

In real projects there are some pitfalls and additional steps to do to make it work seamlessly with Conan as your dependency manager.

Expanding the simple case to dependencies with Conan

First of all your container needs to be able to run Conan. Here is a simple Dockerfile that helps getting started:

FROM debian:bookworm AS toolchain

RUN DEBIAN_FRONTEND=noninteractive apt-get update && apt-get -y dist-upgrade
RUN DEBIAN_FRONTEND=noninteractive apt-get update && apt-get -y install \
  cmake \
  debhelper \
  ninja-build \
  pipx \
  git \
  lsb-release \
  python3 \
  python3-dev \
  pkg-config \
  gdb

RUN PIPX_BIN_DIR=/usr/local/bin pipx install conan

# This allows us to automatically use the conan context from our dockerized toolchain that we populated on the development
# machine
ENV CONAN_HOME=/tmp/my-project/.conan2

The important thing here is that you set CONAN_HOME to the directory CLion uses to mount your project. By default CLion will mount your project root directory to /tmp/<project_name> into the dev container.

If you have some dependencies you need to build/export yourself, you have to run the conan commands using your container image with a bind mount so that the conan artifacts reside on your host machine because CLion tends to use short-lived containers for the toolchain. So we create a build_dependencies.sh script

#!/usr/bin/env bash

# Clone and export conan-omniorb
rm -rf conan-omniorb
git clone -b conan2/4.2.3 https://github.com/softwareschneiderei/conan-omniorb.git
conan export ./conan-omniorb

# Clone and export conan-cpptango
rm -rf conan-cpptango
git clone -b conan2/9.3.6 https://github.com/softwareschneiderei/conan-cpptango.git
conan export ./conan-cpptango

and put it in the docker command:

CMD chmod +x build_environment.sh && ./build_environment.sh

Now we can run the container to setup our Conan context once using a bind-mount like -v C:\repositories\my-project\.conan2:/tmp/my-project/.conan2.

If you have done everything correctly, especially the correct locations for the Conan artifacts you can use your dockerized toolchain and develop transparently regardless of host and target platforms.

I hope this helps someone fighting multiplatform development using C++ and Conan with CLion.

Customizing Vite plugins is as quick as Vite itself

Once in a blue moon or so, it might be worthwhile to look at the less frequently used features of the Vite bundler, just to know how your life could be made easier when writing web applications.

And there are real use cases to think about custom vite plugins, e.g.

  1. wanting to treat SVGs as <svg> code or React Component, not just as a <img> resource – so maye your customer can easily swap them out as separate files. That is a solved problem with existing plugins like vite-plugin-svgr or vite-svg-loader, but… once in a ultra-violet moon or so… even the existing plugins might not suffice.
  2. For teaching a few lectures about WebGL / GLSL shader programming, I wanted to readily show the results of changes in a fragment shader on the fly. That is the case in point:

I figured I could just use Vite’s Hot Module Replacement to reload the UI after changing the shader. There could have been alternatives like

  • Copying pieces of GLSL into my JS code as strings
    – which is cumbersome,
  • Using the async import() syntax of JS
    – which is then async, obviously,
  • Employing a working editor component on the UI like Ace / React-Ace
    – which is nice when it works, but is so far off my actual quest, and I guess commonplace IDEs are still more convenient for editing GLSL

I wanted the changes to be quick (like, pair-programming-quick), and Vite’s name exactly means that, and their HMR aptly so. It also gives you the option of raw string assets (import Stuff from "./stuff.txt?raw";) which is ok, but I wanted a bit of prettification to be done automatically. I found vite-plugin-glsl, but I needed it customized because I wanted to always combine multiple blank lines to a single one and this is how easy it was:

  • ./plugin/glslImport.js
    Note: this is executed by the vite dev server, not our JS app itself.
import glsl from "vite-plugin-glsl";

const originalPlugin = glsl({compress: false});

const glslImport = () => ({
    ...originalPlugin,
    enforce: "pre",
    name: "vite-plugin-glsl-custom",
    transform: async (src, id) => {
        const original = await originalPlugin.transform(src, id);
        if (!original) { // not a shader source
            return;
        }
        // custom transformation as described above:
        const code = original.code
            .replace(/\\r\\n/g, "\\n")
            .replace(/\\n(\\n|\\r|\s)*?(?=\s*\w)/g, "\\n$1");
        return {...original, code};
    },
});

export default glslImport;
  • and then the vite.config.js is simply
import { defineConfig } from 'vite';
import glslImport from './plugin/glslImport.js';

export default defineConfig({
    plugins: [
        glslImport()
    ],
    ...
})

I liked that. It kept me from transforming either the raw import or that of the original plugin in each of the 20 different files, and I could easily fiddle around in my filesystem while my students only saw the somewhat-cleaned-up shader code.

So if you would ever have some non-typical-JS files that need some transformation but are e.g. too many or too volatile to be cultivated in their respective source format, that is a nice tool to know. That is as easily-pluggable-into-other-projects as a plugin should be.

Calculating the Number of Segments for Accurate Circle Rendering

A common way to draw circles with any kind of vector graphics API is by approximating it with a regular polygon, e.g. as a regular polygon with 32 sides. The problem with this approach is that it might look good in one resolution, but crude in another, as the approximation becomes more visible. So how do you pick the right number of sides N for the job? For that, let’s look at the error that this approximation has.

A whole bunch of math

I define the ‘error’ of the approximation as the maximum difference between the ideal circle shape and the approximation. In other words, it’s the difference of the inner radius and the outer radius of the regular polygon. Conveniently, with a step angle \alpha=\frac{2\pi}{N} 
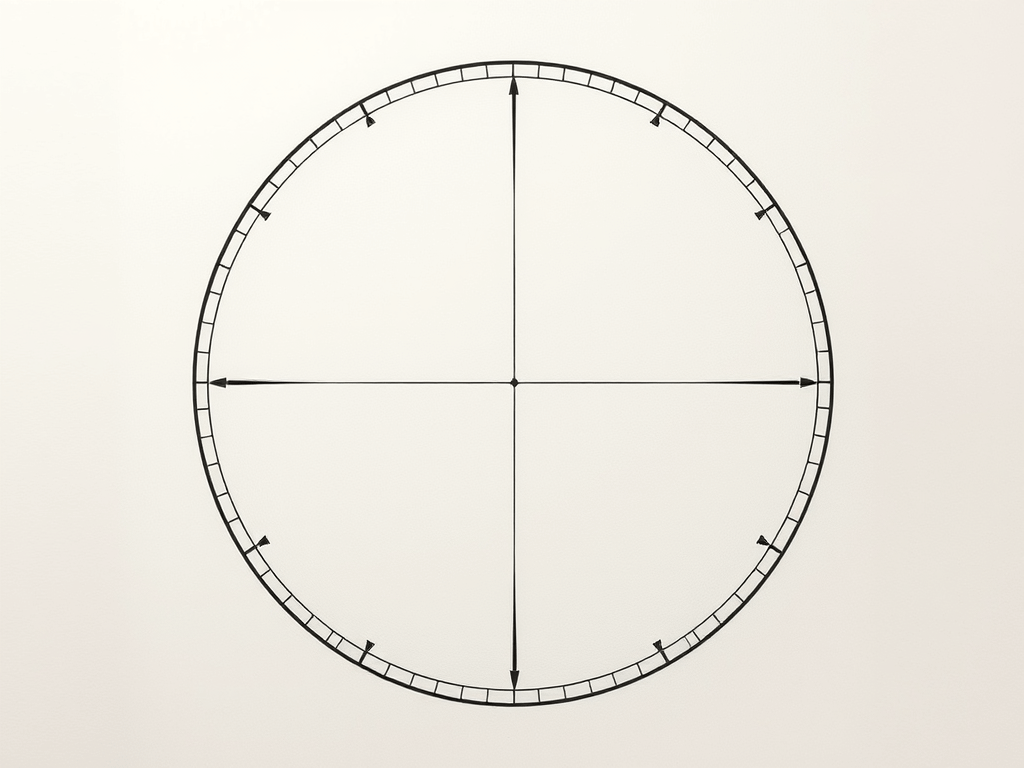
the inner radius is just the outer radius r multiplied by the cosine of half of that: r\times\cos\frac{\alpha}{2}. So the error is r-r\times\cos\frac{\pi}{N}. I find it convenient to use relative error \epsilon for the following, and set r=1:

\epsilon=1-cos\frac{\pi}{N}

The following plot shows that value for N going from 4 to 256:

Plot showing the relative error numbers of subdivision

As you can see, this looks hyperbolic and the error falls off rather fast with an increasing number of subdivisions. This function lets use figure out the error for a given number of subdivisions, but what we really want is he inverse of that: Which number of subdivisions do we need for the error to be less than a given value. For example, assuming a 1080p screen, and a half-pixel error on a full-size (r=540
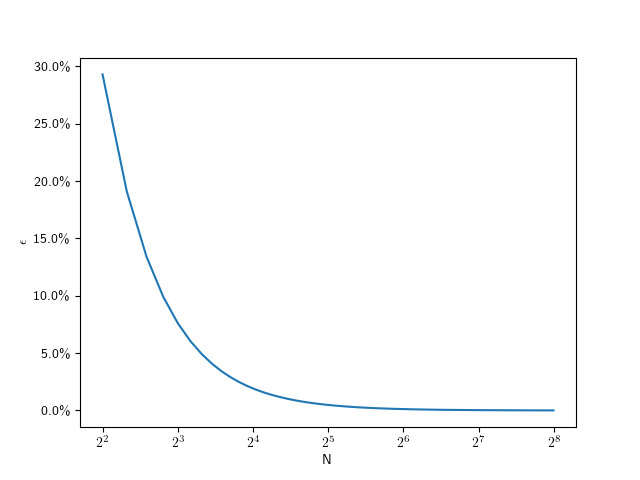
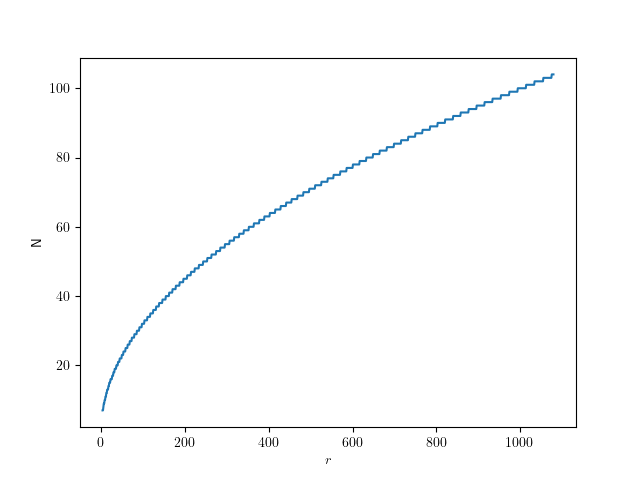
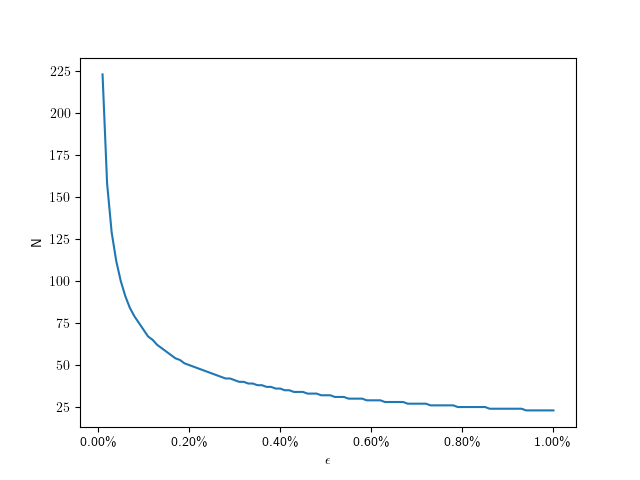
) circle, that means we should aim for a relative error of 0.1\%. So we can solve the error equation above for N. Since the number of subdivisions should be an integer, we round it up:

N=\lceil\frac{\pi}{\arccos{(1-\epsilon)}}\rceil

So for 0.1\% we need only 71 divisions. The following plot shows the number of subdivisions for error values from 0.01\% to 1\%:

Here are some specific values:

\epsilonN
0.01%223
0.1%71
0.2%50
0.4%36
0.6%29
0.8%25
1.0%23

Assuming a fixed half-pixel error, we can plug in \epsilon=\frac{0.5}{radius} to get:

N=\lceil\frac{\pi}{\arccos{(1-\frac{0.5}{radius})}}\rceil

The following graph shows that function for radii up to full-size QHD circles:

Give me code

Here’s the corresponding code in C++, if you just want to figure out the number of segments for a given radius:

std::size_t segments_for(float radius, float pixel_error = 0.5f)
{
  auto d = std::acos(1.f - pixel_error / radius);
  return static_cast<std::size_t>(std::ceil(std::numbers::pi / d));
}

How to improve this() by using super()

I have a particular programming style regarding constructors in Java that often sparks curiosity and discussion. In this blog post, I want to note my part in these discussions down.

Let’s start with the simplest example possible: A class without anything. Let’s call it a thing:

public class Thing {
}

There is not much you can do with this Thing. You can instantiate it and then call methods that are present for every Object in Java:

Thing mine = new Thing();
System.out.println(
    mine.hashCode()
);

This code tells us at least two things about the Thing class that aren’t immediately apparent:

  • It inherits methods from the Object class; therefore, it extends Object.
  • It has a constructor without any parameters, the “default constructor”.

If we were forced to write those two things in code, our class would look like this:

public class Thing extends Object {
    
    public Thing() {
        super();
    }
}

That’s a lot of noise for essentially no signal/information. But I adopted one rule from it:

Rule 1: Every production class has at least one constructor explicitly written in code.

For me, this is the textual anchor to navigate my code. Because it is the only constructor (so far), every instantiation of the class needs to call it. If I use “Callers” in my IDE on it, I see all clients that use the class by name.

Every IDE has a workaround to see the callers of the constructor(s) without pointing at some piece of code. If you are familiar with such a feature, you might use it in favor of writing explicit constructors. But every IDE works out of the box with the explicit constructor, and that’s what I chose.

There are some exceptions to Rule 1:

  • Test classes aren’t instantiated directly, so they don’t benefit from a constructor. See also https://schneide.blog/2024/09/30/every-unit-test-is-a-stage-play-part-iii/ for a reasoning why my test classes don’t have explicit constructors.
  • Record classes are syntactic sugar that don’t benefit from an explicit constructor that replaces the generated one. In fact, record classes use much of their appeal once you write constructors for them.
  • Anonymous inner types are oftentimes used in one place exclusively. If I need to see all their clients by using the IDE, my code is in a very problematic state, and an explicit constructor won’t help.

One thing that Rule 1 doesn’t cover is the first line of each constructor:

Rule 2: The first line of each constructor contains either a super() or a this() call.

The no-parameters call to the constructor of the superclass is done regardless of my code, but I prefer to see it in code. This is a visual cue to check Rule 3 without much effort:

Rule 3: Each class has only one constructor calling super().

If you incorporate Rule 3 into your code, the instantiation process of your objects gets much cleaner and free from duplication. It means that if you only exhibit one constructor, it calls super() – with or without parameters. If you provide more than one constructor, they form a hierarchy: One constructor is the “main” or “core” constructor. It is the one that calls super(). All the other constructors are “secondary” or “intermediate” constructors. They use this() to call the main constructor or another secondary constructor that is an intermediate step towards the main constructor.

If you visualize this construct, it forms a funnel that directs all constructor calls into the main constructor. By listing its callers, you can see all clients of your class, even those that use secondary constructors. As soon as you have two super() calls in your class, you have two separate ways to construct objects from it. I came to find this possibility way more harmful than useful. There are usually better ways to solve the client’s problem with object instantiation than to introduce a major source of current or future duplication (and the divergent change code smell). If you are interested in some of them, leave a comment, and I will write a blog entry explaining some of them.

Back to the funnel:

if you don’t see the funnel yet, let me abstract the situation a bit more:

This is how it looks in source code:

public class Thing {
    
    private final String name;
    
    public Thing(int serialNumber) {
        this(
            "S/N " + serialNumber
        );
    }
    
    public Thing(String name) {
        super();
        this.name = name;
    }
}

I find this structure very helpful to navigate complex object construction code. But I also have a heuristic that the number of secondary constructors (by visually counting the this() calls) is proportional to the amount of head scratching and resistance to change that the class will induce.

As always, there are exceptions to the rule:

  • Some classes are just “more specific names” for the same concept. Custom exception types come to mind (see the code example below). It is ok to have several super() calls in these classes, as long as they are clearly free from additional complexity.
  • Enum types cannot have the super() call in the main constructor. I don’t write a comment as a placeholder; I trust that enum types are low-complexity classes with only a few private constructors and no shenanigans.

This is an example of a multi-super-call class:

public class BadRequest extends IOException {

    public BadRequest(String message, Throwable cause) {
        super(message, cause);
    }

    public BadRequest(String message) {
        super(message);
    }
}

It clearly does nothing more than represent a more specific IOException. There won’t be many reasons to change or even just look at this code.

I might implement a variation to my Rule 2 in the future, starting with Java 22: https://openjdk.org/jeps/447. I’m looking forward to incorporating the new possibilities into my habits!

As you’ve seen, my constructor code style tries to facilitate two things:

  • Navigation in the project code, with anchor points for IDE functionality.
  • Orientation in the class code with a standard structure for easier mental mapping.

It introduces boilerplate or cruft code, but only a low amount at specific places. This is the trade-off I’m willing to make.

What are your ideas about this? Leave us a comment!

Experimenting with CMake’s unity builds

CMake has an option, CMAKE_UNITY_BUILD, to automatically turn your builds into unity-builds, which is essentially combining multiple source files into one. This is supposed to make your builds more efficient. You can just enable enable it while executing the configuration step of your CMake builds, so it is really easy to test. It might just work without any problems. Here are some examples with actual numbers of what that does with build times.

Project A

Let us first start with a relatively small project. It is a real project we have been developing, that reads sensor data, transports it over the network and displays it using SDL and Dear ImGui. I’m compiling it with Visual Studio (v17.13.6) in CMake folder mode, using build insights to track the actual time used. For each configuration, I’m doing a clean rebuild 3 times. The steps are the number of build statements that ninja runs.

Unity Build#StepsTime 1Time 2Time 3
OFF4013.3s13.4s13.6s
ON2810.9s10.7s9.7s

That’s a nice, but not massive, speedup of 124,3% for the median times.

Project A*

Project A has a relatively high number of non-compile steps: 1 step is code generation, 6 steps are static library linking, and 7 steps are executable linking. That’s a total of 14 non-compile steps, which are not directly affected by switching to unity builds. 5 of the executables in Project A are non-essential, basically little test programs. So in an effort to decrease the relative number of non-compile steps, I disabled those for the next test. Each of those also came with an additional source file, so the total number of steps decreased by 10. This really only decreased the relative amount of non-compile steps from 35% to 30%, but the numbers changes quite a bit:

Unity Build#StepsTime 1Time 2Time 3
OFF309.9s10.0s9.7s
ON189.0s8.8s9.1s

Now the speedup for the median times was only 110%.

Project B

Project B is another real project, but much bigger than Project A, and much slower to compile. It’s a hardware orchestration system with a web interface. As the project size increases, the chance for something breaking when enabling unity builds also increases. In no particular order:

  • Include guards really have to be there, even if that particular header was not previously included multiple times
  • Object files will get a lot bigger, requiring /bigobj to be enabled
  • Globally scoped symbols will name-clash across files. This is especially true for static globals or things in unnamed namespaces, which basically don’t do their job anymore. More subtly, things moved into the global namespace will also clash, such as the classes with the same name moved into the global namespace via using namespace.

In general, that last point will require the most work to resolve. If all fails, you can disable unity build on a target via set_target_properties(the_target PROPERTIES UNITY_BUILD OFF) or even just skip specific files for unity build inclusion via SKIP_UNITY_BUILD_INCLUSION. In Project B, I only had to do this for files generated by CMakeRC. Here are the results:

Unity Build#StepsTime 1Time 2Time 3
OFF416279.4s279.3s284,0s
ON11873.2s76.6s74.5s

That’s a massive speedup of 375%, just for enabling a build-time switch.

When to use this

Once your project has a certain size, I’d say definitely use this on your CI pipeline, especially if you’re not doing incremental builds. It’s not just time, but also energy saved. And faster feedback cycles are always great. Enabling it on developer machines is another matter: it can be quite confusing when the files you’re editing do not correspond to what the build system is building. Also, developers usually do more incremental builds where the advantages are not as high. I’ve also used hybrid approaches where I enable unity builds only for code that doesn’t change that often, and I’m quite satisfied with that. Definitely add an option to turn that off for debugging though. Have you had similar experiences with unity builds? Do tell!

Java enum inheritance preferences are weird

Java enums were weird from their introduction in Java 5 in the year 2004. They are implemented by forcing the compiler to generate several methods based on the declaration of fields/constants in the enum class. For example, the static Enum::valueOf(String) method is only present after compilation.

But with the introduction of default methods in Java 8 (published 2014), things got a little bit weirder if you combine interfaces, default methods and enums.

Let’s look at an example:

public interface Person {

  String name();
}

Nothing exciting to see here, just a Person type that can be asked about its name. Let’s add a default implementation that makes clearly no sense at all:

public interface Person {

  default String name() {
    return UUID.randomUUID().toString();
  }
}

If you implement this interface in a class and don’t overwrite the name() method, you are the weird one:

public class ExternalEmployee implements Person {

  public ExternalEmployee() {
    super();
  }
}

We can make your weirdness visible by creating an ExternalEmployee and calling its name() method:

public class Main {

  public static void main(String[] args) {
    ExternalEmployee external = new ExternalEmployee();
    System.out.println(external.name());
  }
}

This main method prints the “name” of your external employee on the console:

1460edf7-04c7-4f59-84dc-7f9b29371419

Are you sure that you hired a human and not some robot?

But what if we are a small startup company with just a few regular employees that can be expressed by a java enum?

public enum Staff implements Person {

  michael,
  bob,
  chris,
  ;
}

You can probably predict what this little main method prints on the console:

public class Main {

  public static void main(String[] args) {
    System.out.println(
      Staff.michael.name()
    );		
  }
}

But, to our surprise, the name() method got overwritten, without us doing or declaring to do so:

michael

We ended up with the “default” generated name() method from the Java enum type. In this case, the code generated by the compiler takes precedence over the default implementation in the interface, which isn’t what we would expect at first glance.

To our grief, we can’t change this behaviour back to a state that we want by overwriting the name() method once more in our Staff class (maybe we want our employees to be named by long numbers!), because the generated name() method is declared final. From the source code of the enum class:

/**
 * @return the name of this enum constant
 */
public final String name() {
  return name;
}

The only way out of this situation is to avoid the names of methods that are generated in an enum type. For the more obscure ordinal(), this might be feasible, but name() is prone for name conflicts (heh!).

While I can change my example to getName() or something, other situations are more delicate, like this Kotlin issue documents: https://youtrack.jetbrains.com/issue/KT-14115/Enum-cant-implement-an-interface-with-method-name

And I’m really a fan of Java’s enum functionality, it has the power to be really useful in a lot of circumstances. But with great weirdness comes great confusion sometimes.

Useful browser features for the common Web Dev

Once every while, I stumble upon some minor thing ingrained in modern browsers that make some specific problem so much easier. And while the usual Developer Tools offer tons of capabilities, these are so wildly spread and grouped that you easily get used to just ignoring most of them.

So this bunch of things come to my mind that seem not to be super-common knowledge. Maybe you benefit from some of it.

Disclaimer: The browsers I know of have their Dev Tools available via pressing F12 and a somewhat similar layout, even though particular words will differ. My naming here relates to the current Chrome, so your experience might differ.

Disabling the Browser cache

Your Browser caches many resources because the standard user usually prefers speed, is used that the browser endlessly hogs memory anyway, and most resources usually do not change that often anyway.

During development, this might lead to confusion because of course, you do change your sources often (in fact, that is your job), and the browser needs to know that fact.

For that, let it be known:

The "Network Tab" has a Checkbox "Disable Cache".
And the Dev Tools have to be open for it to work.

This is usually so much the default setting on my working machines that I need to remember myself on it when I troubleshoot something on someone else’s machine. Spread the word.

Also, browsers have a Hard-Reload-Feature, like under Chrome, to cleaning the Cache before the reload without having to do so for the whole browser.

Hard-Reload: Ctrl + Shift + R

I’ve read that this is also Chrome’s behaviour when pressing F5 while the Dev Tools are open, but anyway. Take extra care that your customer does not of that feature, because sometimes they might be frustrated about a failed update of your app that is actually just a cached version.

Inspect Network Requests

Depending on the complexity of your web app, or what external dependencies you are importing, it might be that the particular order and content of network requests is not trivial anymore.

Now the “Network” tab (you know it already) is interesting on its own, but remember that it only displays the requests since opening the Dev Tools, i.e. some Page Reload (hard or soft) might be required.

And – this appears somewhat changing between browser updates, don’t ask me why that is necessary – this is good to know:

  • The first column of that list shows only the last part of each request URL, but if you click on it, a very helpful window appears with details of the Request Headers, Payload and Response
  • make sure that in the filters above, the “Fetch/XHR” is active
  • And then some day I found, that
Right-Clicking a request gives you options for Copy, e.g. Copy as fetch, to so you can repeat the exact request from javascript-code for debugging etc.

Inspecting volatile elements

The “Elements” tab (called “Inspector” in other browsers) is quite straightforward to find mistakes in styling or the rendered HTML itself – you see the whole current HTML structure, click your element in there and to the right, from bottom to top you see the CSS rules applied.

But sometimes, it can be hard to inspect elements that change on mouse interaction, and it is good to know that (again, this holds for Chrome), first,

There is a shortcut like Ctrl + Shift + C to get into the Inspector without extra mouse movements

Now think of a popup that vanishes when hovering away. You might do it by using Ctrl + Shift + C to open the Inspector, then using the Keyboard to navigate within (especially with the Tab and Cursor keys), but here’s a small trick I thought of that helped me a lot:

Add (temporarily) an on-click-handler to your popup that calls window.alert(...);

With that, you can open your popup, press Ctrl + Shift + C, then click the popup, and the alert() will now block any events and you can use your mouse to inspect all you want.

In easer cases you could just disable the code that makes the popup go away, but in that case I had, this wasn’t an option either.

Now that I think of it, I could also have used debugger; instead of the alert(), but the point is that you have to block javascript execution only after interacting with the popup element.

The performance API

I have no idea why I discovered that only recently, but if precision in timing is important – e.g. measuring the impact of a possible change on performance, one does not have to resort to Date.now() with its millisecond resolution, but

there is performance.now() to give you microsecond precision for time measurements.

It can afford that by not having the epoch “zero” of Jan 1th 1970 as reference, and instead, the moment of starting your page.

The Performance API has a lot more stuff – which I didn’t need yet.

A FPS Monitor, and a whole world of hidden features

If you do graphics programming or live data visualization of some measurement, it might be of interest to see that. There’s a whole hidden menu at least in Chrome, and you can access it by focussing the Dev Tools, then

  • press Ctrl + Shift + P
  • Enter “FPS” and select
  • Now you have a nice overlay over your page.

Even if you are not in the target group of that specific feature, it might be interesting to know that there is a whole menu of many particular (sometimes experimental) features built into all these browsers. They differ from browser to browser, and version to version, and of course, plugins can do a lot more,

but it might just be worth the idea to think that maybe your work flow can benefit from any of that stuff.

Local Javascript module development

https://www.viget.com/articles/how-to-use-local-unpublished-node-packages-as-project-dependencies/

yalc: no version upgrade, no publish etc.

Building an application using libraries – called packages or modules in Javascript – is a common practice since decades. We often use third-party libraries in our projects to not have to implement everything ourselves.

In this post I want to describe the less common situation where we are using a library we developed on our own and/or are actively maintaining. While working on the consuming application we need to change the library sometimes, too. This can lead to a cumbersome process:

  1. Need to implement a feature or fix in the application leads to changes in our library package.
  2. Make a release of the library and publish it.
  3. Make our application reference the new version of our library.
  4. Test everything and find out, that more changes are needed.
  5. Goto 1.

This roundtrip-cycle takes time, creates probably useless releases of our library and makes our development iterations visible to the public.

A faster and lighter alternative

Many may point to npm link or yarn link but there are numerous problems associated with these solutions, so I tried the tool yalc.

After installing the tool (globally) you can make changes to the library and publish them locally using yalc publish.

In the dependent project you add the local dependency using yalc add <dependency_name>. Now we can quickly iterate without creating public releases of our library and test everything locally until we are truly ready.

This approach worked nicely for me. yalc has a lot more features and there are nice guides and of course its documentation.

Conclusion

Developing several javascript modules locally in parallel is relatively easy provided the right tooling.

Do you have similar experiences? Do you use other tools you would recommend?