Web, your users deserve better

The web has come a long way since its inception. But nevertheless many applications fail to serve the user appropriately. We talk a lot about new presentation styles, approaches and enhancements. These are all good endeavors but we should not neglect the basics.

The web has come a long way since its inception. But nevertheless many applications fail to serve the user appropriately. We talk a lot about new presentation styles, approaches and enhancements. These are all good endeavors but we should not neglect the basics. Say you have crafted a beautiful application. It is fast, reliable and has all features the client, user or product manager has envisioned. But is it usable? Is its design up to the task? How should you know? You are no designer. But you can evaluate if your application has the fundamental building blocks, the basics. How?
Fortunately there is an ISO standard about the proper behaviour of information systems: ISO 9241-110. It defines seven principles for dialogues (in a wider sense):

  • Suitability for the task: the dialogue is suitable for a task when it supports the user in the effective and efficient completion of the task.
  • Self-descriptiveness: the dialogue is self-descriptive when each dialogue step is immediately comprehensible through feedback from the system or is explained to the user on request.
  • Controllability: the dialogue is controllable when the user is able to initiate and control the direction and pace of the interaction until the point at which the goal has been met.
  • Conformity with user expectations: the dialogue conforms with user expectations when it is consistent and corresponds to the user characteristics, such as task knowledge, education, experience, and to commonly accepted conventions.
  • Error tolerance: the dialogue is error tolerant if despite evident errors in input, the intended result may be achieved with either no or minimal action by the user.
  • Suitability for individualization: the dialogue is capable of individualization when the interface software can be modified to suit the task needs, individual preferences, and skills of the user.
  • Suitability for learning: the dialogue is suitable for learning when it supports and guides the user in learning to use the system.

This sounds pretty abstract so let’s take a look at each principle in detail.

Suitability for the task

bloated app

Simple and easy. You all know the bloated applications from the desktop with myriads of functions, operations, options, settings, preferences, … These are easy to spot. But often the details are left behind. Many applications try to collect too much information. Or in the wrong order. Scattered over too many dialogues. This is such a big problem in today’s information systems that there’s even a German word for preventing this: Datensparsamkeit. Your application should only collect and ask for the information it needs to fulfill its tasks.
But not only collecting information is a problem. Help in little things like placing the focus on the first input field or prefilling fields with meaningful values which can be automatically derived improve the efficience of task completion. Todays application has many context information available and can help the user in filling out these data from the context she is in like the current date, location, selected contexts in the application or previous values.
Above all you have to talk to your users and understand them to adequately support their goals. Communication is key. This is hard work. They might not know what is important to them. Then watch them using your application, look at how they reached their goals before your application was there. What were their problems? What went well? What (common) mistakes did they make? How can your application avoid those?

Self descriptiveness

In every part of your application the user needs to know what is the function of every item on the screen. A recent trend in design generates widgets on the screen that are too ambiguous. Is this a link, a button or just text? What is clickable? Or editable? UX calls this an affordance:

“a situation where an object’s sensory characteristics intuitively imply its functionality and use”

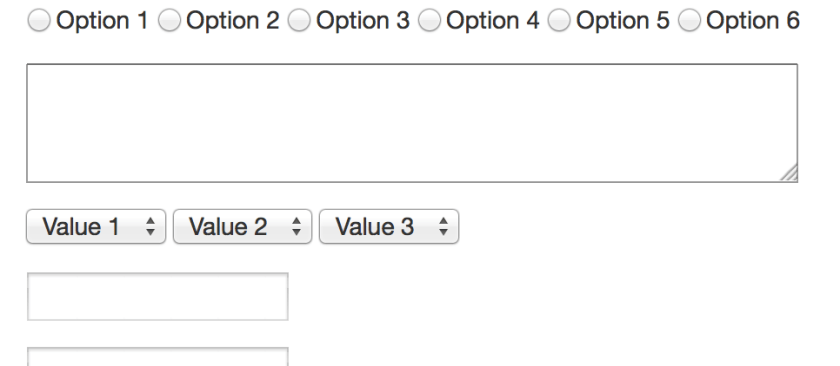
So just from looking at it the user has to have an idea what the control is for. So when you look at the following input field, what is the format of the date you need to enter?

date format

So if your application accepts a set of formats you should tell the user beforehand. Same with required fields or constraints like maximum or minimum length or value ranges. But nowadays applications can go a step further: you can tell the user while she enters her data that her input contradicts another input or value in your database. You can tell her that the username she wants is already taken, the date of the appointment is already blocked.

username taken

Controllability

Everybody has seen this dreaded message:

Item was deleted

Despite any complex confirmations needed to delete an item items get deleted accidentally. What now? Adding levels of confirmation or complex rituals to delete an item does not value the users and their time. Some applications only mark an item as deleted and remove this flag if necessary. That is not enough. What if the user does not delete but overwrites a value of an item by mistake? Your application needs an undo mechanism. A global one. Users as all humans make mistakes. The technology is ready to and should not make them feel bad about it. It can be forgiving. So every action an user does must be revocable. Long running processes must be cancelable. Updates must be undoable.
I know there are exceptions to this. Actions which cause processes in the real world to start can sometimes be irrevocable. Sometimes. Nobody thought that sending an email can be undone. Google did it. How? They delay sending and offer an option to cancel this process. Think about it. Maybe you can undone the actions taken.
Your application should not only allow to reverse a process but also to start a process and complete it. This sounds obvious. But many applications set so many obstacles to find how to start an action. Show the actions which can be started. Provide shortcuts to the user to start and to advance. If your process has multiple steps make it easy for the user to return to where she left.

Conformity with user expectations

Especially in web design where there is so much freedom how your application looks: avoid fancy- or cleverness.

fancyness - blog post without borders and title

There are certain standards how widgets look, stick to them. If the users clicks a button on a form she expects that the content she entered is submitted. If she wants to upload a file the button should be labelled accordingly. Use clear words. Not only conventions determine how something is worded but also the task at hand. If the user expects to see a chart of her data, “calculate” or “generate” might not be the right button label even if the application does that. So again: talk to your users, understand them and their experience. Choose clarity over cleverness. Make it obvious. Your application might look “boring” but if the user knows where and what to do this is some much more worth.

Error tolerance

Oh! Your application accepts scientific notation. Entering 9e999999999… and

boom!

Users don’t enter malicious data by purpose (at least not always). But mistakes happen. Your application should plan for that. Constrain your input values. Don’t blow up when the users attachs a 100 GB file. Tell them what values you accept and when and why their entered information does not comply. Help them by showing fuzzy matches if their search term doesn’t yield an exact match. Even if the user submitted data is correct, data from other sources might not be. Your application needs to be robust. Take into account the problem and error cases not just the sunshine state.

Suitability for individualisation

Users are different. They have differ in skills, education, knowledge, experience and other characteristics. Some might need visual assistance like a color blind mode. Your application needs to provide this. Due to the different levels of experience and the different approachs a user takes your application should provide options to define how much and how the presented information is shown. Take a look at the following table of values. Do you see what is shown?

sinus curve values

Now take a look at a graph with the same values.

sinus curve values as graph

Sometimes one representation is better as another. Again talk to your users they might prefer different presentations.

Suitability for learning

You know your application. You know where to start an action and where to click. You know how the search is used and what filters are. You know where to find the report generation. You built it. But for first time users it is as entering a foreign city. Some things might be familiar and some strange. You need to think about the entry of your application. Users need help. Think about the blank slate, when your user or your application does not have any data. How do you guide the user to create her first project or enter information for the first item. She needs help with where to find the appropiate buttons and links to start the processes. She might not recognize the function behind an icon at first glance. Sometimes a tooltip helps. Sometimes you need a legend. And sometimes you should use a text instead of an icon.

icon glory

Database Migration Categories

Most long-running projects need to manage changes to the database schema of the system and data migrations in some way. As the system evolves new datatypes/tables and properties/columns are added, some are removed and others are changed. Relationships between objects also change in unpredictable ways so that you have to deal with these changes in some way. Not all changes are equal in nature, so we handle them differently!

One tool we use to manage our database is liquibase. The units of change are called migrations and are logged in the database itself (table “databasemigrations”) so that you can actually see in which state the schema is. Our experience using such tools for several years is very positive because there is no manual work on the database of some production system needed and new installations automatically create the database schema matching the running software. There are however a few situations when you want to do things manually. So we identified three types of changes and defined how to handle them:

1. structural changes

Structural changes modify the database schema but no data. In some cases you have to care about the default values for not null columns. These changes are handled by database management/versioning tools. They are relevant for all instances and specific for each deployed version of the system. The changes are stored with the source code under version control. Most of the time they are needed when extending the functionality of the system and implementing new features. In SQL the typical commands are CREATE, DROP and ALTER.

2. data rule changes

Changes to the way how the data is stored we call data rule changes. Examples for this are changing the representation of an enum from integer to string or a relation from one-to-many to many-to-many. In such a case the schema and importantly existing data has to be changed. For these migrations you do not need explicit ids of an object in the database but you change all entries in the same way according to the new rules. The changes can be applied to each instance of the system that is update to the new database (and software) version. Like structural changes they are executed using the database migration tool and stored under version control. The typical SQL command after the involveld structural changes needed is UPDATE with an where clause and sometimes CASE WHEN statements.

3. data modifications

Sometimes you have to change individual data sets of one instance of a system. That may be because of a bug in the software or corrupted/wrong entries that cannot by fixed using the system itself, e.g. as super user. Here you fix the entries of one instance of the system manually or with a SQL script. You will usually name specific object ids of the database and perform these exact changes only on this instance. It may be necessary to perfom similar tasks on other instances using different object ids. Because of this one-time and instance-specific nature of the changes we do not use a migration tool but some kind of SQL shell. Such manual changes have to be performed with extra caution and need to be thoroughly documented, e.g. in your issue tracker and wiki. If possible use a non-destructive approach and make backups of the data before executing the changes. Typical SQL statements are UPDATE or DELETE containing ids or business keys.

Conclusion

With categories and guidelines above developers can easily figure out how to deal with changes to the database. They can keep the software, database schema and customer data up-to-date, nice and clean over many years while improving and evolving the system and managing several instances running possibly different versions of the system.

Build your own performance and log monitoring solution

Tips for a better performance only help when you know where you can improve performance. So to find the places where speed is needed you can monitor the performance of your app in production. Here we build a simple performance and log monitoring solution.

Tips for a better performance like using views or reducing the complexity of your algorithms only help when you know where you can improve performance. So to find the places where speed is needed you can build extensive load and performance tests or even better you can monitor the performance of your app in production. Many solutions exists which give you varying levels of detail (the costs of them also varies). But often a simple solution is enough. We start with a typical (CRUD) web app and build a monitor and a tool to analyse response times. The goal is to see what are the ten worst performing queries of the last week. We want an answer to this question continuously and maybe ask additional questions like what were the details of the responses like user/role, URL, max/min, views or persistence. A web app built on Rails gives us a lot of measurements we need out of the box but how do we extract this information from the logs?
Typical log entries from an app running on JRuby on Rails 4 using Tomcat looks like this:

Sep 11, 2014 7:05:29 AM org.apache.catalina.core.ApplicationContext log
Information: I, [2014-09-11T07:05:29.455000 #1234]  INFO -- : [19e15e24-a023-4a33-9a60-8474b61c95fb] Started GET "/my-app/" for 127.0.0.1 at 2014-09-11 07:05:29 +0200

...

Sep 11, 2014 7:05:29 AM org.apache.catalina.core.ApplicationContext log
Information: I, [2014-09-11T07:05:29.501000 #1234]  INFO -- : [19e15e24-a023-4a33-9a60-8474b61c95fb] Completed 200 OK in 46ms (Views: 15.0ms | ActiveRecord: 0.0ms)

Important to identify log entries for the same request is the request identifier, in our case 19e15e24-a023-4a33-9a60-8474b61c95fb. To see this in the log you need to add the following line to your config/environments/production.rb:

config.log_tags = [ :uuid ]

Now we could parse the logs manually and store them in a database. That’s what we do but we use some tools from the open source community to help us. Logstash is a tool to collect, parse and store logs and events. It reads the logs via so called inputs, parses, aggregates and filters with the help of filters and stores by outputs. Since logstash is by Elasticsearch – the company – we use elasticsearch – the product – as our database. Elasticsearch is a powerful search and analytcs platform. Think: a REST frontend to Lucene – only much better.

So first we need a way to read in our log files. Logstash stores its config in logstash.conf and reads file with the file input:

input {
  file {
    path => "/path/to/logs/localhost.2014-09-*.log"
    # uncomment these lines if you want to reread the logs
    # start_position => "beginning"
    # sincedb_path => "/dev/null"
    codec => multiline {
      pattern => "^%{MONTH}"
      what => "previous"
      negate => true
    }
  }
}

There are some interesting things to note here. We use wildcards to match the desired input files. If we want to reread one or more of the log files we need to tell logstash to start from the beginning of the file and forget that the file was already read. Logstash remembers the position and the last time the file was read in a sincedb_path to ignore that we just specify /dev/null as a path. Inputs (and outputs) can have codecs. Here we join the lines in the log which do not start with a month. This helps us to record stack traces or multiline log entries as one event.
Add an output to stdout to the config file:

output {
  stdout {
    codec => rubydebug{}
  }
}

Start logstash with

logstash -f logstash.conf --verbose

and you should see your log entries as json output with the line in the field message.
To analyse the events we need to categorise them or tag them for this we use the grep filter:

filter {
  grep {
    add_tag => ["request_started"]
    match => ["message", "Information: .* Started .*"]
    drop => false
  }
}

Grep normally drops all non matching events, so we need to pass drop => false. This filter adds a tag to all events with the message field matching our regexp. We can add filters for matching the completed and error events accordingly:

  grep {
    add_tag => ["request_completed"]
    match => ["message", "Information: .* Completed .*"]
    drop => false
  }
  grep {
    add_tag => ["error"]
    match => ["message", "\:\:Error"]
    drop => false
  }

Now we know which event starts and which ends a request but how do we extract the duration and the request id? For this logstash has a filter named grok. One of the more powerful filters it can extract information and store them into fields via regexps. Furthermore it comes with predefined expressions for common things like timestamps, ip addresses, numbers, log levels and much more. Take a look at the source to see a full list. Since these patterns can be complex there’s a handy little tool with which you can test your patterns called grok debug.
If we want to extract the URL from the started event we could use:

grok {
    match => ["message", ".* \[%{TIMESTAMP_ISO8601:timestamp} \#%{NUMBER:}\].*%{LOGLEVEL:level} .* \[%{UUID:request_id}\] Started %{WORD:method} \"%{URIPATHPARAM:uri}\" for %{IP:} at %{GREEDYDATA:}"]
 }

For the duration of the completed event it looks like:

grok {
    match => ["message", ".* \[%{TIMESTAMP_ISO8601:timestamp} \#%{NUMBER:}\].*%{LOGLEVEL:level} .* \[%{UUID:request_id}\] Completed %{NUMBER:http_code} %{GREEDYDATA:http_code_verbose} in %{NUMBER:duration:float}ms (\((Views: %{NUMBER:duration_views:float}ms \| )?ActiveRecord: %{NUMBER:duration_active_record:float}ms\))?"]
 }

Grok patterns are inside of %{} like %{NUMBER:duration:float} where NUMBER is the name of the pattern, duration is the optional field and float the data type. As of this writing grok only supports floats or integers as data types, everything else is stored as string.
Storing the events in elasticsearch is straightforward replace or add to your stdout output an elasticsearch output:

output {
  elasticsearch {
    protocol => "http"
    host => localhost
    index => myindex
  }
}

Looking at the events you see that start events contain the URL and the completed events the duration. For analysing it would be easier to have them in one place. But the default filters and codecs do not support this. Fortunately it is easy to develop your own custom filter. Since logstash is written in JRuby, all you need to do is write a Ruby class that implements register and filter:

require "logstash/filters/base"
require "logstash/namespace"

class LogStash::Filters::Transport < LogStash::Filters::Base

  # Setting the config_name here is required. This is how you
  # configure this filter from your logstash config.
  #
  # filter {
  #   transport { ... }
  # }
  config_name "transport"
  milestone 1

  def initialize(config = {})
    super
    @threadsafe = false
    @running = Hash.new
  end 

  def register
    # nothing to do
  end

  def filter(event)
    if event["tags"].include? 'request_started'
      @running[event["request_id"]] = event["uri"]
    end
    if event["tags"].include? 'request_completed'
      event["uri"] = @running.delete event["request_id"]
    end
  end
end

We name the class and config name ‘transport’ and declare it as milestone 1 (since it is a new plugin). In the filter method we remember the URL for each request and store it in the completed event. Insert this into a file named transport.rb in logstash/filters and call logstash with the path to the parent of the logstash dir.

logstash --pluginpath . -f logstash.conf --verbose

All our events are now in elasticsearch point your browser to http://localhost:9200/_search?pretty or where your elasticsearch is running and it should return the first few events. You can test some queries like _search?q=tags:request_completed (to see the completed events) or _search?q=duration:[1000 TO *] to get the events with a duration of 1000 ms and more. Now to the questions we want to be answered: what are the worst top ten response times by URL? For this we need to group the events by URL (field uri) and calculate the average duration:

curl -XPOST 'http://localhost:9200/_search?pretty' -d '
{
  "size":0,
  "query": {
    "query_string": {
      "query": "tags:request_completed AND timestamp:[7d/d TO *]"
     }
  },
  "aggs": {
    "group_by_uri": {
      "terms": {
        "field": "uri.raw",
        "min_doc_count": 1,
        "size":10,
        "order": {
          "avg_per_uri": "desc"
        }
      },
      "aggs": {
        "avg_per_uri": {
          "avg": {"field": "duration"}
        }
      }
    }
  }
}'

See that we use uri.raw to get the whole URL. Elasticsearch separates the URL by the /, so grouping by uri would mean grouping by every part of the path. now-7d/d means 7 days ago. All groups of events are included but if we want to limit our aggregation to groups with a minimum size we need to alter min_doc_count. Now we have an answer but it is pretty unreadable. Why not have a website with a list?
Since we don’t need a whole web app we could just use Angular and the elasticsearch JavaScript API to write a small page. This page displays the top ten list and when you click on one it lists all events for the corresponding URL.

<!DOCTYPE html>
<html>
  <head>
    <script type="text/javascript" src="https://ajax.googleapis.com/ajax/libs/angularjs/1.2.11/angular.min.js"></script>
    <script type="text/javascript" src="elasticsearch-js/elasticsearch.angular.js"></script>
    <script type="text/javascript" src="monitoring.js"></script>

    <link rel="stylesheet" href="http://netdna.bootstrapcdn.com/bootstrap/3.1.0/css/bootstrap.min.css">
    <link rel="stylesheet" href="http://netdna.bootstrapcdn.com/bootstrap/3.1.0/css/bootstrap-theme.min.css">
  </head>
  <body>
    <div ng-app="Monitoring" class="container" ng-controller="Monitoring">
      <div class="col-md-6">
        <h2>Last week's top ten slowest requests</h2>
        <table class="table">
          <thead>
            <tr>
              <th>URL</th>
              <th>Average Response Time (ms)</th>
            </tr>
          </thead>
          <tbody>
            <tr ng-repeat="request in top_slow track by $index">
              <td><a href ng-click="details_of(request.key)">{{request.key}}</a></td>
              <td>{{request.avg_per_uri.value}}</td>
            </tr>
          </tbody>
        </table>
      </div>
      <div class="col-md-6">
        <h3>Details</h3>
        <table class="table">
          <thead>
            <tr>
              <th>Logs</th>
            </tr>
          </thead>
          <tbody>
            <tr ng-repeat="line in details track by $index">
              <td>{{line._source.message}}</td>
            </tr>
          </tbody>
        </table>
      </div>
    </div>
  </body>
</html>

And the corresponding Angular app:

var module = angular.module("Monitoring", ['elasticsearch']);

module.service('client', function (esFactory) {
  return esFactory({
    host: 'localhost:9200'
  });
});

module.controller('Monitoring', ['$scope', 'client', function ($scope, client) {
var indexName = 'myindex';
client.search({
index: indexName,
body: {
  "size":0,
  "query": {
    "query_string": {
      "query": "tags:request_completed AND timestamp:[now-1d/d TO *]"
     }
  },
  "aggs": {
    "group_by_uri": {
      "terms": {
        "field": "uri.raw",
        "min_doc_count": 1,
        "size":10,
        "order": {
          "avg_per_uri": "desc"
        }
      },
      "aggs": {
        "avg_per_uri": {
          "avg": {"field": "duration"}
        }
      }
    }
  }
}
}, function(error, response) {
  $scope.top_slow = response.aggregations.group_by_uri.buckets;
});

$scope.details_of = function(url) {
client.search({
index: indexName,
body: {
  "size": 100,
  "sort": [
    { "timestamp": "asc" }
  ],
  "query": {
    "query_string": {
      "query": 'timestamp:[now-1d/d TO *] AND uri:"' + url + '"'
     }
  },
}
}, function(error, response) {
  $scope.details = response.hits.hits;
});
};
}]);

This is just a start. Now we could filter out the errors, combine logs from different sources or write visualisations with d3. At least we see where performance problems lie and take further steps at the right places.

The power of analysis

A short story about the power of good analysis. Thinking in terms of the problem domain is a key ingredient.

Quite some years ago, I heard a story about the power of analysis that happened even deeper in the past. Its moral holds true until today, though. It’s the insight that to fully analyse a particular challenge or task, you have to think outside your own box. Let’s hear the story before we analyse it:

The problem

A small company for sensor technology usually solved customer problems like distance measurement without contact or gas mixture control. The team was informed about all the latest sensors and trained to come up with solutions even to really challenging tasks. This lead to a word of mouth recommendation for a new customer that promptly described his problem.

christmas-star-lamp-smallThe customer ran a workshop for physically handicapped people that mostly worked with wood and produced a wide variety of products that got sold on various markets. One product was the Christmas lamp in shape of a star. It proved to be a best-seller and had a good economic ratio. At least it could have, if only the rejects rate would be lower. To assemble the lamp from little wooden laths was difficult for skilled workers and even harder for skilled handicapped workers. The main difficulty was to glue the laths in just the right angle to result in the desired star shape. The customer needed some set-up of sensors that would indicate to the worker when the angle was right. He imagined something like a cheap navigation system that would yell/display “left” and “right” until the angle was “correct”.

The solution finding

The team accepted the task and started the creative solution process that lasted several days of thinking, doodling, researching and scribbling. Then, the team gathered for a solution finding session. A multitude of ideas were presented and almost instantly rejected. From laser distance measurement over acoustic ultrasonic sensors to camera-based image evaluation, everything cool and remotely feasible was presented and rejected because nothing had an even remote chance to succeed outside of laboratory settings. Not one approach survived the applicability check. The team was devastated and returned to the creative phase, if not as reckless as the first time.

The solution

A few days later, the second solution finding session had only a few new ideas, none standing a chance. Finally, a student spoke up: “This isn’t a problem that should be solved with sensors!”. Well, this was a bold sentence in a team of sensor technologists. The student explained: “The real problem is the placement of the small laths, not the correct angle itself. Even if we build a sensor that can reliably indicate right and wrong angles, it would just tell the worker that whatever he tries, he won’t get it right. These workers don’t need supervision, they need assistance. No sensor is going to deliver that.” The team was baffled. The student went on: “I thought about a solution that will assist the worker during the assembly, but it’s nothing we will get rich with. A simple mould in the right shape, perhaps non-adhering to the glue they use for the wood, would let them produce one half of the lamp. Glue two of those halves together and everything fits. No need for batteries even.”

christmas-lamp-star-sideWhen the sensor technology company proposed this solution to the customer, he laughed loud and long. It was the most elegant and inexpensive solution he never thought of. It was exactly what was needed. It worked perfectly from the first prototypes onward. The Christmas lamp rejects rate dwindled to almost zero instantly. In short: perfect score. Just that the sensor technology company wouldn’t earn anything with maintenance or improvements was a minor drawback.

Good analysis

This story is my illustrative material when I have to explain what good analysis is. Let’s take a look at the bafflement of the team: They had all started their solution finding with the premise that this was a problem inside their area of expertise. Even the customer said so. Good analysis works out the real nature of a problem regardless of what anybody says about it. This includes any description given by the customer or even the wood workers in charge of the actual work. Good analysis finds a solution that fits the problem, not the field of expertise of the analyst.

Analysis is the process of thinking in terms of the problem space. In this story, an important part of the analysis was already done by the customer: Most of the rejects have wrong angles, so we need to make sure the angles are correct and we need a machine to tell us, because apparently the workers themselves can’t. The machine needs sensors, so lets assign a sensor company on the task. This was the initial premise that nobody except the student questioned. And this was half of the analysis that nobody bothered to repeat. You cannot really understand the problem if you begin your thinking mid-flight.

Applying good analysis

It’s easy to tell a story (even if it really happened) and derive insights from it. It’s much harder to apply these insights in the own work. The crucial step is to fully understand the actual problem that should be solved (in the story: correct justification instead of correct angle). The next step is to incorporate the value system of the customer: if I alter some key characteristics of the solution, will it still serve the customer’s actual needs? In the story: A cheap aluminium mould serves the customer even better than some expensive fancy machine. The mould can be duplicated nearly infinitely, the machine probably not. The mould is grasped instantly, the machine needs instructions. The mould keeps working long after the machine ran out of battery. The mould assists, the machine merely scolds.

If, after thoroughly working on these two steps, the solution lies still inside your field of expertise, you can proceed to design the solution. You’ve just left the analysis process to concentrate on one possible solution. That’s all right, but remember to return to the earliest steps of analysis when you get stuck. Designing a solution for a falsely analysed premise almost always leads nowhere in the long run.

Ansible: Play it again, Sam

Recently we started using Ansible for the provisioning of some of our servers. Ansible is one of many configuration management / provisioning tools that are popular right now. Puppet and Chef are probably more widely known representatives of their kind, but what attracted us to Ansible was the fact that it’s agentless: the target machines don’t need an agent installed, all you need is remote access via SSH. Well, almost. It turns out that Python is also required on the remote machines, otherwise you’ll be limited to a very basic set of functionality (the raw module). Fortunately, most Linux distributions have Python installed by default.

With Ansible you describe the desired target configuration as a sequence of tasks in a YAML file called Playbook: package installation, copying files, enabling and starting services, etc. The playbook is semi-declarative. Each step usually describes a goal, e.g. package XY should be present. Action is only taken if necessary. On the other hand it’s also very imperative: steps are executed sequentially and you can have conditionals and loops (e.g. “with_items”). You can also define handlers, which are executed once after they have been notified, for example if you want to restart the Apache web server after its configuration has changed.

Before a playbook is applied to a remote machine Ansible will query “facts” about this machine. These facts are available as variables in the playbook. You can also define your own variables.

A playbook is usually applied to a set of machines. Available machines are listed in a separate file, the inventory, where they can be grouped by roles. With one command you can configure or update all the machines of a specific role at once. You can also execute a “dry run”, which simulates a playbook run and tells you what changes would be applied.

So far our experience with Ansible has been good. The concepts are easy to grasp. YAML syntax requires getting used to, but at least it’s not XML. On the website the actual documentation is a bit hidden among promotion for their commercial products, but you can also directly visit docs.ansible.com.

Configuring your Java webapp

There are several ways to configure your Java Servlet-based webapp with values for deployment-specific things like the database connection or directories for data and logs. Let us take a look at the alternatives and their benefits and drawbacks.

web.xml

The deployment descriptor (web.xml) resides inside your WAR file. You can specify init parameters available using the ServletContext.
web.xml

<context-param>
    <param-name>LogDirectory</param-name>
    <param-value>/myapp/logs</param-value>
</context-param>

Accessing the parameter in your Servlet:

String logDirectory = getServletContext().getInitParameter("LogDirectory");
// do something with it

The nice thing about this solution is the self-containment of your packaged application. The price is building a customized web.xml/WAR for each deployment instance.

Environment variables

Another possibility is to pass environment variables to your servlet container at startup, e.g. using JAVA_OPTS in the case of Apache Tomcat.
tomcat.conf

...
JAVA_OPTS="-DLogDirectory=/myapp/logs"
...

They can be easily accessed using

    System.getProperty("LogDirectory");

This is very easy to employ but has several drawbacks:

  • you have to mess with the configuration of your servlet container/host to set the variables
  • they are valid for the whole servlet container, possibly interferring with other webapps or the container itself
  • the settings are harder to find than in one file that you deliver with your webapp
  • need of server restart to change the values

context.xml

Using context.xml and JNDI is our preferred way of configuring our webapps. You can ship a default context.xml in the META-INF directory of your WAR and easily configure resources and beans:

<Context>
    <Environment name="LogDirectory" value="/myapp/logs" type="java.lang.String" />
    <!-- Development DB -->
    <Resource name="jdbc/devdb" auth="Container" type="javax.sql.DataSource"
               maxActive="100" maxIdle="30" maxWait="-1"
               username="sa" password="" driverClassName="org.h2.Driver"
               url="jdbc:h2:mem:devDB;mode=Oracle"/>
</Context>

A context.xml outside of your WAR has to be copied in the context configuration directory of your servlet container, e.g.:

cp context.xml /etc/tomcat7/Catalina/localhost/myapp.xml

You can then access the configuration items using JNDI:

Context ctx = (Context) new InitialContext().lookup("java:comp/env");
String logDirectory = (String) ctx.lookup("LogDirectory");
// do something

You can of course use context-params and the ServletContext to retrieve simple String parameters stored in the context.xml instead of web.xml, too.

The name of the context file must match the name of the deployed application. That way we can deploy the same WAR on several target machines and configure the applications separately. The context.xml not only contains the JNDI datasources (which is very common) but also configuration parameters that may change for each target system.

Bit-fiddling is possible in Java

We have a service interface for Modbus devices that we can use remotely from Java. Modbus supports only very basic data types like single bits and 16-bit words. Our service interface provides the contents of a 16-bit input or holding register as a Java integer.

Often one 16-bit register is not enough to solve a problem in your domain, like representing a temperature as floating point number. A common solution is to combine two 16-bit registers and interpret their contents as a floating point number.

So the question is how to combine the bits of the two int values and convert them to a float in Java. There are at least two possiblities I want to show you.

The “old-fashioned” way includes bit-shifting and bit-wise operators which you actually can use in Java despite of the major flaw regarding primitive types: there are no unsigned data types; even byte is signed!

public static float floatFrom(int mostSignificat16Bits, int leastSignificant16Bits) {
    int bits = (mostSignificat16Bits << 16) | leastSignificant16Bits;
    return Float.intBitsToFloat(bits);
}

As seemingly more modern way is using java.nio.ByteBuffer:

public static float nioFloatFrom(int mostSignificat16Bits, int leastSignificant16Bits) {
    final ByteBuffer buf = ByteBuffer.allocate(4).putShort((short) mostSignificat16Bits).putShort((short) leastSignificant16Bits);
    buf.rewind(); // rewind to the beginning of the buffer, so it can be read!
    return buf.getFloat();
}

The second method seems superior when working with many values because you can fill the buffer conveniently in one phase and extract the float values conveniently by subsequent calls to getFloat().

Conclusion

Even if it is not one of Java’s strengths you actually can work on the bit- and byte-level and perform low level tasks. Do not let the lack of unsigned data types scare you; signedness is irrelevant for the bits in memory.

Dynamic addition and removal of collection-bound items in an HTML form with Angular.js and Rails

A common pattern in one of our web applications is the management of a list of items in a web form where the user can add, remove and edit multiple items and finally submit the data:

form-fields

The basic skeleton for this type of functionality is very simple with Angular.js. We have an Angular controller with an “items” array:

angular.module('example', [])
  .controller('ItemController', ['$scope', function($scope) {
    $scope.items = [];
  }]);

And we have an HTML form bound to our Angular controller:

<form ... ng-app="example" ng-controller="ItemController"> 
  <table>
    <tr>
      <th></th>
      <th>Name</th>
      <th>Value</th>
    </tr>
    <tr ng-repeat="item in items track by $index">
      <td><span class="remove-button" ng-click="items.splice($index, 1)"></span></td>
      <td><input type="text" ng-model="item.name"></td>
      <td><input type="text" ng-model="item.value"></td>
    </tr>
    <tr>
      <td colspan="3">
        <span class="add-button" ng-click="items.push({})"></span>
      </td>
    </tr>
  </table>
  <!-- ... submit button etc. -->
</form>

The input fields for each item are placed in a table row, together with a remove button per row. At the end of the table there is an add button.

How do we connect this with a Rails model, so that existing items are filled into the form, and items are created, updated and deleted on submit?

First you have to transform the existing Ruby objects of your has-many association (in this example @foo.items) into JavaScript objects by converting them to JSON and assigning them to a variable:

<%= javascript_tag do %>
  var items = <%= escape_javascript @foo.items.to_json.html_safe %>;
<% end %>

Bring this data into your Angular controller scope by assigning it to a property of $scope:

.controller('ItemController', ['$scope', function($scope) {
  $scope.items = items;
}]);

Name the input fields according to Rails conventions and use the $index variable from the “ng-repeat” directive to provide the correct index value. You also need a hidden input field for the id, if the item already has one:

  <td>
    <input name="foo[items_attributes][$index][id]" type="hidden" ng-value="item.id" ng-if="item.id">
    <input name="foo[items_attributes][$index][name]" type="text" ng-model="item.name">
  </td>
  <td>
    <input name="foo[items_attributes][$index][value]" type="text" ng-model="item.value">
  </td>

In order for Rails to remove existing elements from a has-many association via submitted form data, a special attribute named “_destroy” must be set for each item to be removed. This only works if

accepts_nested_attributes_for :items, allow_destroy: true

is set in the Rails model class, which contains the has-many association.

We modify the click handler of the remove button to set a flag on the JavaScript object instead of removing it from the JavaScript items array:

<span class="remove-button" ng-click="item.removed = true"></span>

And we render an item only if the flag is not set by adding an “ng-if” directive:

<tr ng-repeat="item in items track by $index" ng-if="!item.removed">

At the end of the form we render hidden input fields for those items, which are flagged as removed and which already have an id:

<div style="display: none" ng-repeat="item in items track by $index"
ng-if="item.removed && item.id">
  <input type="hidden" name="foo[items_attributes][$index][id]" ng-value="item.id">
  <input type="hidden" name="foo[items_attributes][$index][_destroy]" value="1">
</div>

On submit Rails will delete those elements of the has-many association with the “_destroy” attribute set to “1”. The other elements will be either updated (if they have an id attribute set) or created (if they have no id attribute set).

How to speed up your ORM queries of n x m associations

What solution (no cache) causes a 45x speedup? Learn the different approaches and how they compare

What causes a speedup like this? (all numbers are in ms)

Disclaimer: the absolute benchmark numbers are for illustration purposes, the relationship and the speedup between the different approaches are important (just for the curious: I measured 500 entries per table in a PostgreSQL database with both Rails 4.1.0 and Grails 2.3.8 running on Java 7 on a recent MBP running OSX 10.8)

Say you have the model classes Book and (Book)Writer which are connected via a n x m table named Authorship:

A typical query would be to list all books with its authors like:

Fowler, Martin: Refactoring

A straight forward way is to query all authorships:

In Rails:

# 1500 ms
Authorship.all.map {|authorship| "#{authorship.writer.lastname}, #{authorship.writer.firstname}: #{authorship.book.title}"}

In Grails:

// 585 ms
Authorship.list().collect {"${it.writer.lastname}, ${it.writer.firstname}: ${it.book.title}"}

This is unsurprisingly not very fast. The problem with this approach is that it causes the famous n+1 select problem. The first option we have is to use eager fetching. In Rails we can use ‘includes’ or ‘joins’. ‘Includes’ loads the associated objects via additional queries, one for authorship, one for writer and one for book.

# 2300 ms
Authorship.includes(:book, :writer).all

‘Joins’ uses SQL inner joins to load the associated objects.

# 1000 ms
Authorship.joins(:book, :writer).all
# returns only the first element
Authorship.joins(:book, :writer).includes(:book, :writer).all

Additional queries with ‘includes’ in our case slows down the whole request but with joins we can more than halve our time. The combination of both directives causes Rails to return just one record and is therefore ruled out.

In Grails using ‘belongsTo’ on the associations speeds up the request considerably.

class Authorship {
    static belongsTo = [book:Book, writer:BookWriter]

    Book book
    BookWriter writer
}

// 430 ms
Authorship.list()

Also we can implement eager loading with specifying ‘lazy: false’ in our mapping which boosts a mild performance increase.

class Authorship {
    static mapping = {
        book lazy: false
        writer lazy: false
    }
}

// 416 ms
Authorship.list()

Can we do better? The normal approach is to use ‘has_many’ associations and query from one side of the n x m association. Since we use more properties from the writer we start from here.

class Writer < ActiveRecord::Base
  has_many :authors
  has_many :books, through: :authors
end

Testing the different combinations of ‘includes’ and ‘joins’ yields interesting results.

# 1525 ms
Writer.all.joins(:books)

# 2300 ms
Writer.all.includes(:books)

# 196 ms
Writer.all.joins(:books).includes(:books)

With both options our request is now faster than ever (196 ms), a speedup of 7.
What about Grails? Adding ‘hasMany’ and the authorship table as a join table is easy.

class BookWriter {
    static mapping = {
        books joinTable:[name: 'authorships', key: 'writer_id']
    }

    static hasMany = [books:Book]
}
// 313 ms, adding lazy: false results in 295 ms
BookWriter.list().collect {"${it.lastname}, ${it.firstname}: ${it.books*.title}"}

The result is rather disappointing. Only a mild speedup (2x) and even slower than Rails.

Is this the most we can get out of our queries?
Looking at the benchmark results and the detailed numbers Rails shows us hints that the query per se is not the problem anymore but the deserialization. What if we try to limit our created object graph and use a model class backed by a database view? We can create a view containing all the attributes we need even with associations to the books and writers.

create view author_views as (SELECT "authorships"."writer_id" AS writer_id, "authorships"."book_id" AS book_id, "books"."title" AS book_title, "writers"."firstname" AS writer_firstname, "writers"."lastname" AS writer_lastname FROM "authorships" INNER JOIN "books" ON "books"."id" = "authorships"."book_id" INNER JOIN "writers" ON "writers"."id" = "authorships"."writer_id")

Let’s take a look at our request time:

# 15 ms
 AuthorView.select(:writer_lastname, :writer_firstname, :book_title).all.map { |author| "#{author.writer_lastname}, #{author.writer_firstname}: #{author.book_title}" }
// 13 ms
AuthorView.list().collect {"${it.writerLastname}, ${it.writerFirstname}: ${it.bookTitle}"}

13 ms and 15 ms. This surprised me a lot. Seeing this in comparison shows how much this impacts performance of our request.

The lesson here is that sometimes the performance can be improved outside of our code and that mapping database results to objects is a costly operation.

Don’t ever not avoid negative logic

If you want to be nice to people with a challenged relationship with boolean logic, try to avoid negative formulations and negations.

I start this post with a confession: I’m not able to discern true from false. I wasn’t born with this inability, it got worse over time. The first time I knew I have this problem was in driver’s school when my teacher told me that most people cannot switch from forward to backward drive and still tell left from right. Left and right are the same to me ever since, even in forward motion. When I was taught boolean logic, my inability spread from “left and right” to “true and false” and led to funny results in some tests, especially multiple choice questions with negative statements. But my guess is that I’m not alone with this problem.

No negations

So I’m probably a little bit over-sensitive about this topic, but that should only make the point clearer: Don’t obscure your (boolean) statement with unnecessary layers of negation. See? I just did it, too. Let me rephrase: Always state your boolean logic without negation, if possible.

It’s really easy for us super-clever programmers to juggle several dozen variables in our head and evaluate any boolean statement on the fly by reading it once – regardless of parenthesis. Well, until it’s not. The thing about boolean logic is that you can’t be “unsure”. It’s only ever “true” or “false”, and just by wild guessing, you will be right about it half the time – try that with basic numerical algebra! So even if the statement looks daunting, you have a fifty-fifty chance of success.

Careful crafting

For me (and probably all people with “boolean disability”, as I call it), every boolean statement is a challenge. So you can be sure that I put maximum effort in succeeding. I write my statements carefully and with great emphasis on clarity (this blog post only covers one aspect). I re-read them several times, sometimes aloud (to my imaginary rubber duck). I thoroughly test them – most statements are factored into their own method to achieve direct testability. And I try them out before committing. Still, there is a valid chance that my boolean disability didn’t magically disappear when I wrote my unit tests and I happily asserted that the statement always has to decide the right things in the wrong way.

By painful introspection about the real nature of my boolean disability, I discovered a great easement: If a statement doesn’t flip everything on its head by negation or negative formulation, I can actually follow through most of the time. Let me rephrase for clarity: If a statement uses negation, it is hard for me to follow. And I guess everyone has a personal limit:

ow_owl

A workaround

The workaround for my boolean disability is really easy: Express the statement like it really was meant in the first place. Express it without “plot twist”. Instead of

if (!string.isEmpty())

try something like

if (string.hasContent())

Disclaimer: I know that the Java SDK (still) doesn’t provide this method. It was just an example.

A real-life example

A real-life example that caused us some troubles can be found in the otherwise excellent Greenmail plugin for Grails. In the configuration, you can set the property

greenmail.disabled = true

to disable the mail server that otherwise would start automatically. The positive formulation would be

greenmail.enabled = false

To tell the full story: The negated formulation was probably chosen to simplify the plugin’s implementation in Groovy. The side effect of this short-cut is that you can’t state

greenmail.disabled = false

and be sure that it will start the mail server. In fact, it won’t. As a developer challenged by boolean logic, this issue gave me nightmares.

The three-state trap

Using this rule as a guideline for boolean statements will also prohibit that you fall into the “three-state trap”. Imagine a Person object with the method

boolean isOlderThan(Person other)

But you want to know if a person is younger than another, so you just negate the result:

if (!personA.isOlderThan(personB))

just to be clear, following the rule of “no negations”, you would’ve written:

if (personA.isYoungerThan(personB))

which isn’t quite the same! If both persons are of equal age (the “third state”), the negated statement returns true (if I evaluated it correct!), whereas the last statement gives the correct answer (false – not younger).

Use as a guideline

Don’t get me wrong: Avoiding negations isn’t always possible or the best available option. This isn’t a law, it’s a guideline or a rule of thumb. And just because some complex boolean statement is free of negations doesn’t make it acceptable automatically. It’s just a tiny step towards pain-free boolean statements. And that’s a bad thing… NOT.