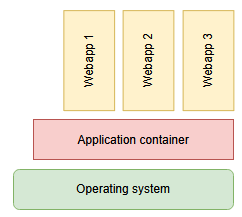
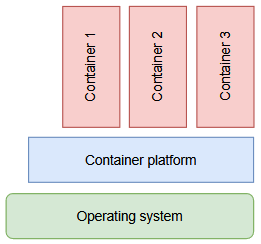
Containers are a great way of running your software in an environment that you defined and no one else needs to maintain of even know about. This is especially true if your software provides its service using a network port. All that operators have to provide is the execution platform for the container and the required resources.
Tango servers fit quite well into this type of software: Essentially they provide a service over the network. Unfortunately, they need a tango control system to be fully usable, so thats some other services. Luckily, there are docker images for this so building a stack of containers to run your Tango server in the scope of a control system is quite easy (sample docker-compose.yml):
version: '3.7'
services:
  my-tango-server:
    container_name: my-tango-server
    image: my-ts
    environment:
      - TANGO_HOST=tango-cs:10000
    depends_on:
      - tango-cs
  tango-cs:
    container_name: tango-database
    image: tangocs/tango-cs:9.3.2-alpha.1-no-tango-test
    ports:
      - "10000:10000"
    environment:
      - TANGO_HOST=localhost:10000
      - MYSQL_HOST=tango-db:3306
      - MYSQL_USER=tango
      - MYSQL_PASSWORD=tango
      - MYSQL_DATABASE=tango
    links:
      - "tango-db:localhost"
    depends_on:
      - tango-db
  tango-db:
    container_name: mysql-database
    image: tangocs/mysql:9.2.2
    environment:
      - MYSQL_ROOT_PASSWORD=root
    volumes:
      - tango_mysql_data:/var/lib/mysql
volumes:
  tango_mysql_data:
Example Dockerfile for the image my-ts used for the my-tango-server container:
FROM debian:buster

WORKDIR /tango-server
COPY ./my-tango-server .

RUN DEBIAN_FRONTEND=noninteractive apt-get install -y ./*.deb

CMD my-tango-server myts
Unfortunately this naive approach has the following issues:
- The network port of our tango server changes with each restart and is not available from outside the docker stack
- The tango server communicates the internal IP-Address of its container to the tango database so connection attempts from the outside fail even if the port is correct
- Even though the tango server container depends on the tango control system container the tango server might start up before the tango control system is available.
Let us tackle the issues one by one.
Expose a fixed port for the Tango server
This is probably the easiest issue to fix because it is well documented for OmniORB and widely used. So let us change docker-compose.yml to expose a port and pass it into the container as an environment variable:
version: '3.7'
services:
  my-tango-server:
    container_name: my-tango-server
    image: my-ts
    ports:
      - "45450:45450"
   environment:
      - TANGO_HOST=tango-cs:10000
      - TANGO_SERVER_PORT=45450
    depends_on:
      - tango-cs
  tango-cs:
 ...
And use it in our Dockerfile for the my-ts image:
FROM debian:buster

WORKDIR /tango-server
COPY ./my-tango-server .

RUN DEBIAN_FRONTEND=noninteractive apt-get install -y ./*.deb

CMD my-tango-server myts -ORBendPoint giop:tcp::$TANGO_SERVER_PORT
Fine, now our Tango server always listens on a defined port and that same port is exposed to the outside of our docker stack.
Publish the correct IP/hostname of the Tango server
I found it hard to find documentation about this and how to put it on the command line correctly but here is the solution to the problem. The crucial command line parameter is -ORBendPointPublish . We need to pass a hostname of the host machine into the container and let OmniORB publish that name (tango-server.local in our example):
version: '3.7'
services:
  my-tango-server:
    container_name: my-tango-server
    image: my-ts
    ports:
      - "45450:45450"
   environment:
      - TANGO_HOST=tango-cs:10000
      - TANGO_SERVER_PORT=45450
      - TANGO_SERVER_PUBLISH=tango-server.local:45450
    depends_on:
      - tango-cs
  tango-cs:
 ...
And the corresponding changes to our Dockerfile:
FROM debian:buster

WORKDIR /tango-server
COPY ./my-tango-server .

RUN DEBIAN_FRONTEND=noninteractive apt-get install -y ./*.deb

CMD my-tango-server myts -ORBendPoint giop:tcp::$TANGO_SERVER_PORT -ORBendPointPublish giop:tcp:$TANGO_SERVER_PUBLISH
Waiting for availability of a service
This one is not specific to our tango server and the whole stack but a general problem when building stacks where one service depends on another one being up and listening on a network port. Docker compose takes care of the startup order of the containers but does not check for the readiness of services running in the containers. In linux containers this can easily be achieved by using the small shell utility wait-for-it. Here we only need to make some changes to our Dockerfile:
FROM debian:buster
RUN DEBIAN_FRONTEND=noninteractive apt-get update && apt-get install wait-for-it

WORKDIR /tango-server
COPY ./my-tango-server .

RUN DEBIAN_FRONTEND=noninteractive apt-get install -y ./*.deb

CMD wait-for-it $TANGO_HOST -- my-tango-server myts -ORBendPoint giop:tcp::$TANGO_SERVER_PORT -ORBendPointPublish giop:tcp:$TANGO_SERVER_PUBLISH
Depending on your distribution/base image installation of the tool (or other similar alternatives like dockerize or docker-compose-wait).
Summing it up
After moving some rocks out of the way it is dead easy to deploy your tango servers together with a complete tango control system to any host platform providing a container runtime. You do not need to delivery everything in one single stack if you do not want to. Most of the stuff described above works the same when deploying tango control system and tango servers in independent stacks or as separate containers even on multiple hosts.

 for a morphism from object
  to object
  .
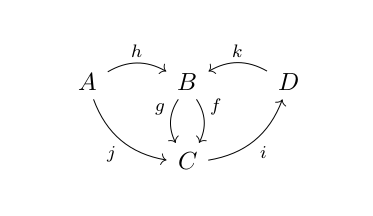
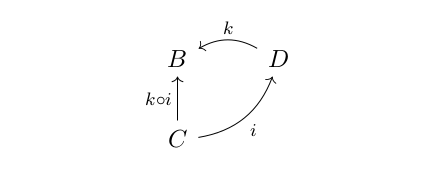
. ” can only be applied to morphisms, if they form “a line”. For example, if we have morphisms like k and i in the picture below, in a category, there will be a new morphism “
 “:
“:
 ” is on the right in “
 and
and  returns a morphism

 ,
,  and
and  , we have:
 we have:
 . “
. “ ” is defined to be
  .
. and an identity for
  is
is  .
.
 be a labelled directed graph with edges
  and nodes
  . Then there is a category
  with objects